Chat Widget Channel name
You can customize the Widget name according to your preference. The name is not visible to customers. We advise changing the name if you have multiple Chat Widgets.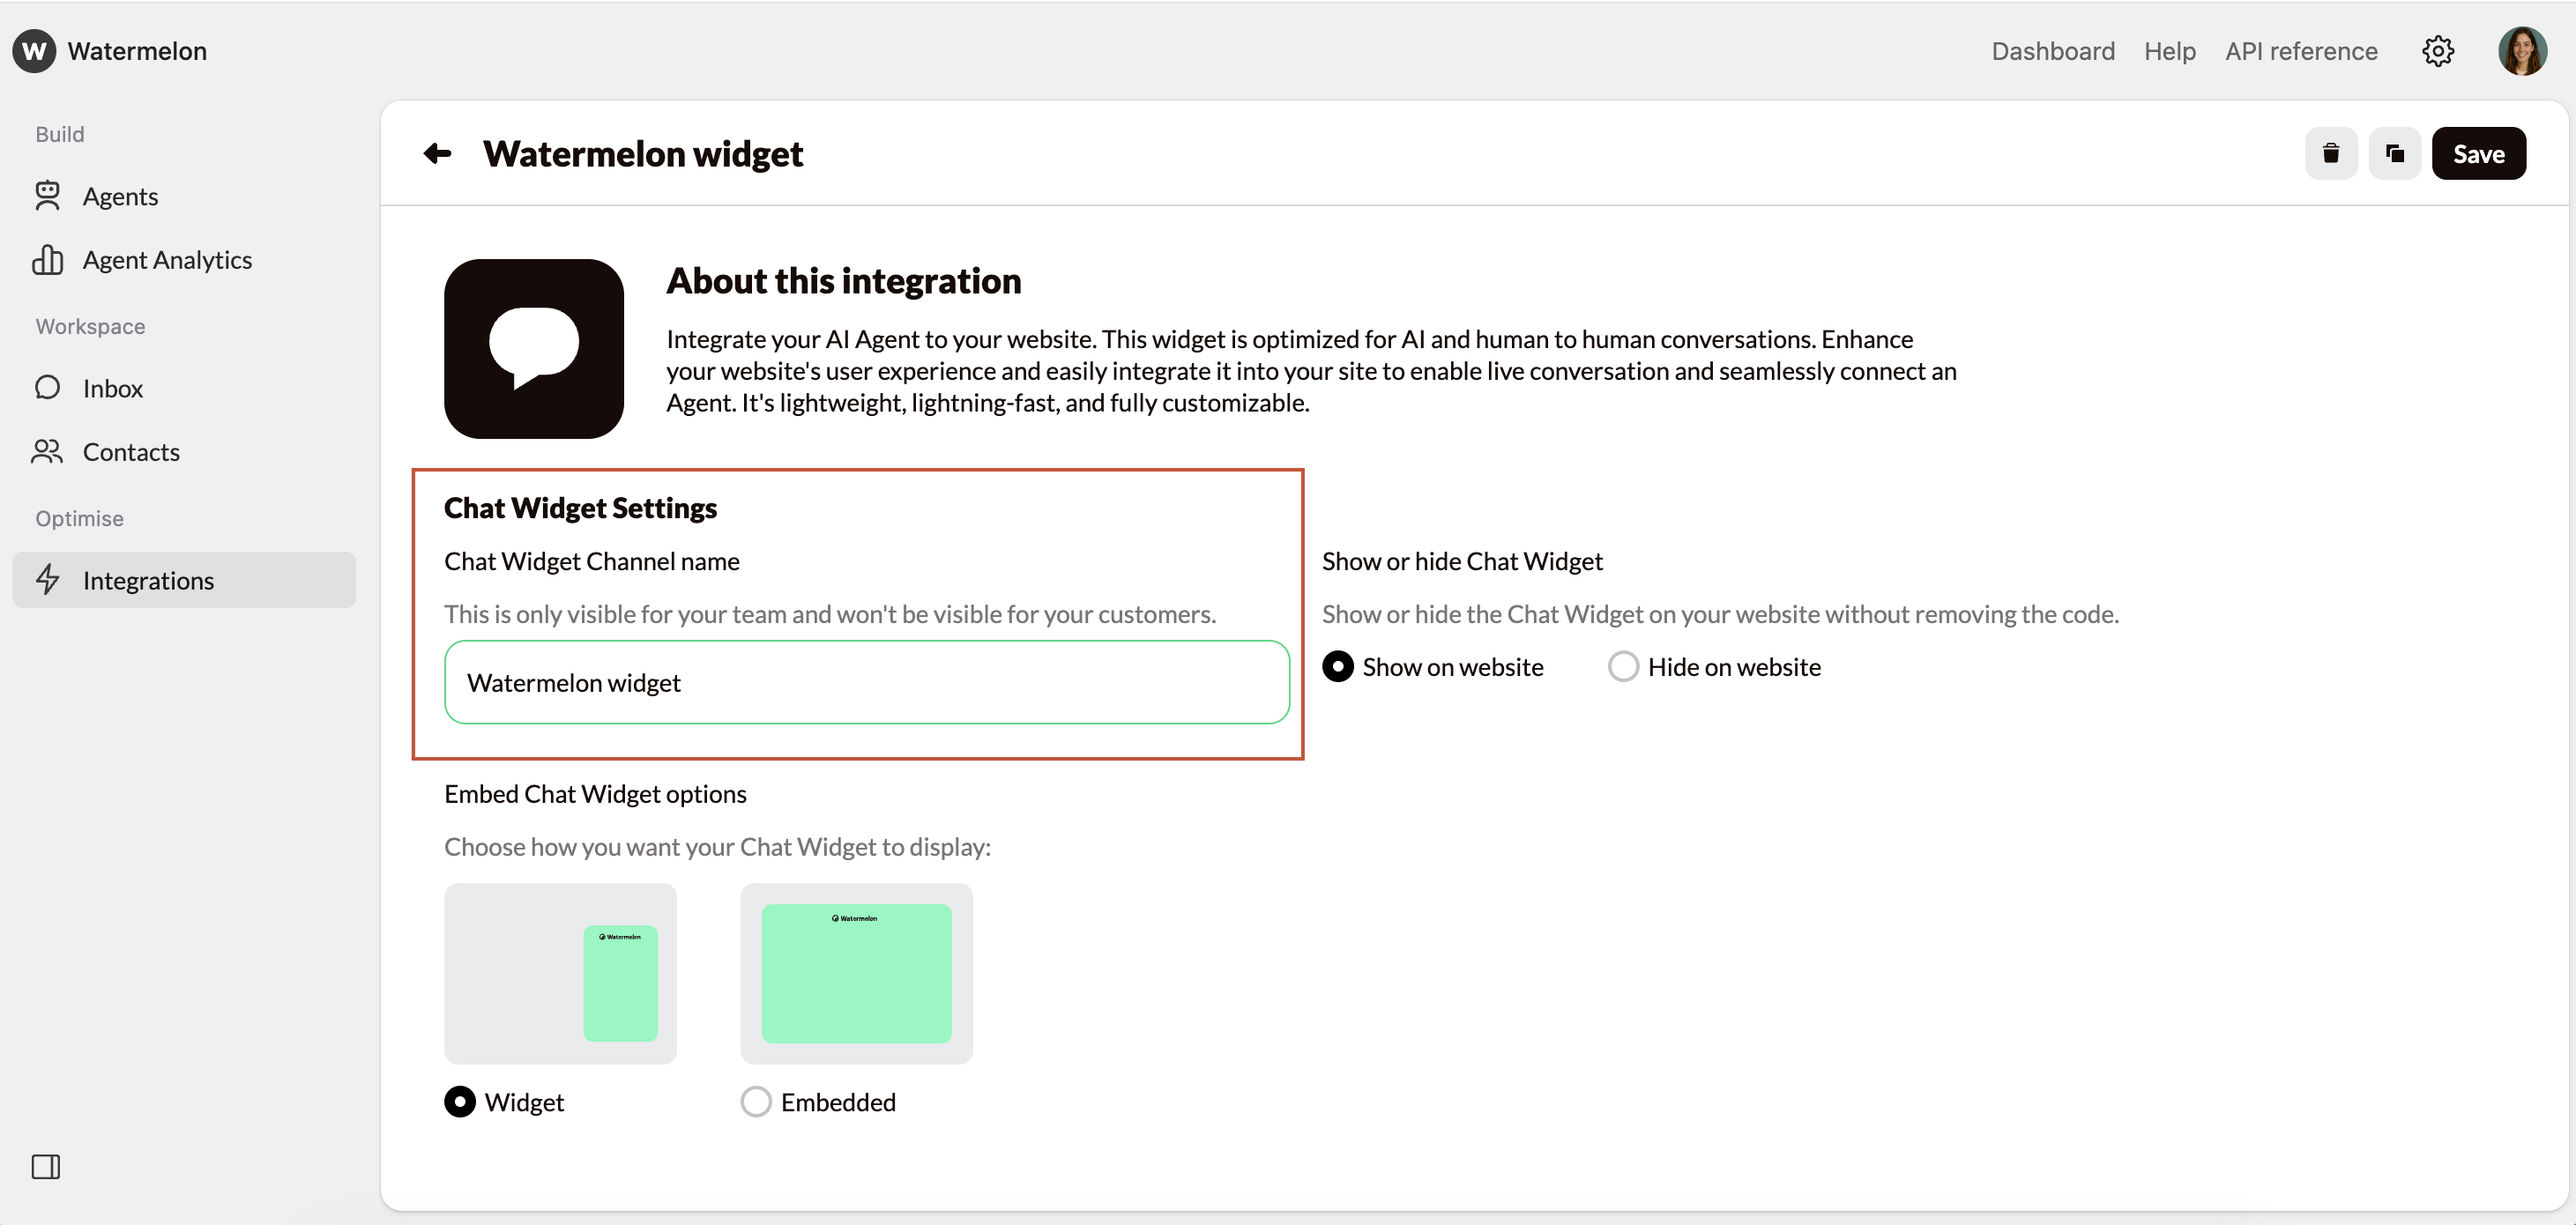
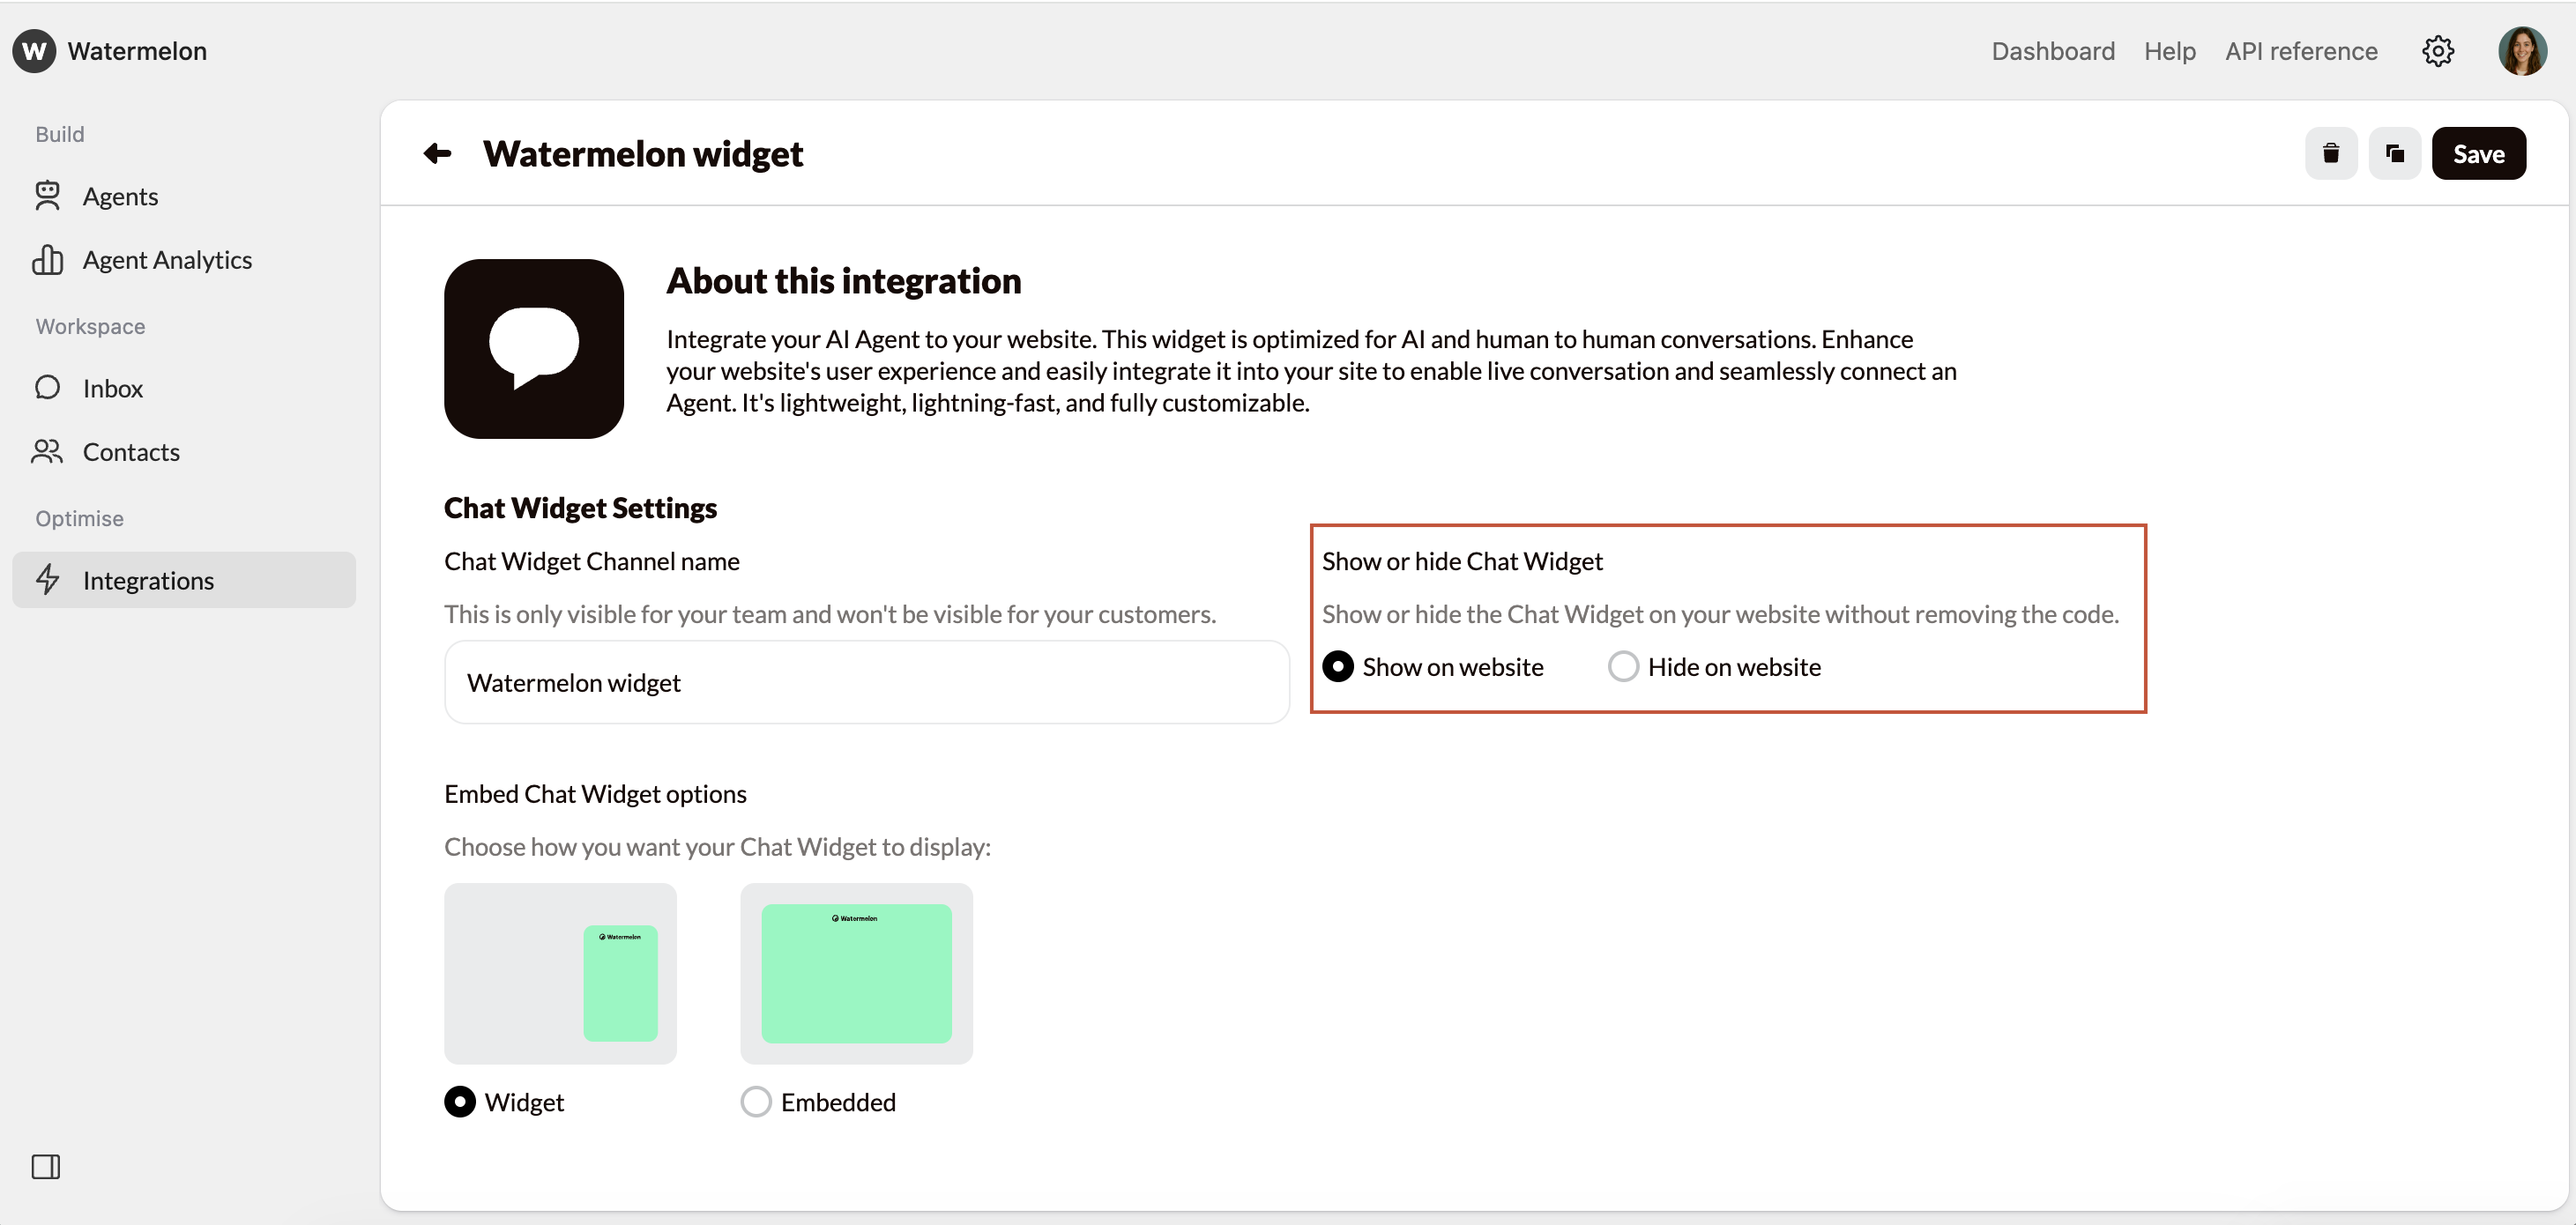
Show or hide Chat Widget
With Show or hide chat widget, you decide if the Agent is visible on your website.Once the widget code is placed, you no longer need a developer. Simply toggle the setting to show or hide the entire chat widget without removing any code.
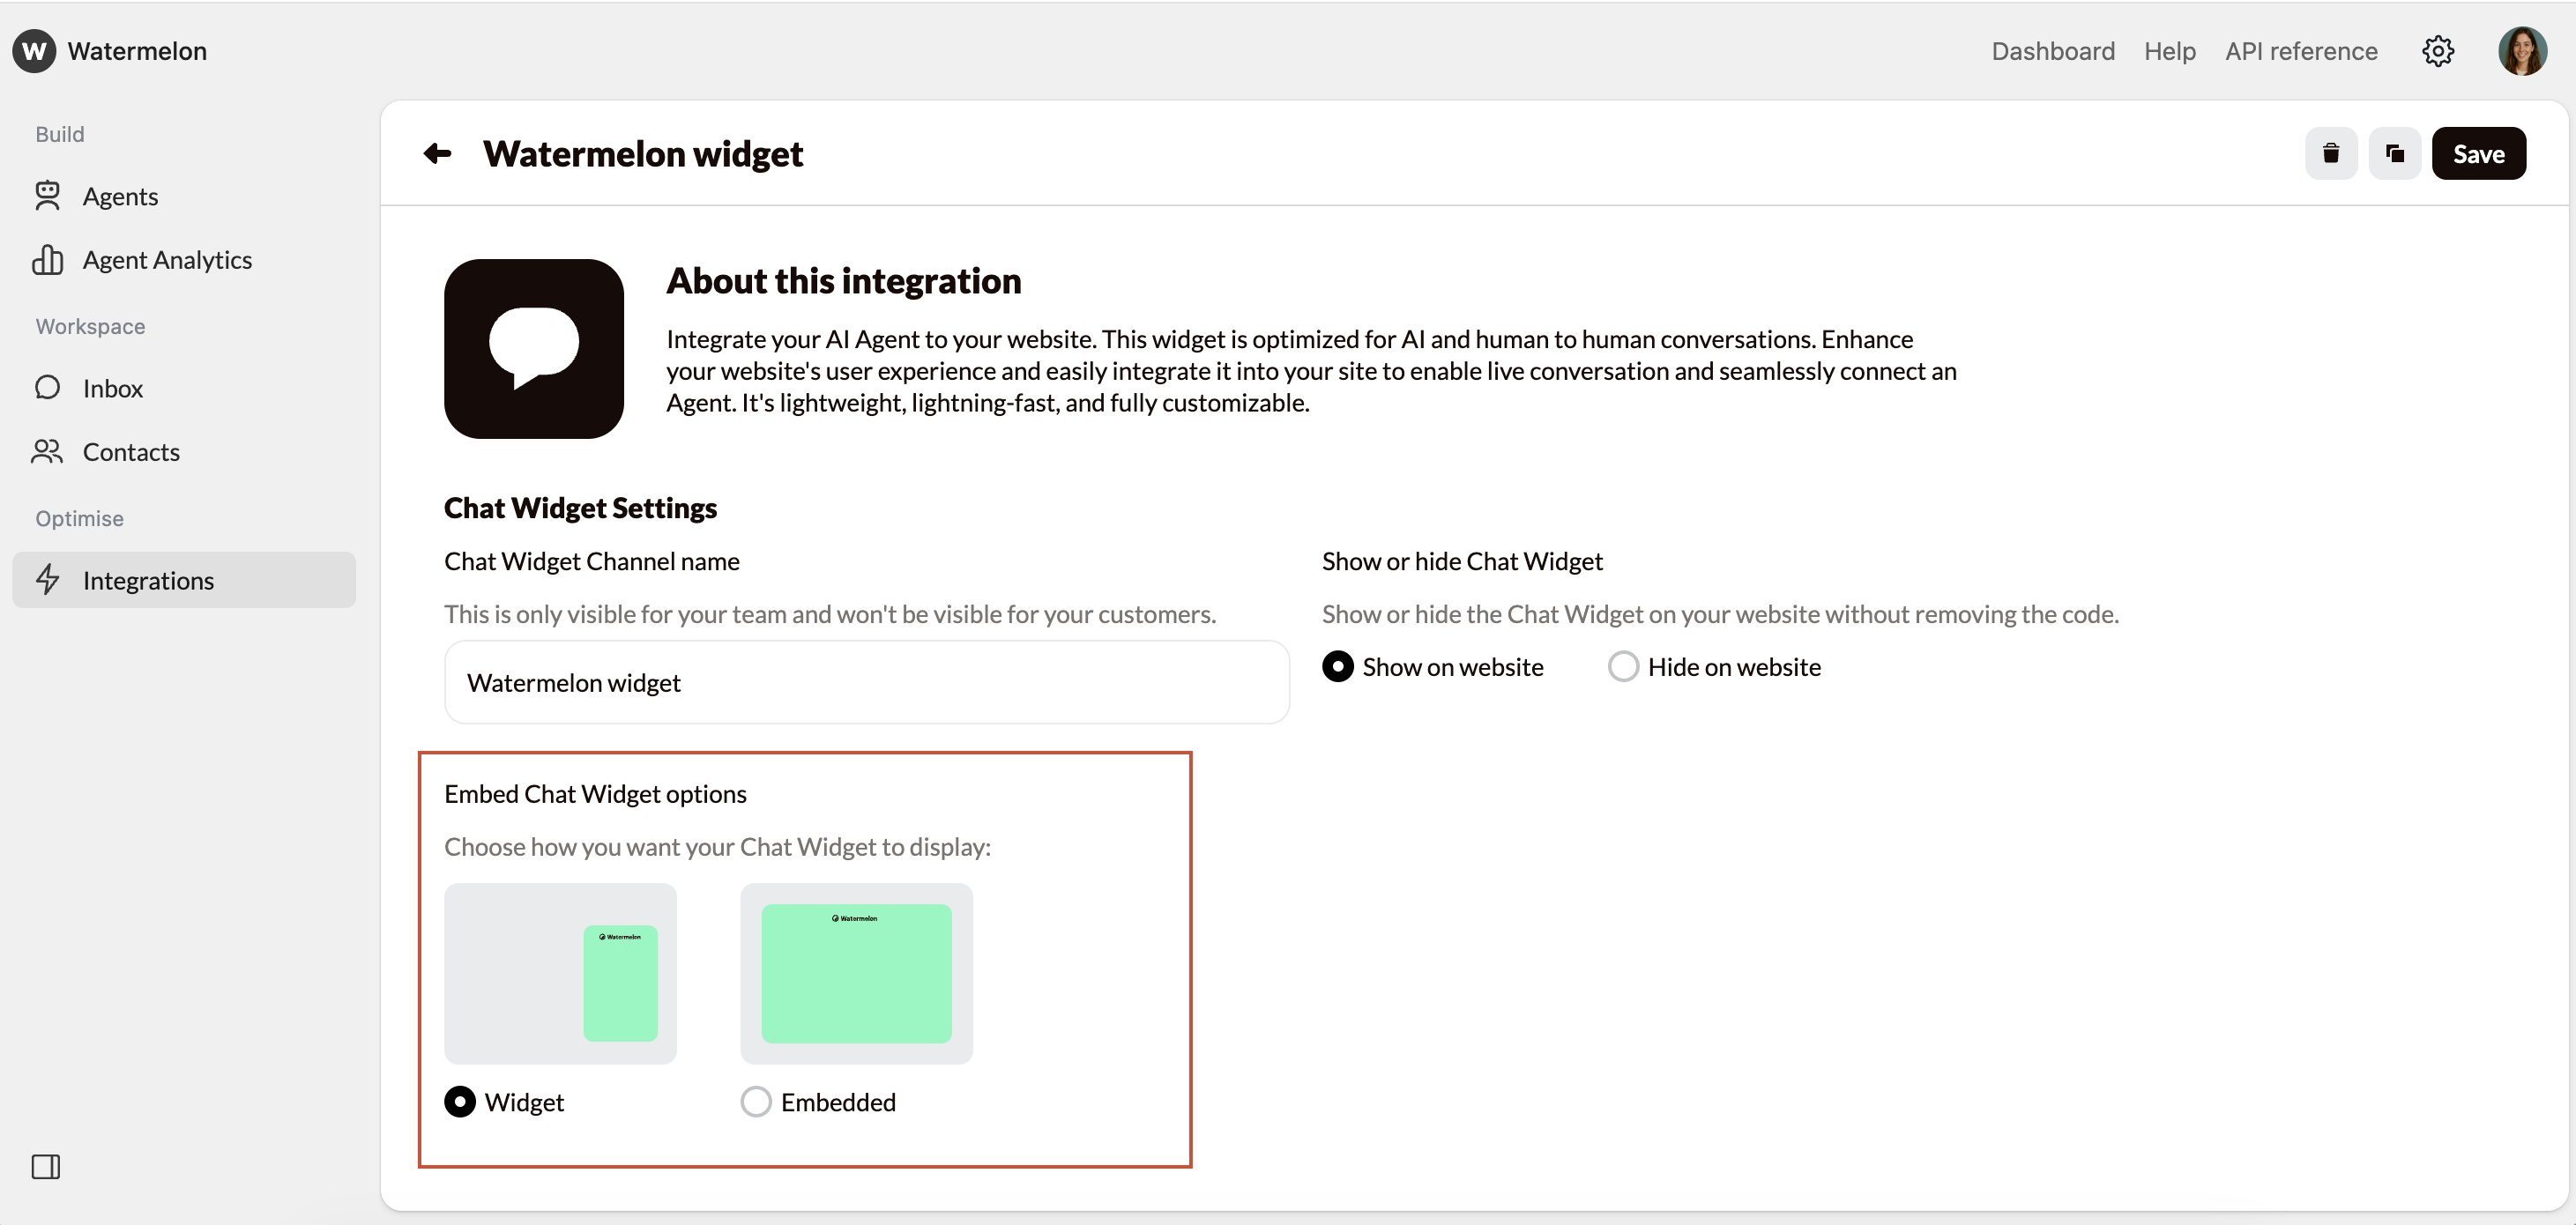
Embeded Chat Widget options
Within the embedding options, you can choose how to display your Chat Widget.- Widget: A chat widget appears in the corner of your website, allowing visitors to start a conversation from any page.
- Embedded: You can embed the widget so it opens in an iframe or in full screen on a page.
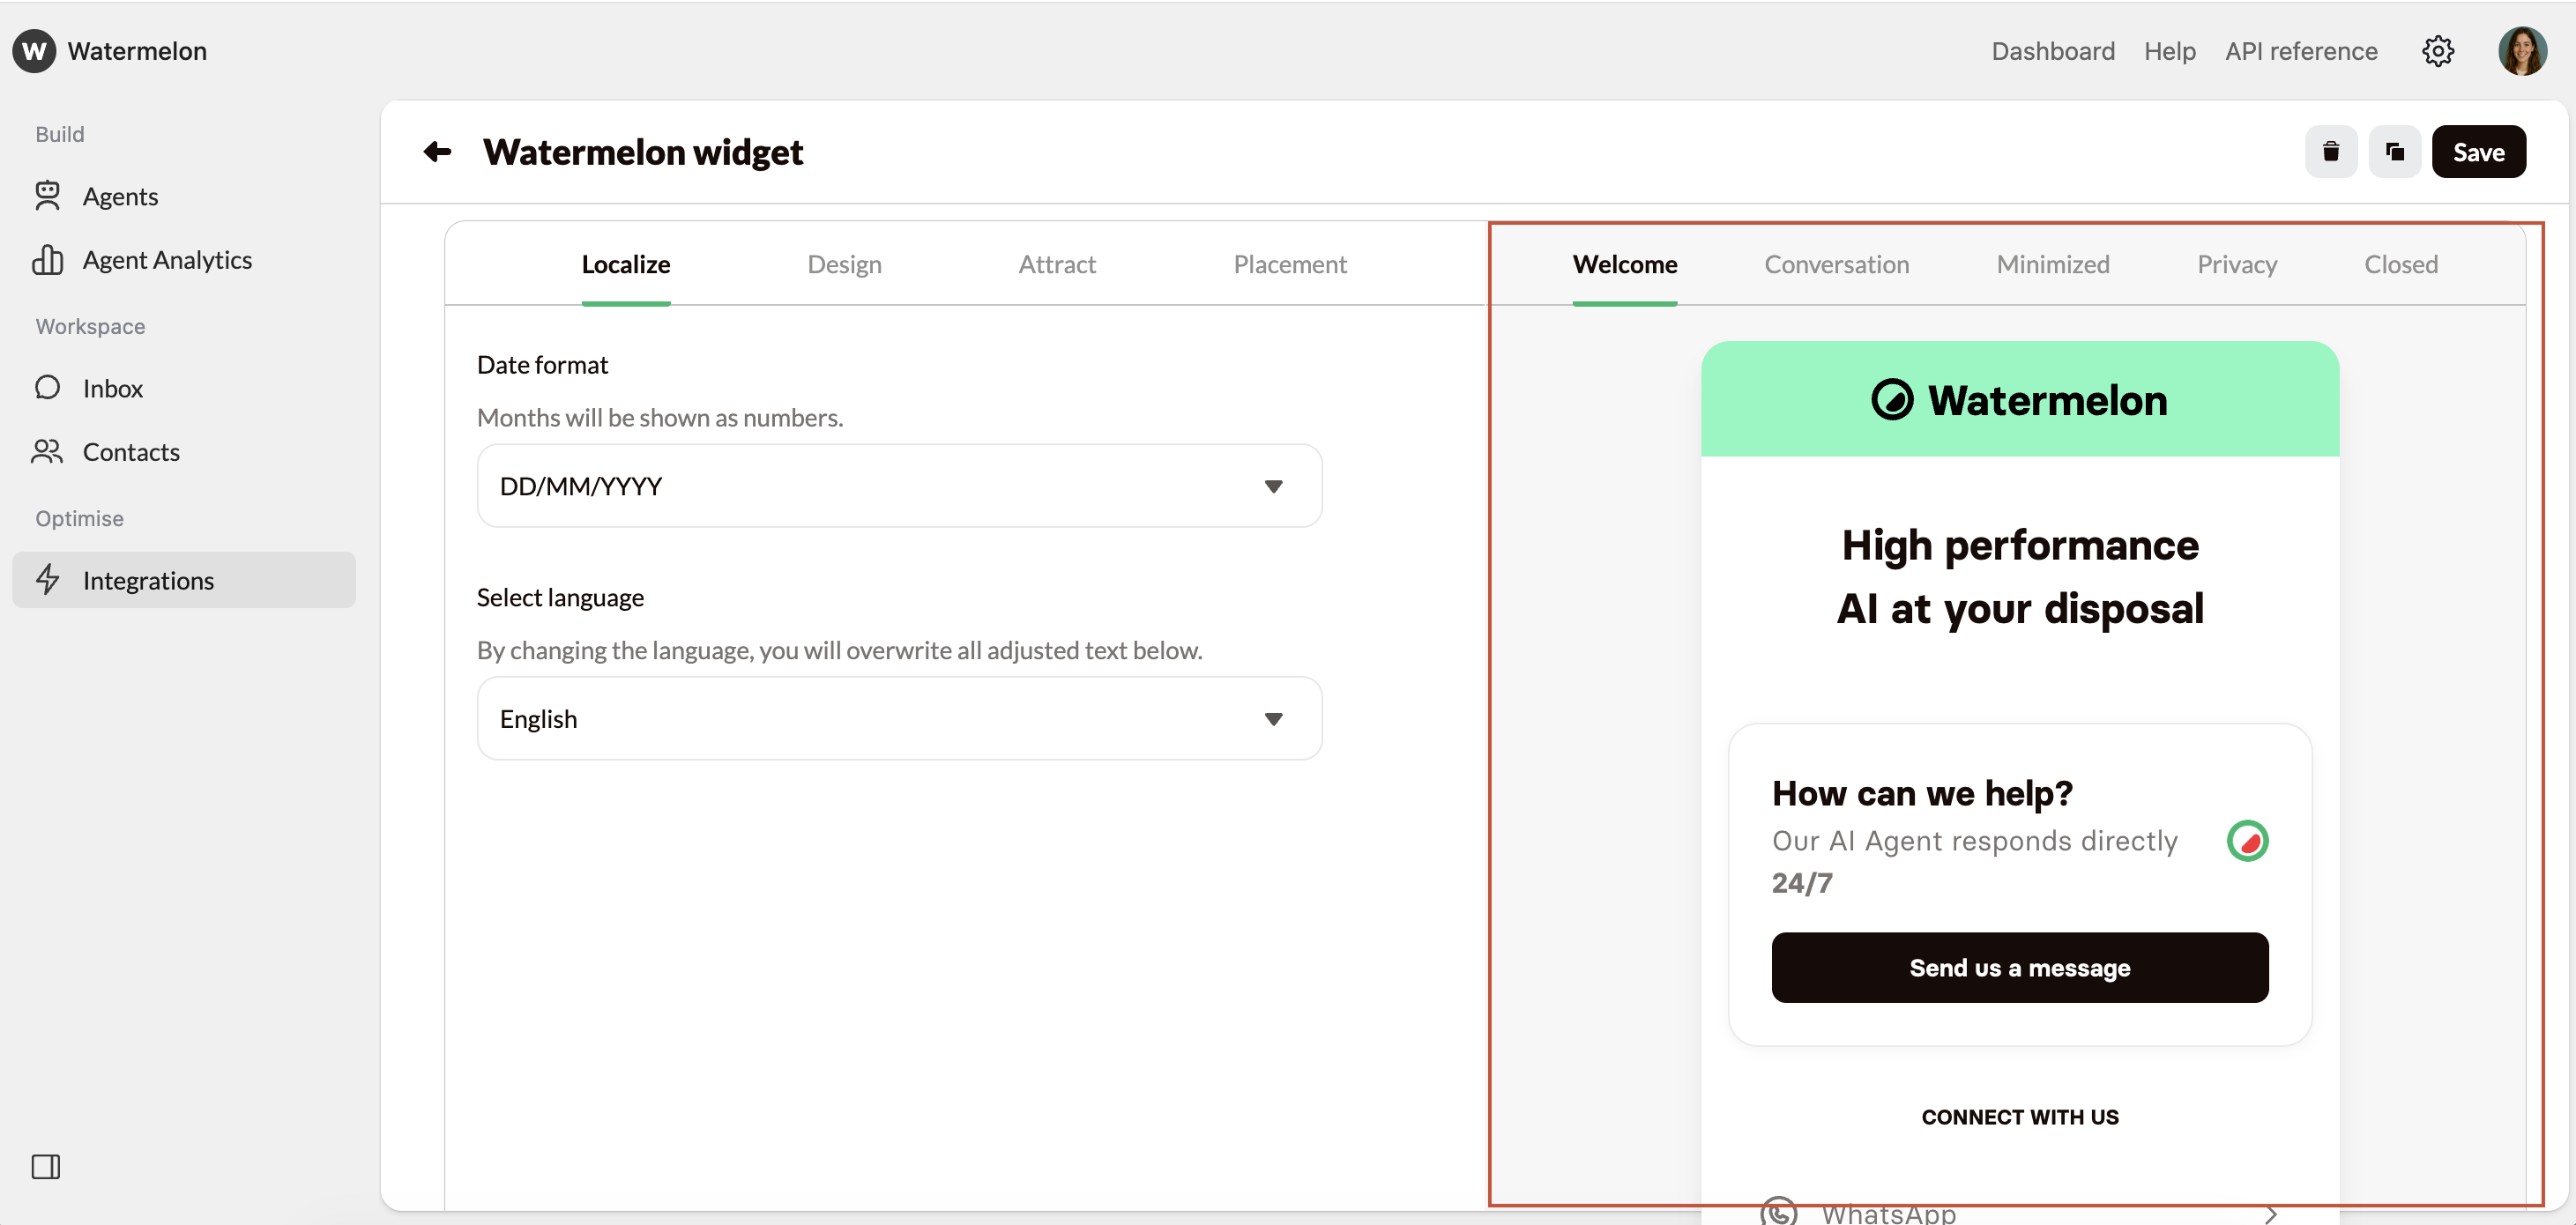
Preview changes
Each time you make a change, you will see the update on the right side as a preview of the chat widget, just as the customer will see it. There are various tabs where you can preview different forms of the Chat Widget:- Welcome is the Welcome screen of the chat, the first thing people see when they open the chat.
- Chat is when someone is engaged in a conversation.
- Minimized shows how your AI Agent looks when someone has not opened the chat or has minimized it using the minimize button.
- Privacy for the privacy policy.
- Closed is out of business hours, it is then only possible to send messages when the AI Agent is active.