It only takes a few minutes to install the Widget on your website. Once installed, you’ll be able to answer Frequently Asked Questions automatically in no-time.
You have two ways to install your widget:
- For visitors on your website – the widget appears for anyone browsing your site. Conversations will be saved in the browser via a cookie.
- For both visitors and logged-in users – the widget is available across your website and inside your platform or app. The widget will show information like customer names and previous conversations across devices.
We recommend installing the Widget for both visitors and logged-in users to give everyone instant access to your team.
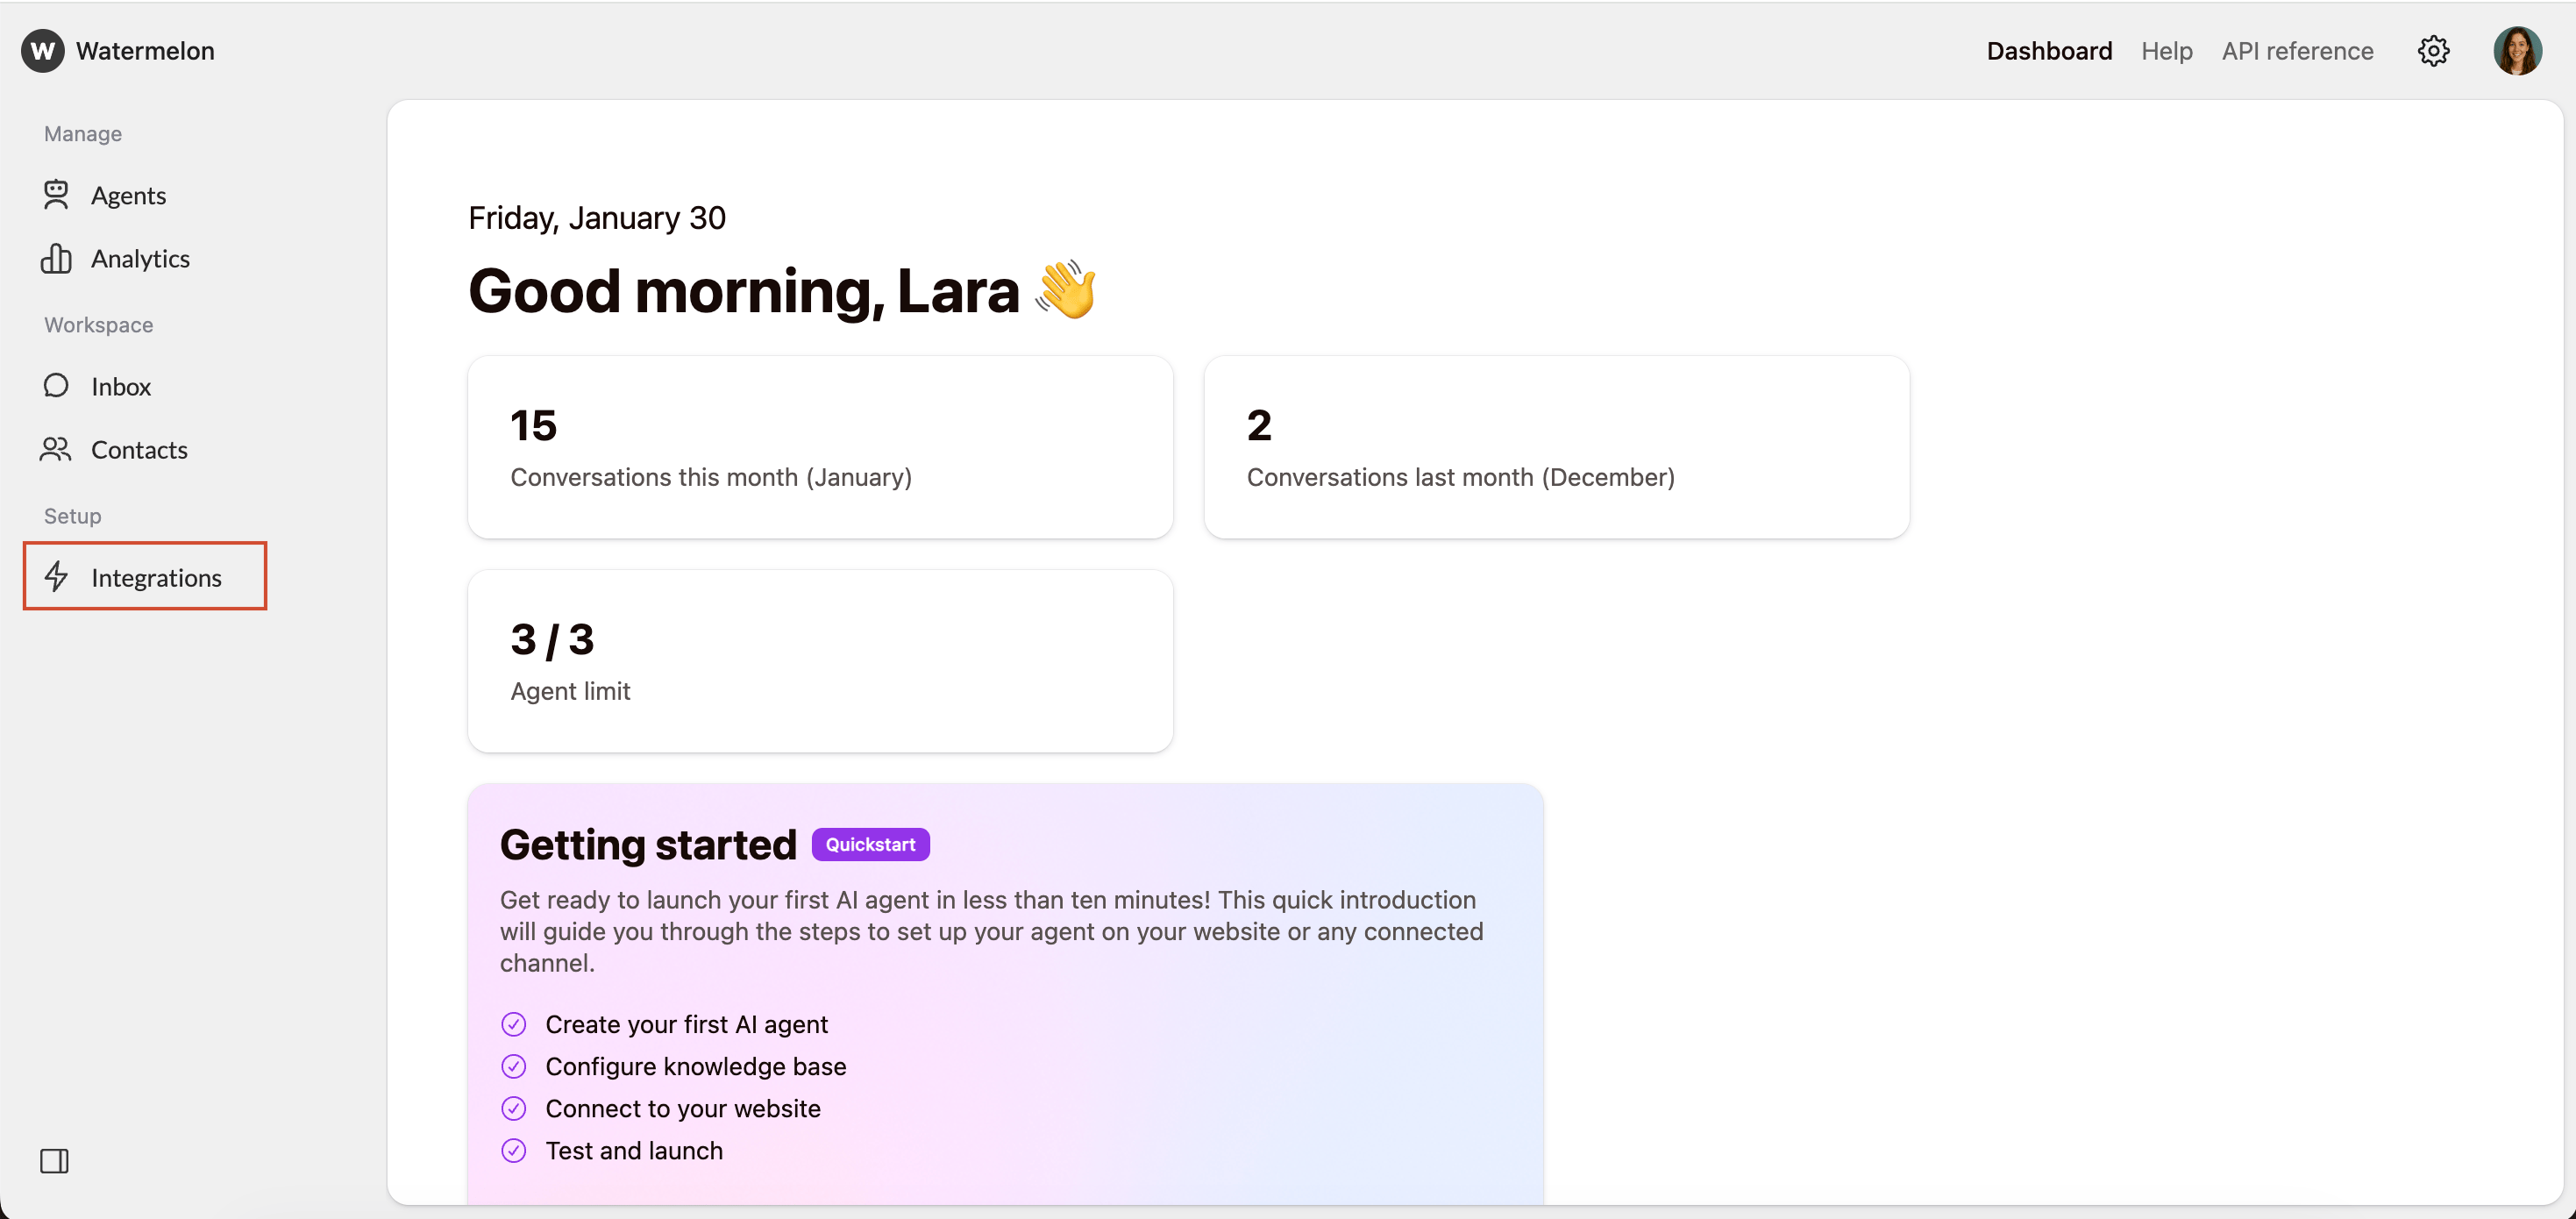
Open Integrations
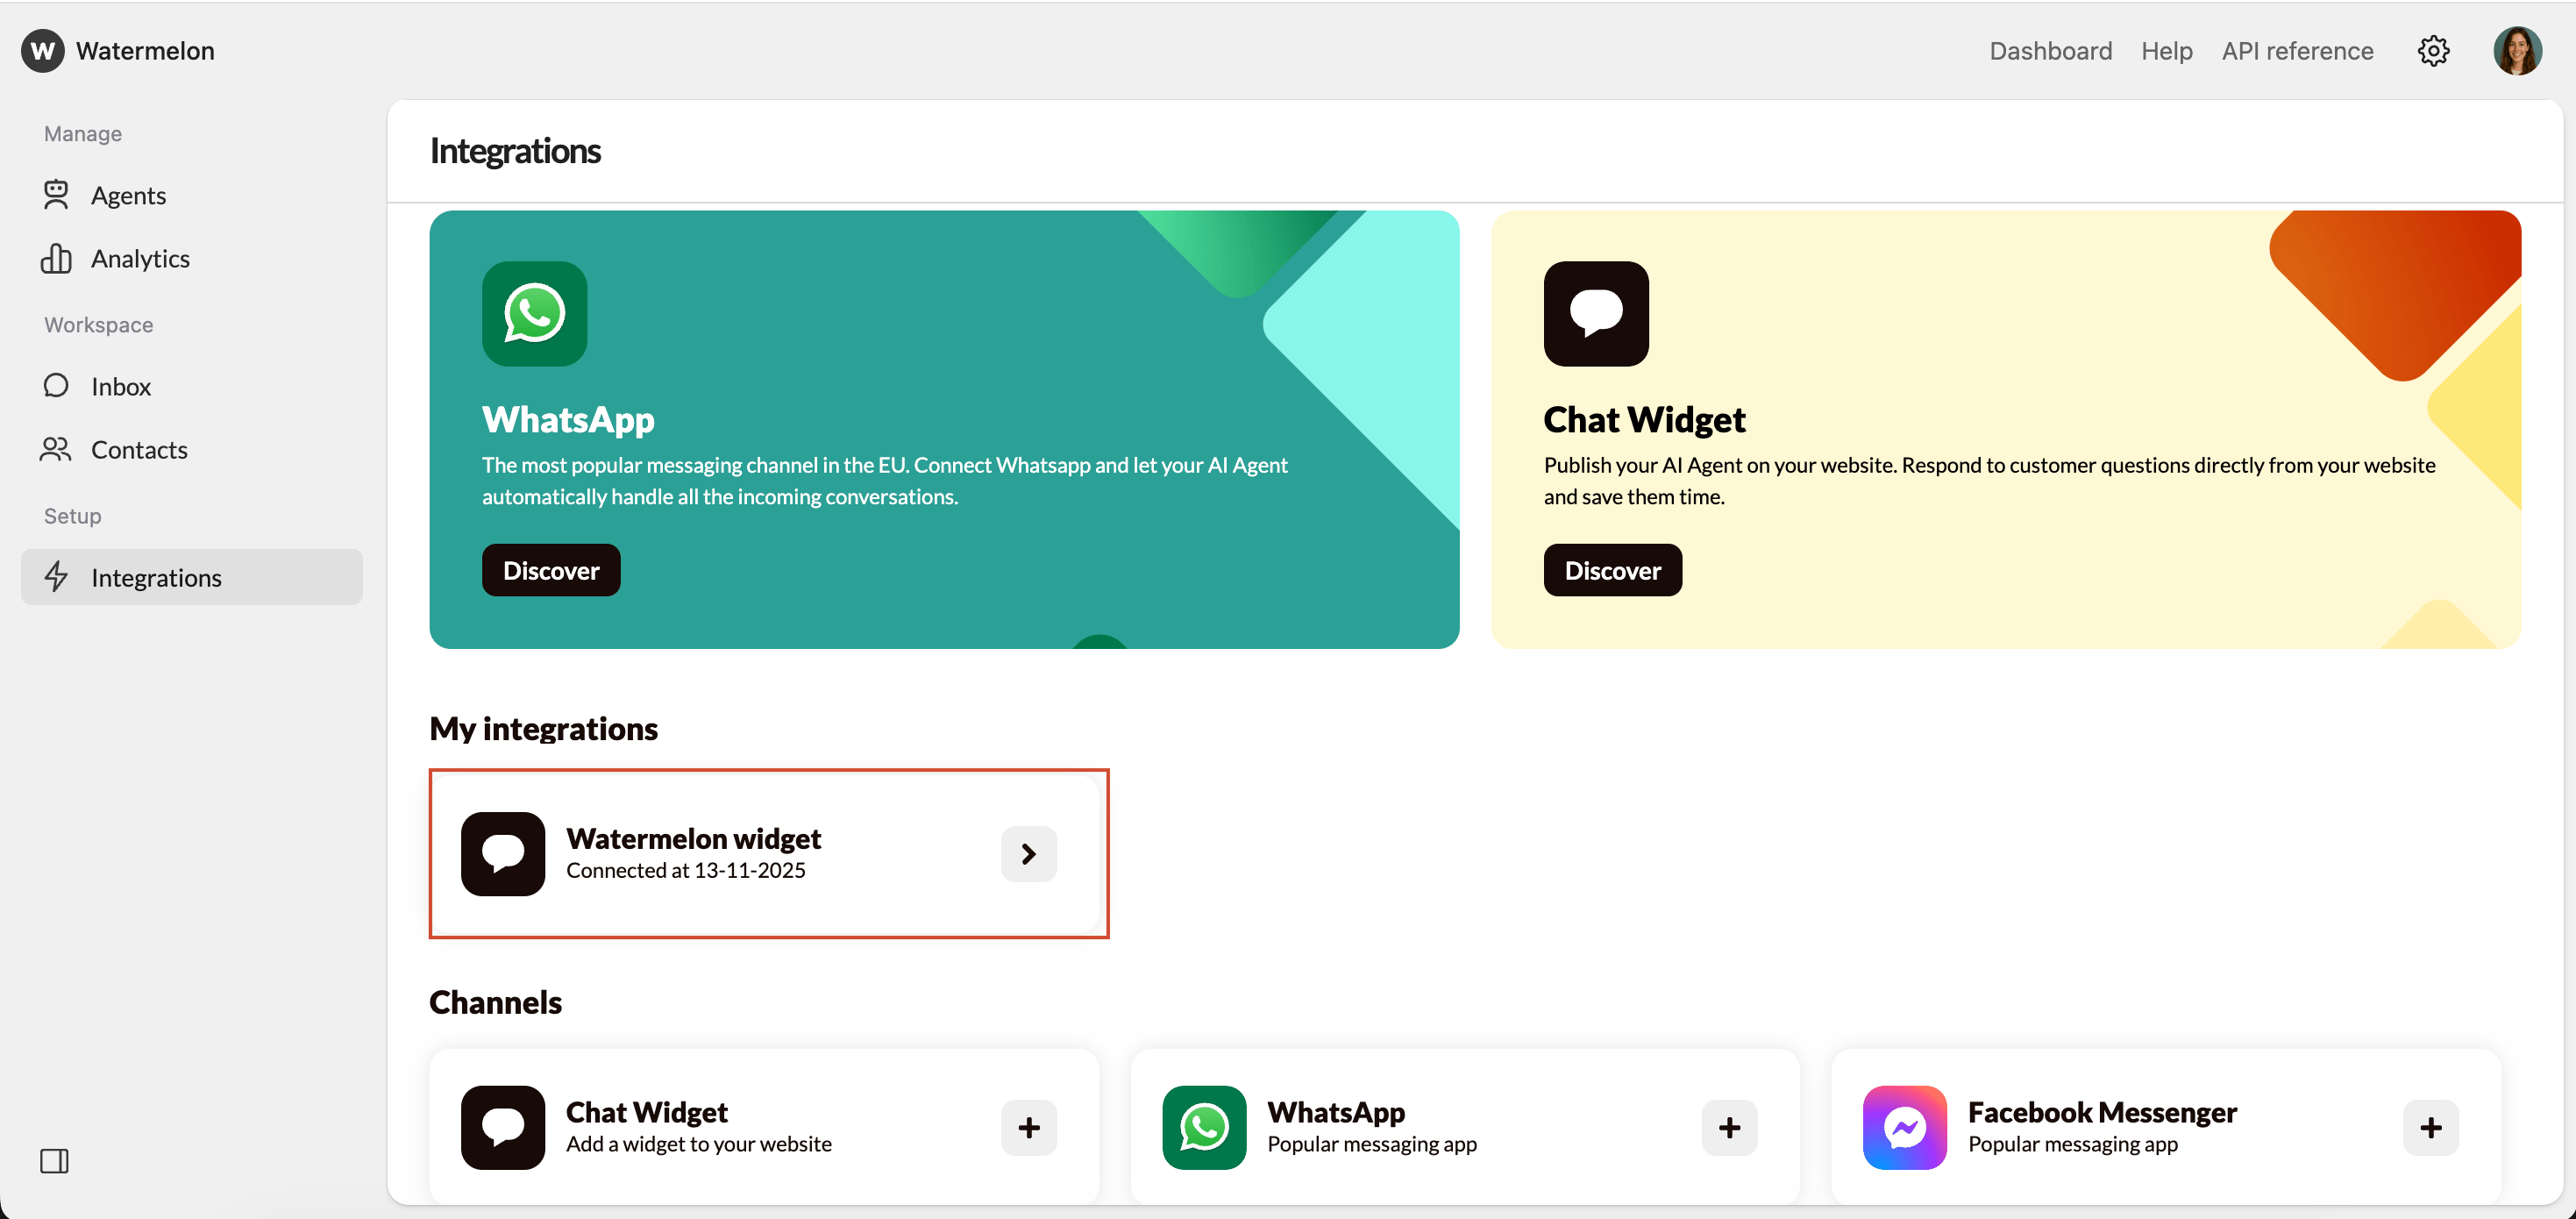
Navigate to Integrations in the menu on the left-hand side of your Watermelon dashboard. Open Chat Widget
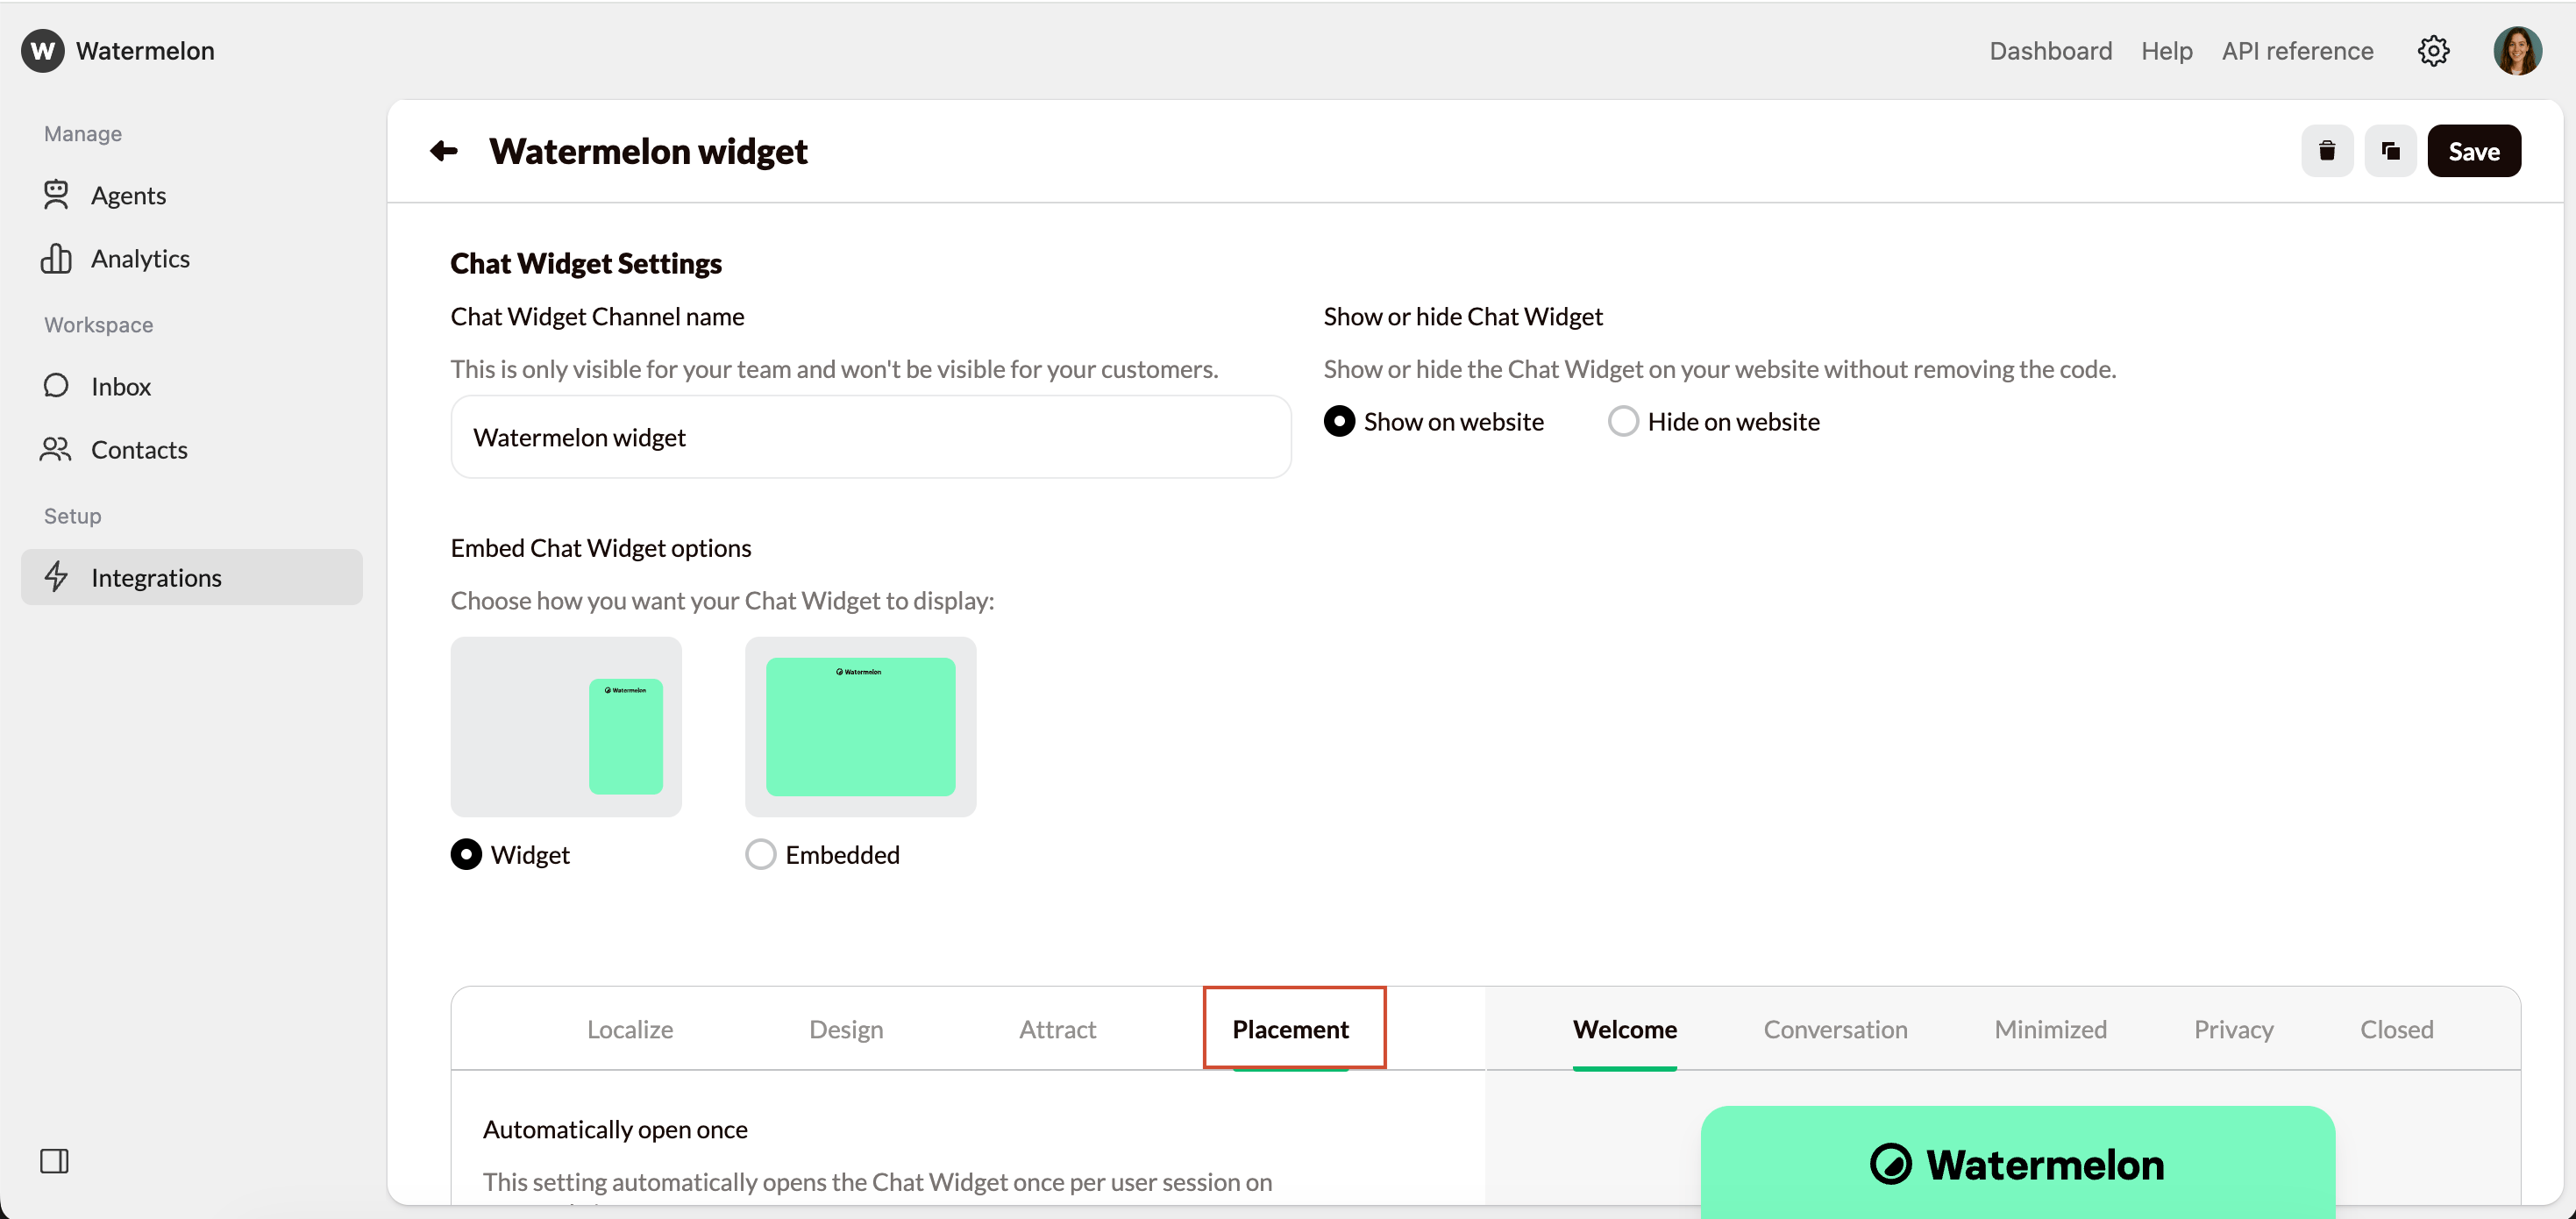
Go to the section Channels, click on Chat Widget and select the widget you want to place on your website. Go to placement
In the widget settings, open the Placement tab. Copy your widget code
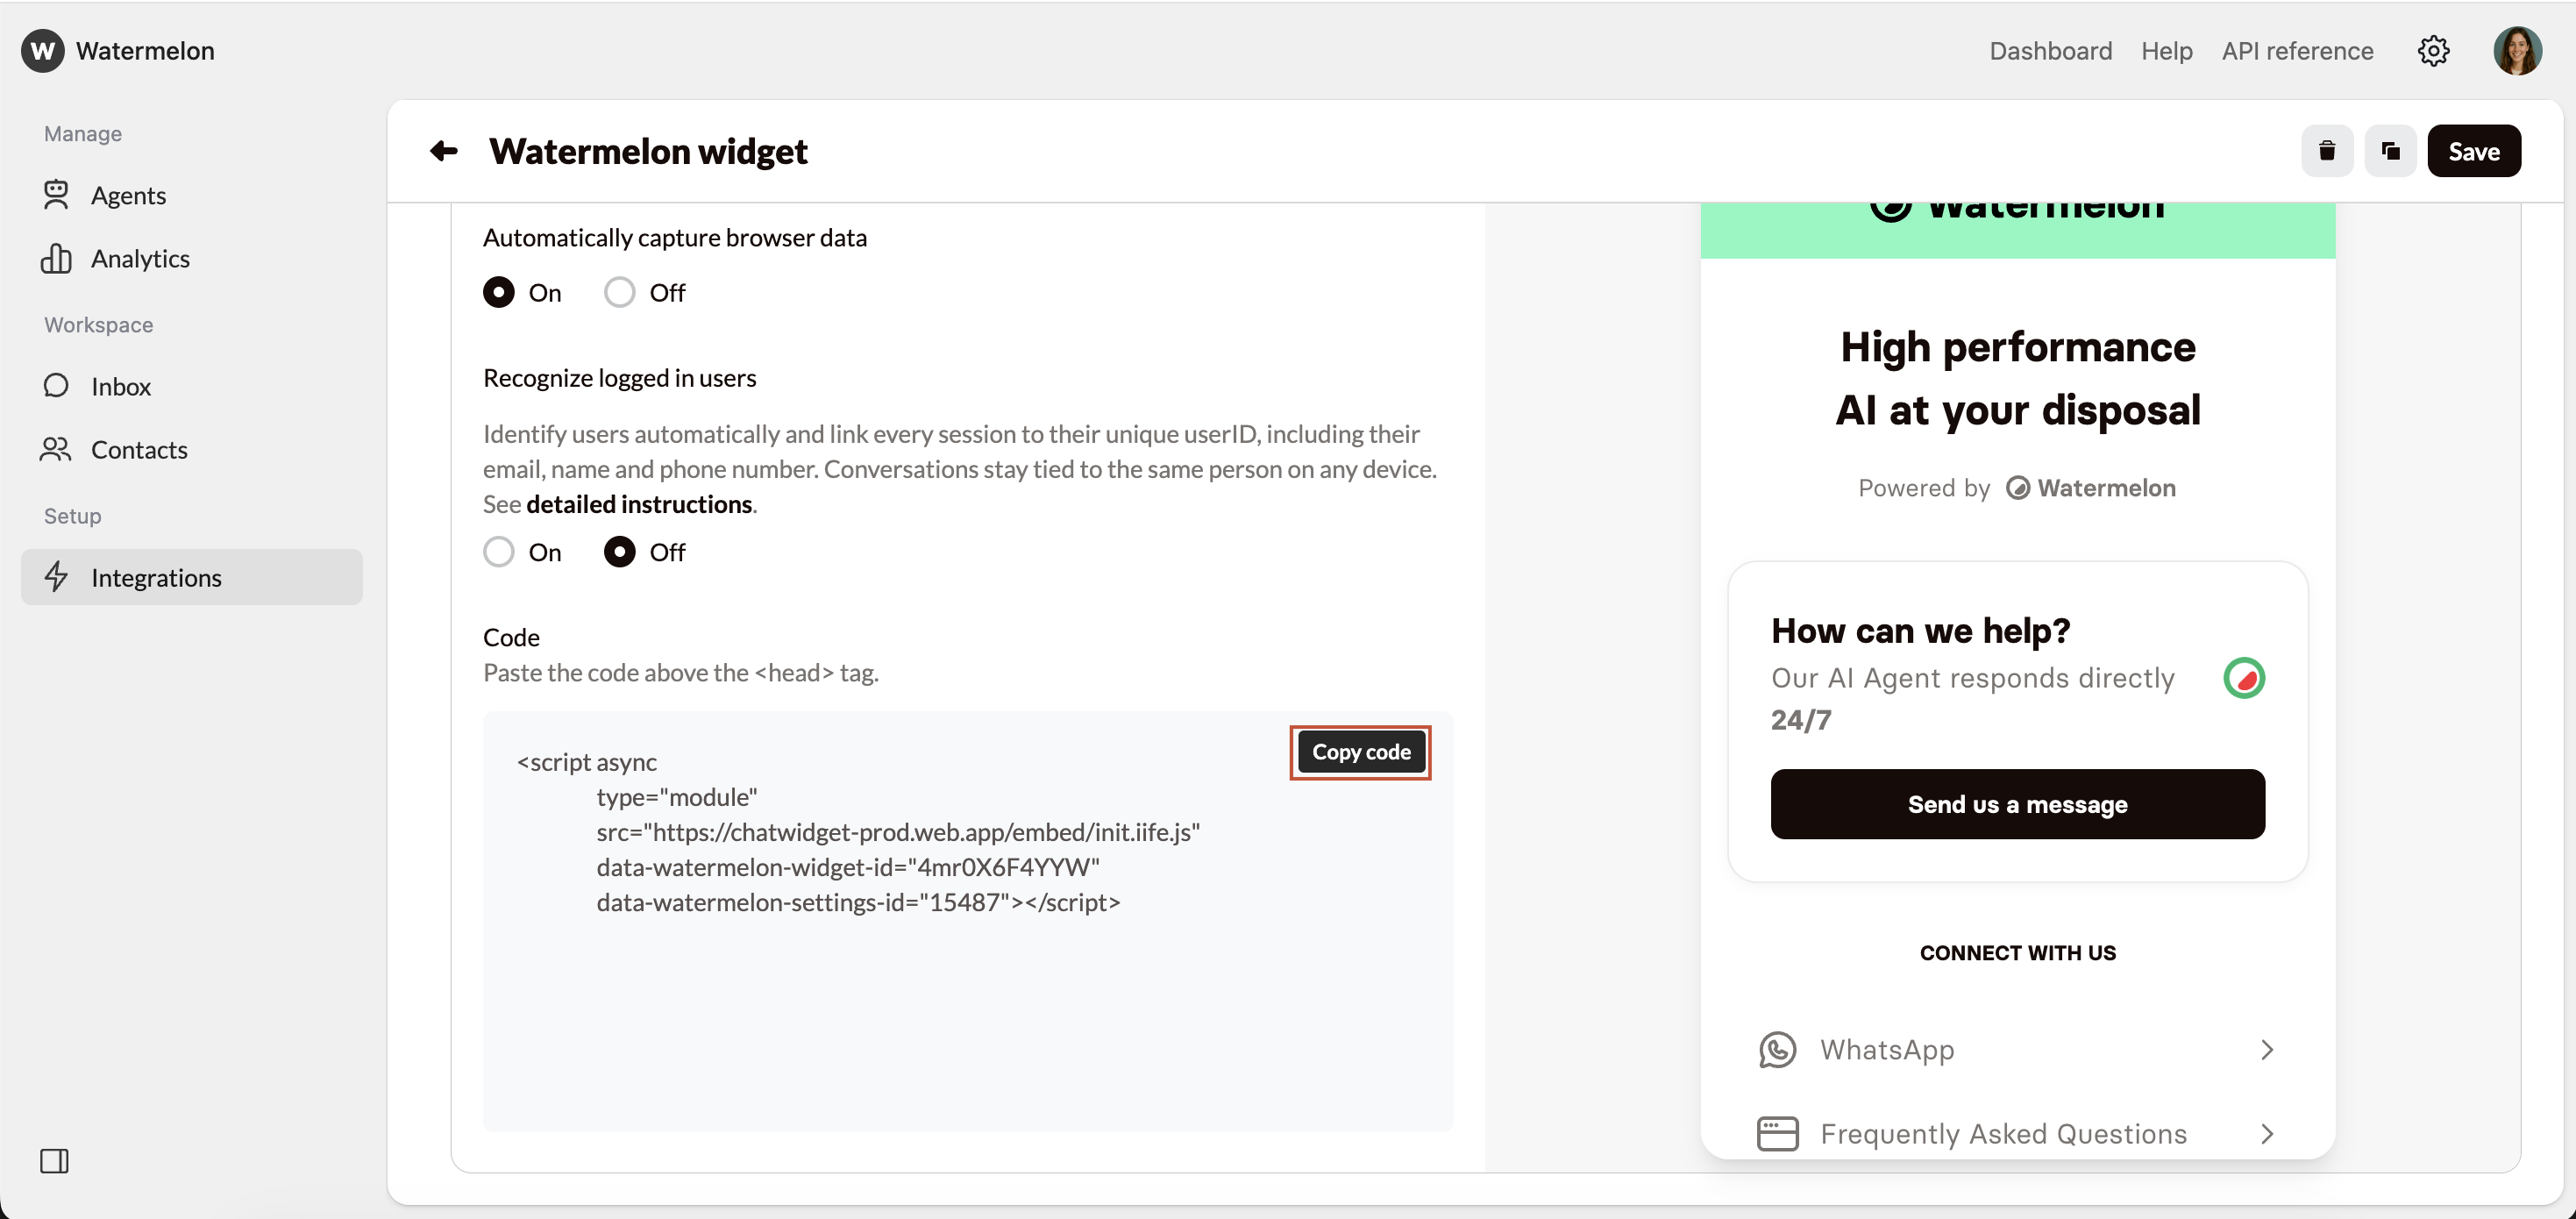
Under Code, you’ll find your installation snippet. Click copy code in the top-right corner to copy the code to your clipboard. Install yourself
Click Copy code and paste it before the </head> tag on every page you want the Widget to appear on your app and website.
After adding the code, open your app and website and the Widget will appear.
You can also use one of our guides to install the widget in a CMS:
Wordpress
Wix
Lightspeed
Google tag manager
Shopify
Joomla
Squarespace
Framer
Webflow
BigCommerce
Weebly
Add your chat widget to your WordPress website so visitors can chat directly with your team or AI Agent. You can install the widget in two ways:
- By adding your snippet directly to your theme’s footer
- By using a plugin (recommended for most users)
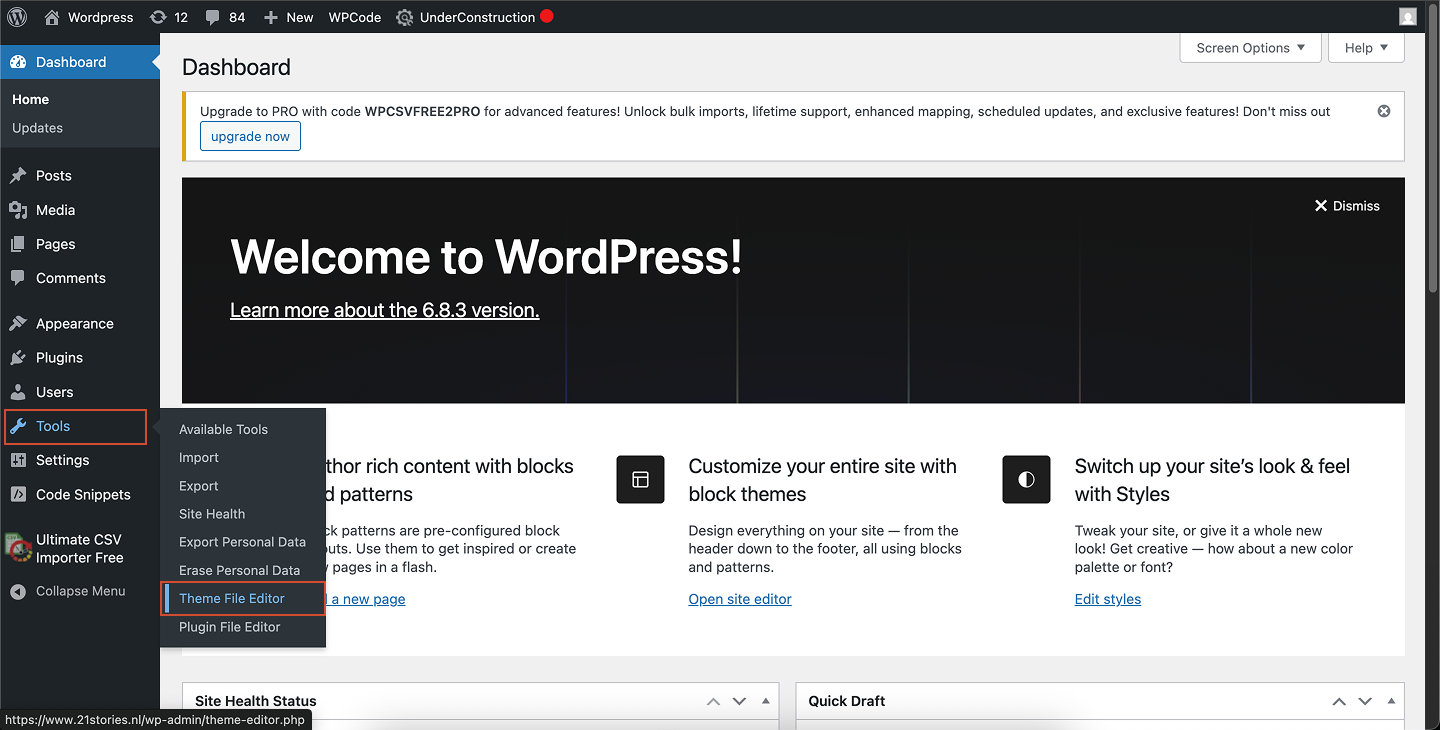
Open the Theme File Editor
In your WordPress admin panel, go to Tools → Theme File Editor. Open the footer file
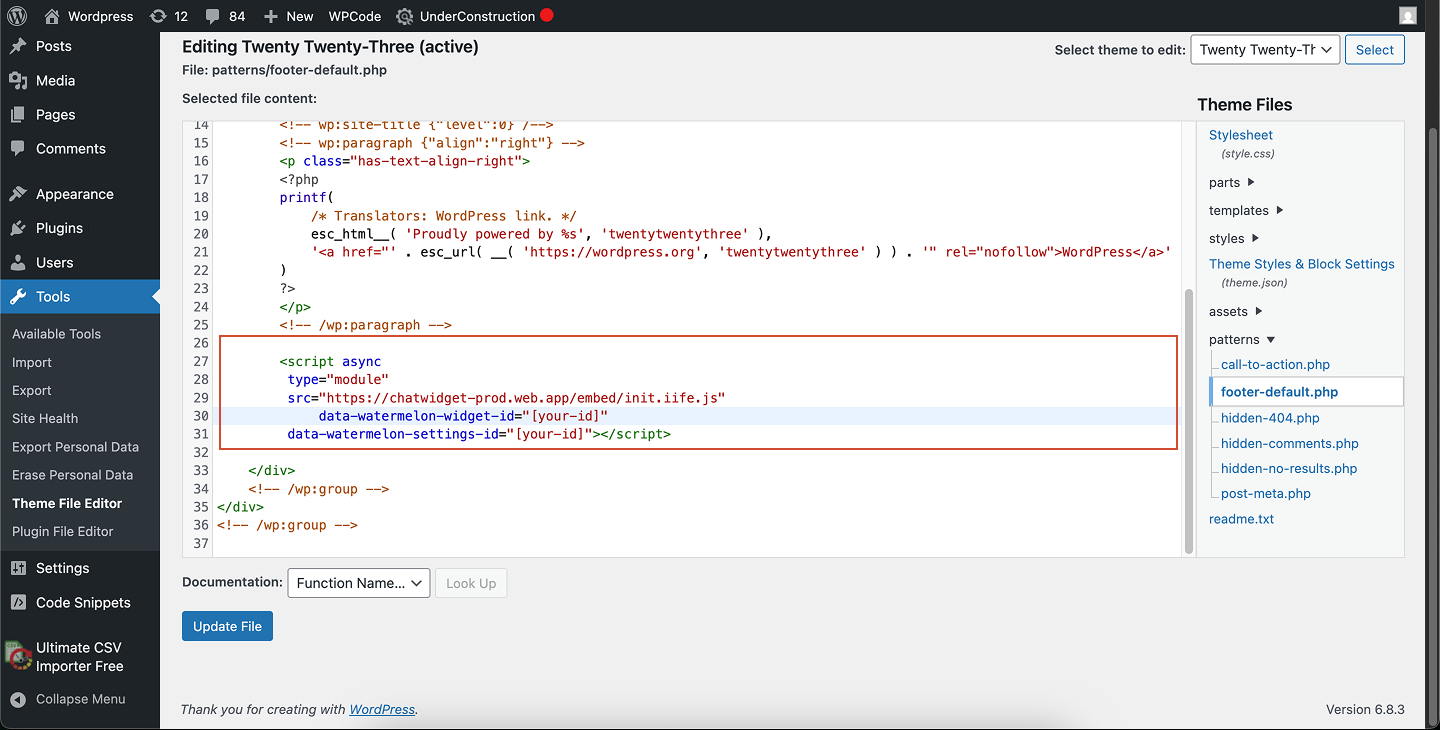
In the file list, expand Patterns and select Footer-default.php. Paste your chat widget code
Scroll to the bottom of the file and paste your chat widget snippet.Place it just before the closing </body> tag if present. Save your changes
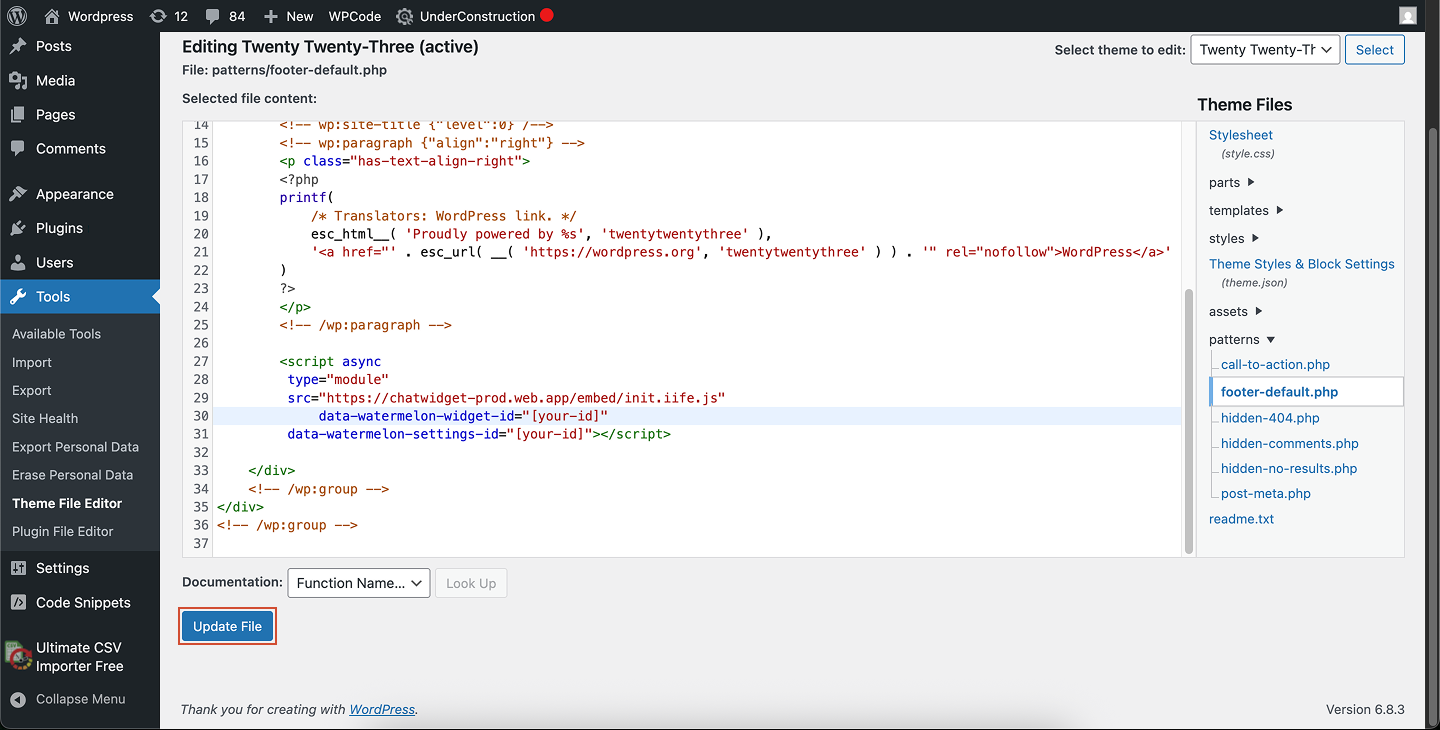
Click Update File at the bottom of the code editor to apply your changes. Preview your site
Open your website in a browser (not the editor preview) to confirm your chat widget is now live.Editing theme files directly requires caution. If you switch or update your theme, your changes may be lost.If you prefer a safer option, use the WPCode plugin instead.
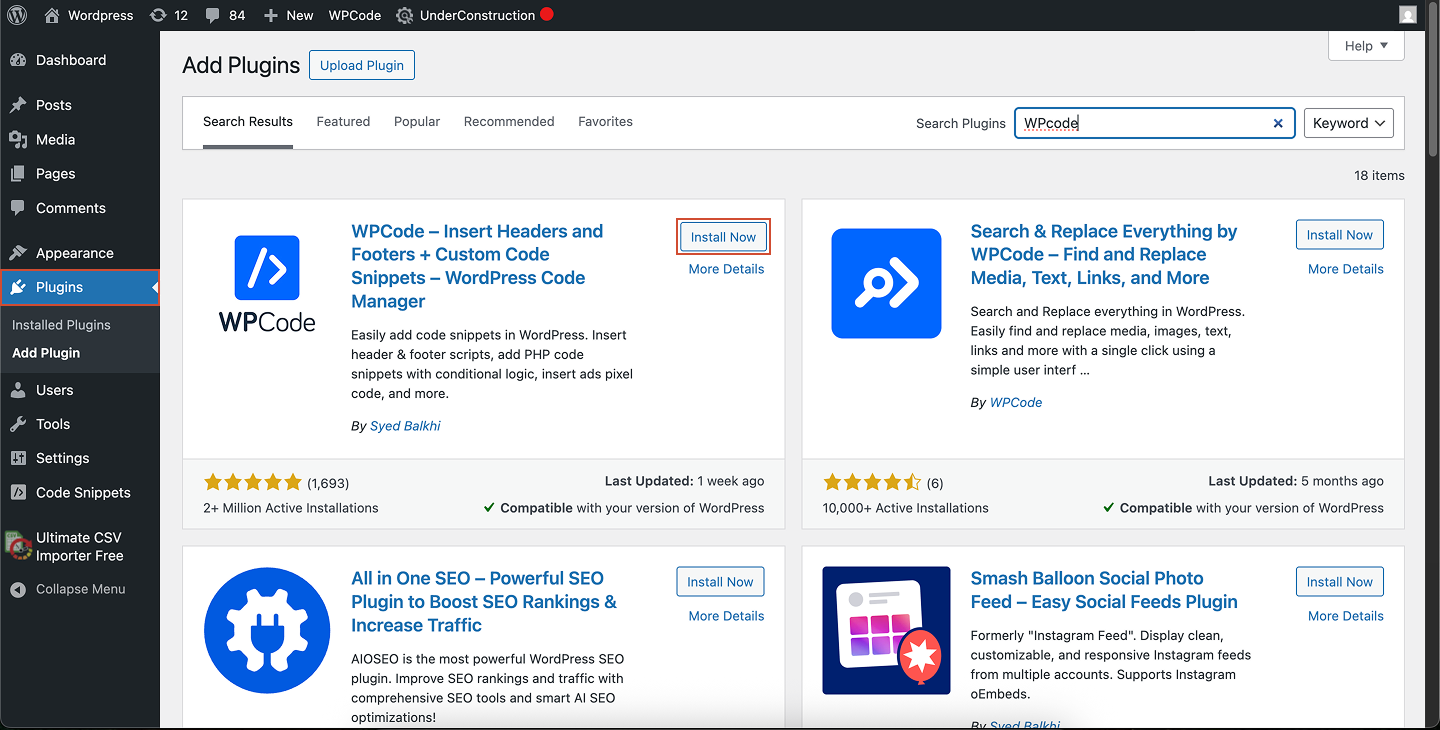
Install WPCode
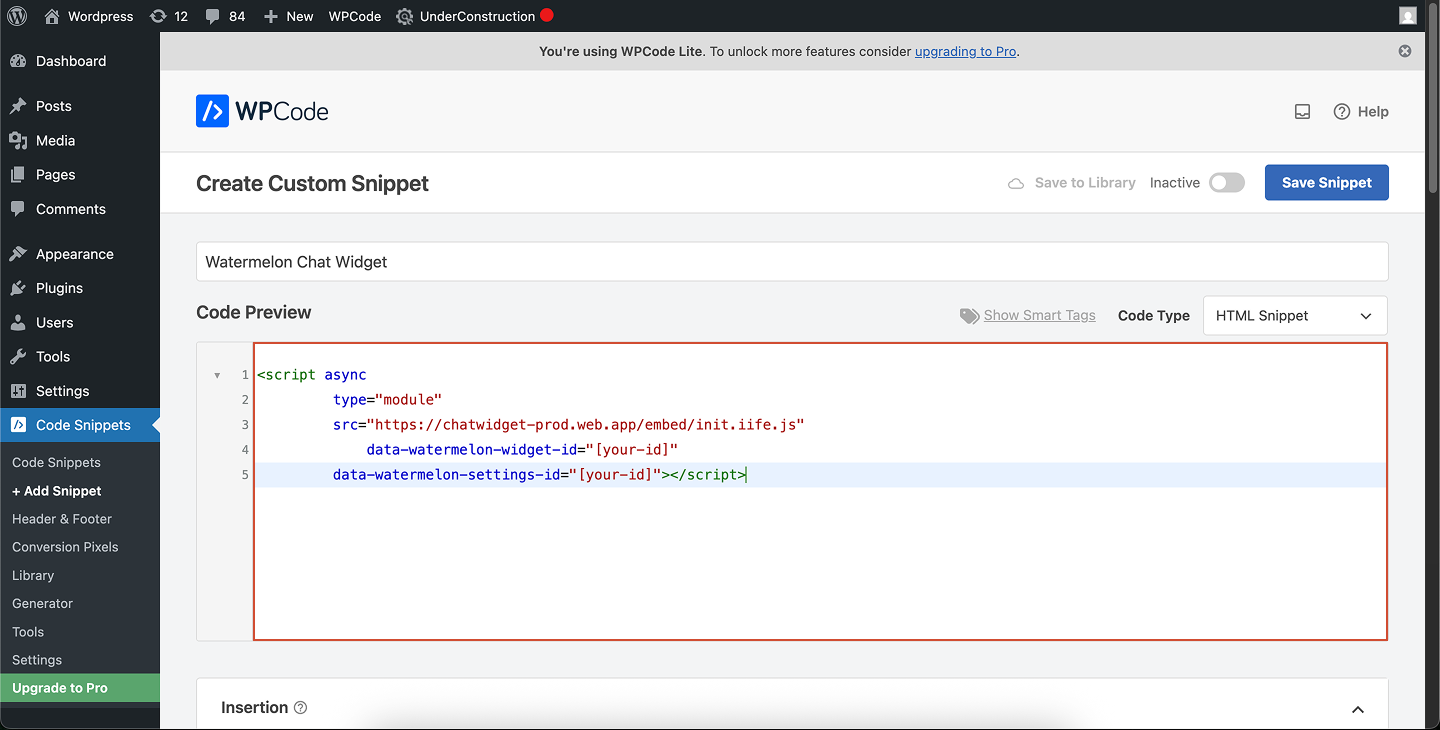
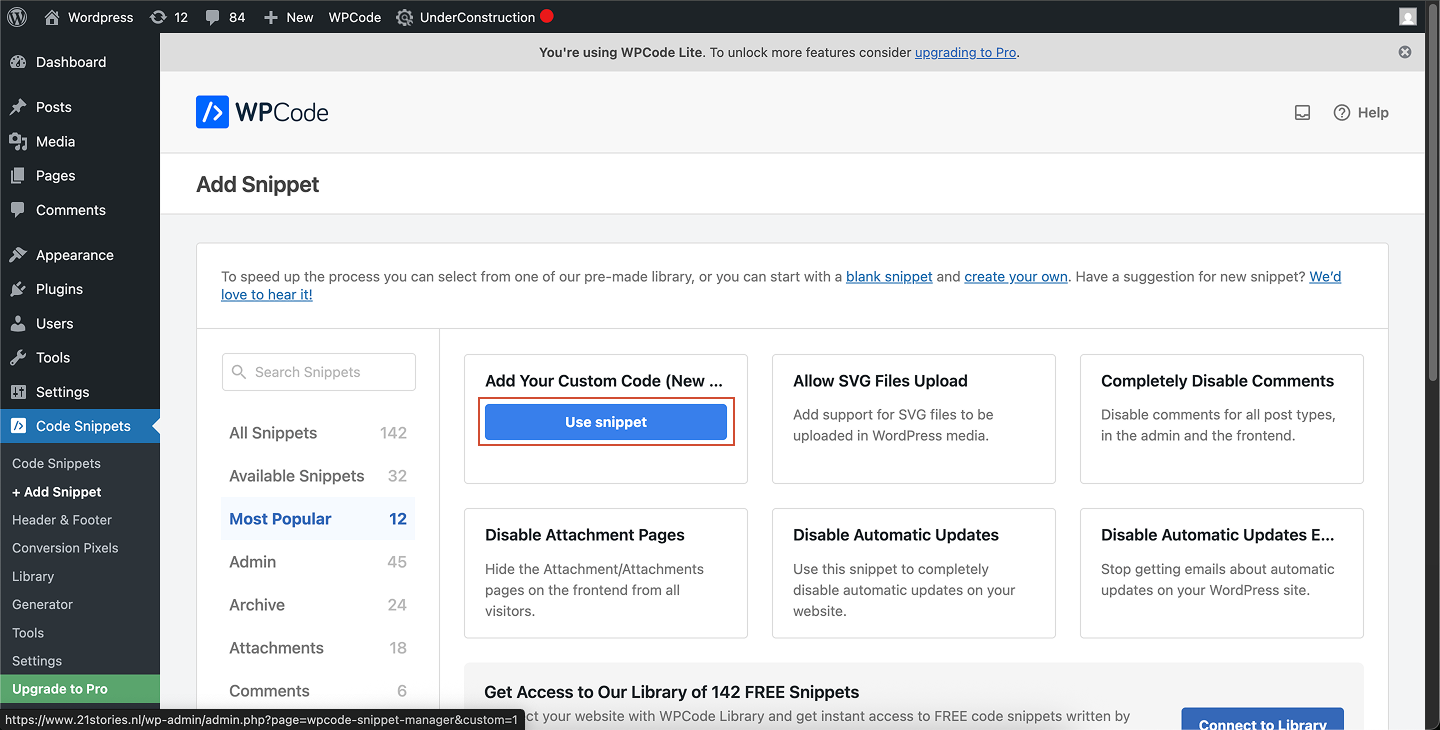
Install and activate the WPCode plugin (formerly Insert Headers and Footers). Create a new snippet
Go to Code Snippets → + Add Snippet.Hover over Add Your Custom Code (New Snippet) and click Use Snippet. Configure your snippet
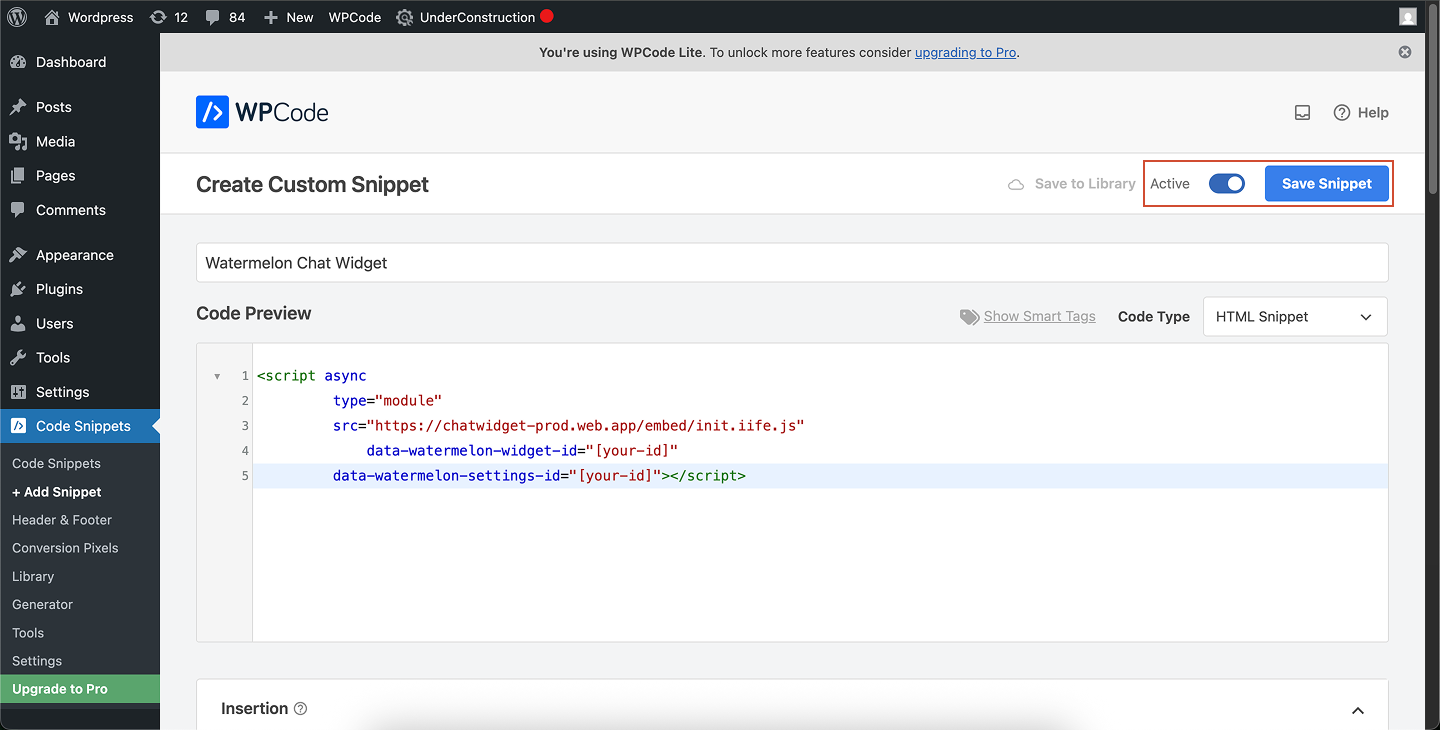
- Give your snippet a title (e.g., “Chat widget”).
- Set Code Type to JavaScript Snippet.
Paste your widget code in the Code Preview area.Choose where to load the snippet
Under Insertion, select where the script should appear:
-
Header (most reliable)
-
Footer (better performance)
-
Or target specific pages using WPCode’s conditional logic
You can load the widget only on certain pages or for specific users, thanks to WPCode’s Smart Conditional Logic.
Save and activate
Click Save Snippet, then switch the toggle to Active.Your chat widget is now live on your site. Content Security Policy (CSP)
If your website uses a Content Security Policy (CSP) that restricts external styles, you need to allow Watermelon’s widget styles.The widget loads its CSS from:https://chatwidget-css.web.app
style-src-elem (recommended), orstyle-src if you’re not splitting directives
Example:Content-Security-Policy:
style-src-elem 'self' https://chatwidget-css.web.app;
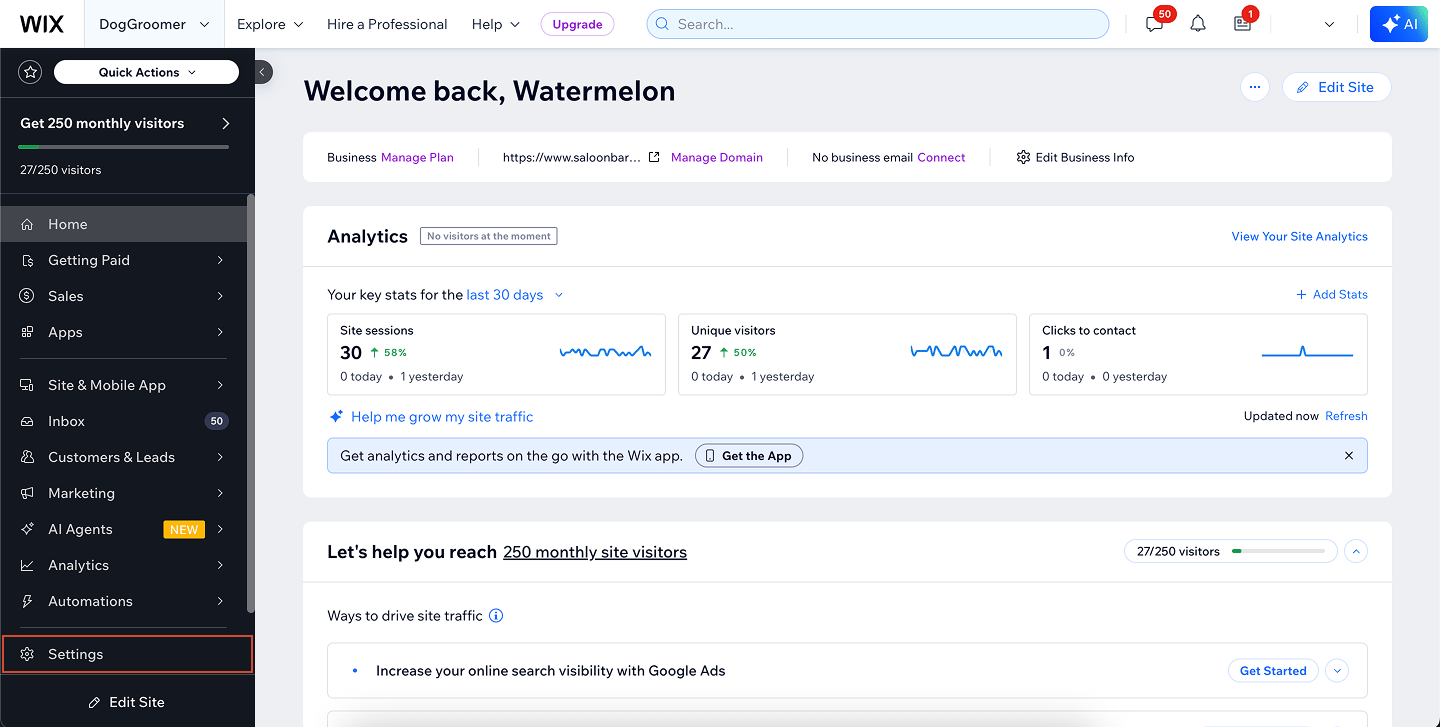
Add your chat widget to your Wix website so visitors can chat directly with your team or AI Agent. To add custom JavaScript in Wix, you need a paid Wix plan with a connected domain. Free Wix sites don’t support adding custom code snippets.Open your Wix Dashboard
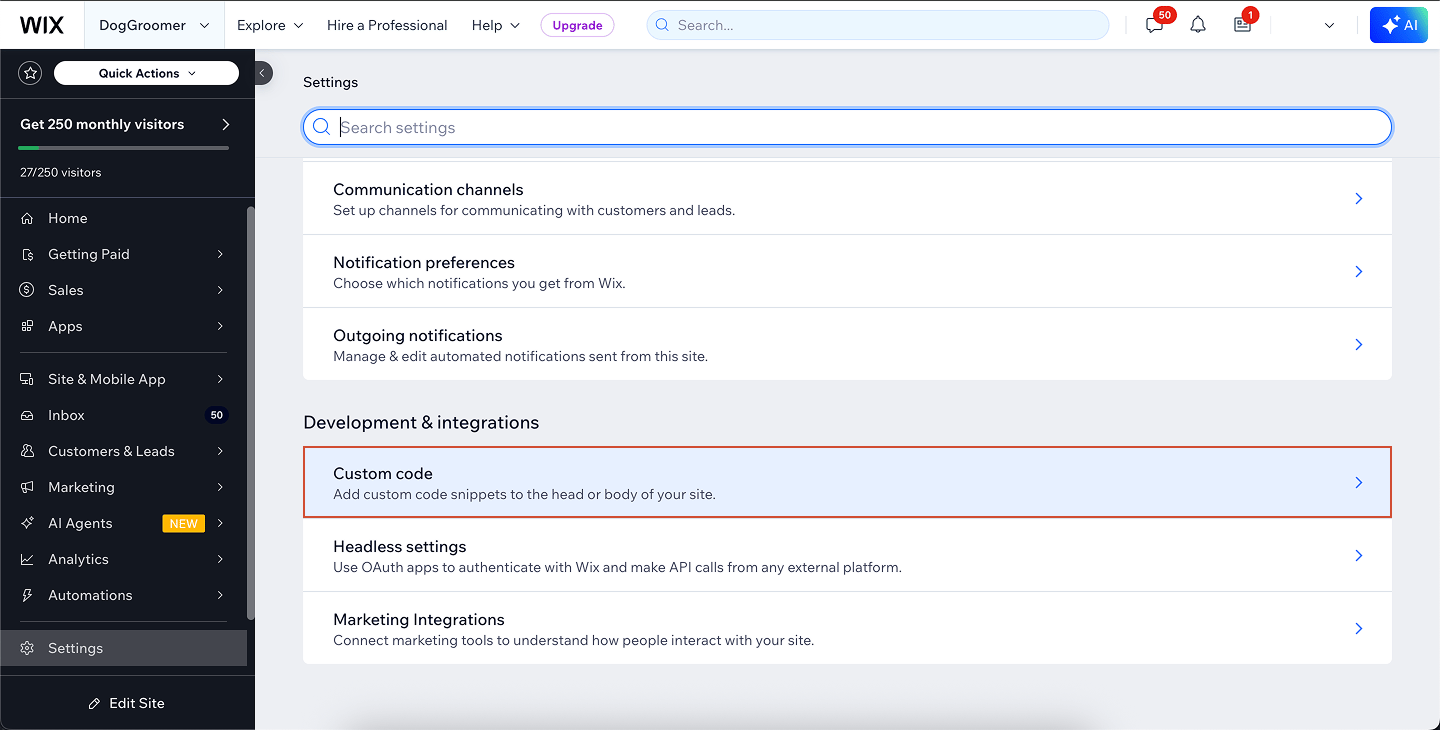
Go to your Wix Website Dashboard.Scroll down and click Settings in the left-hand menu. Open the Custom Code settings
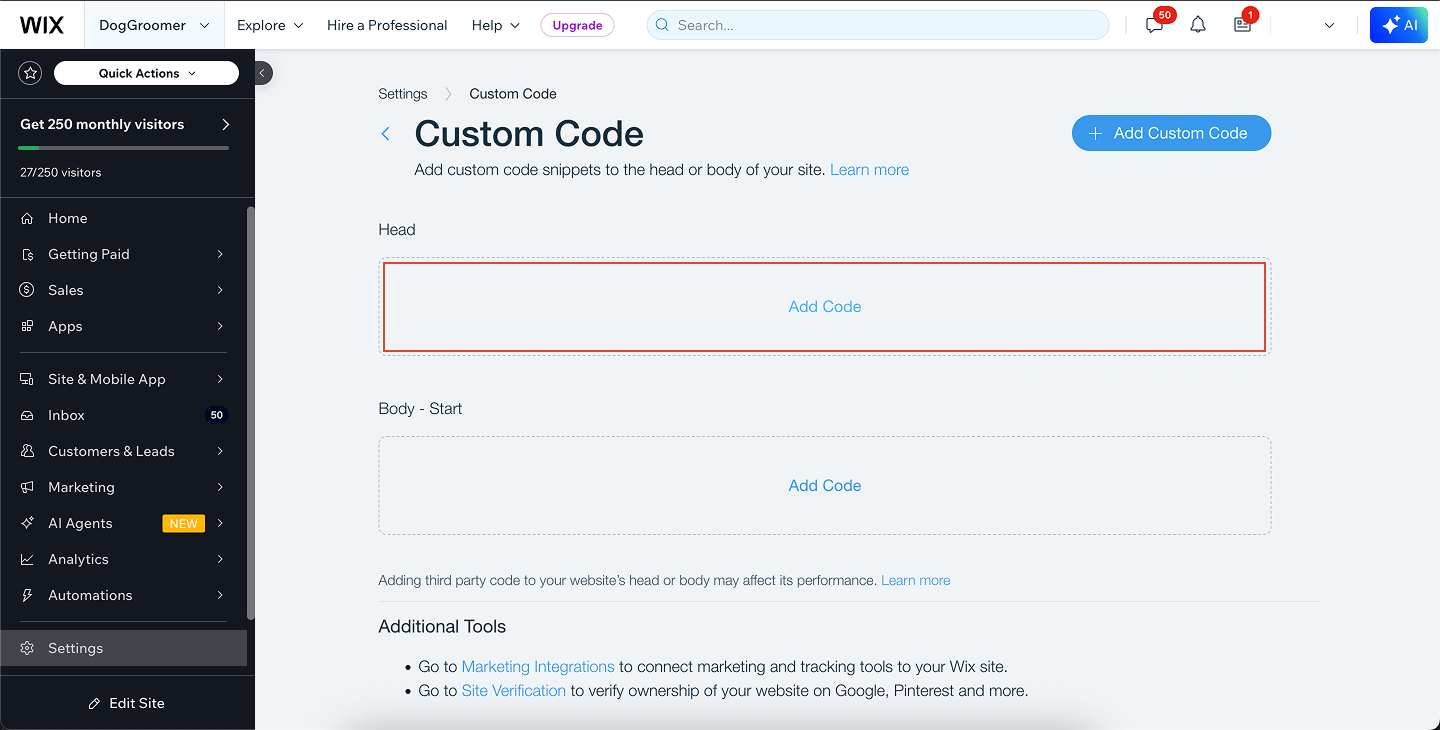
Scroll to the bottom of the Settings page and open Advanced → Custom Code. Add your chat widget code
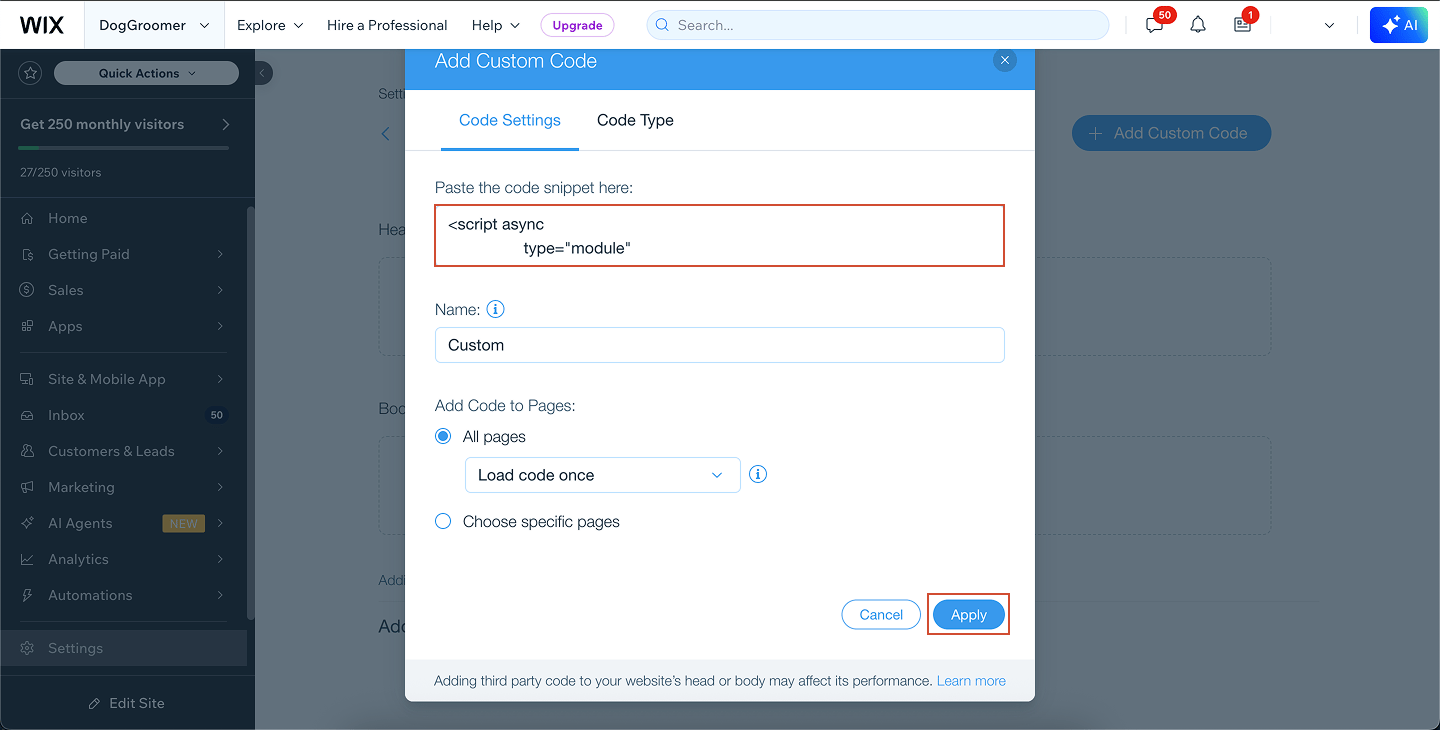
Click Add Code, then choose Head as the placement location.Paste your chat widget JavaScript code into the code editor. Enable the snippet
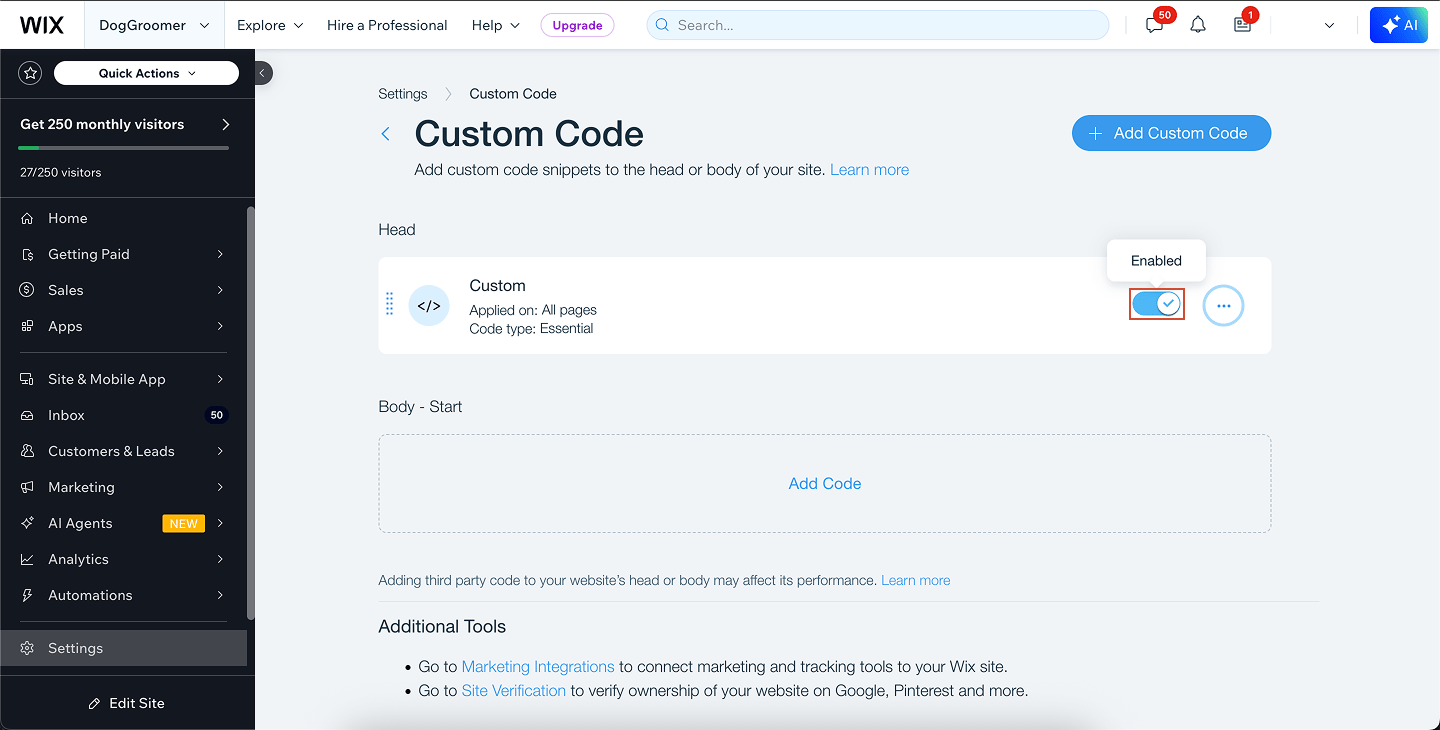
After applying your code, turn on the toggle switch to enable the snippet on your website. Disable the built-in Wix Chat (optional)
If you don’t want Wix’s native chat to appear next to your own chat widget:
- Open the Wix Editor
- Select the Wix Chat element
- Delete it from the page
Publish and preview your live site
Click Publish to make the changes live.Open your website in a browser — not in preview mode — to confirm that your chat widget is now visible
Add your chat widget to your Lightspeed eCom C-Series store so visitors can chat directly with your team or AI Agent.Lightspeed eCom C-Series allows you to add custom code to the <head> section of your entire website. This is the best—and only—location for adding your chat widget script.Open your eCom settings
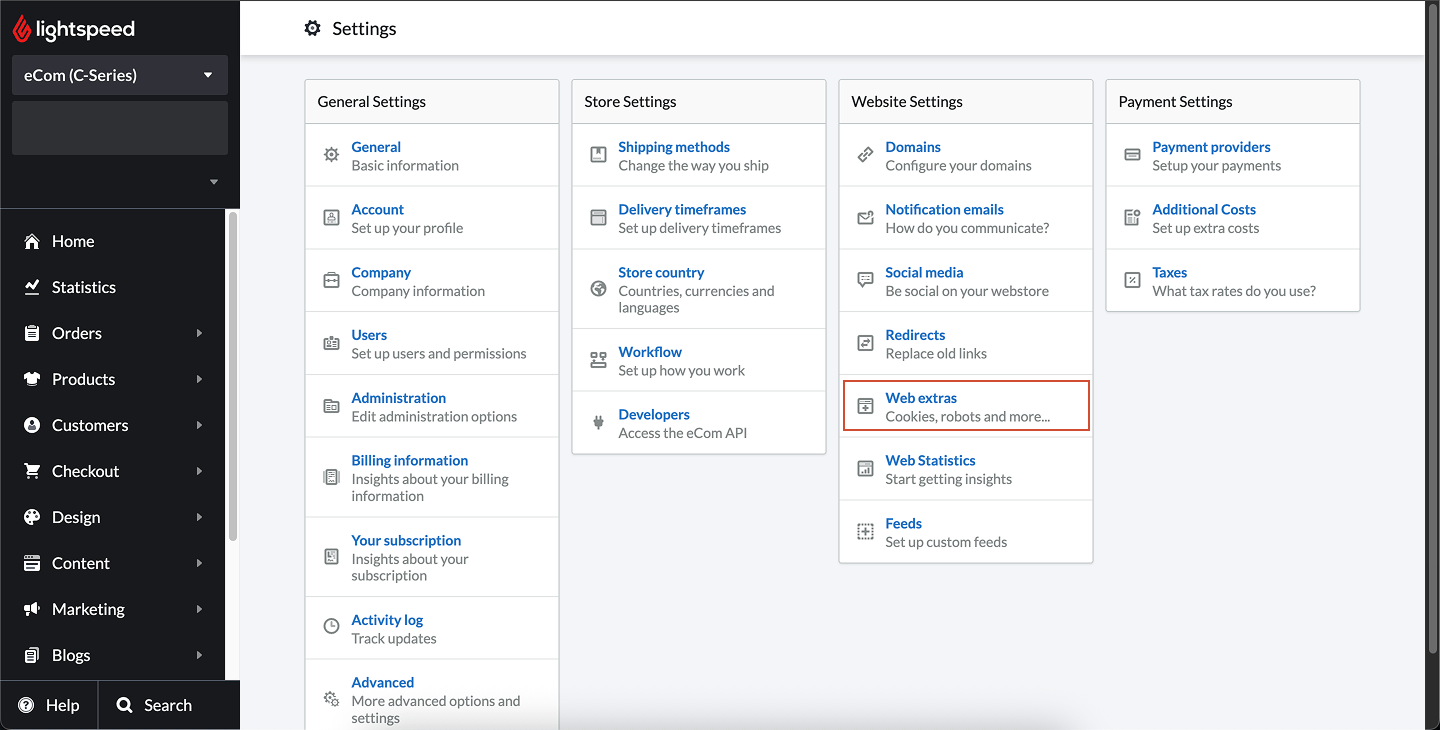
From your Lightspeed eCom admin, go to Settings. Open Web extras
Under the Website Settings column, select Web extras. Add your custom code
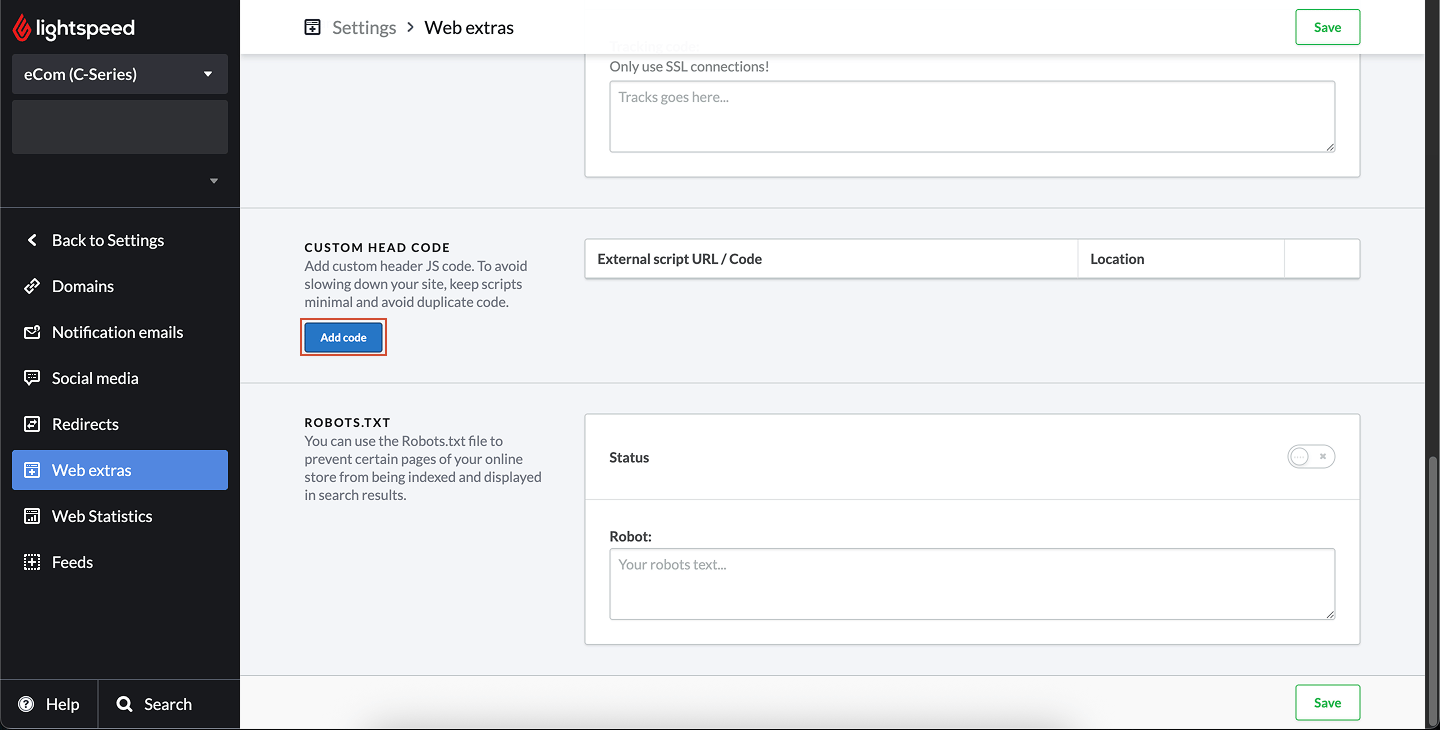
In the Custom head code section, click Add code.
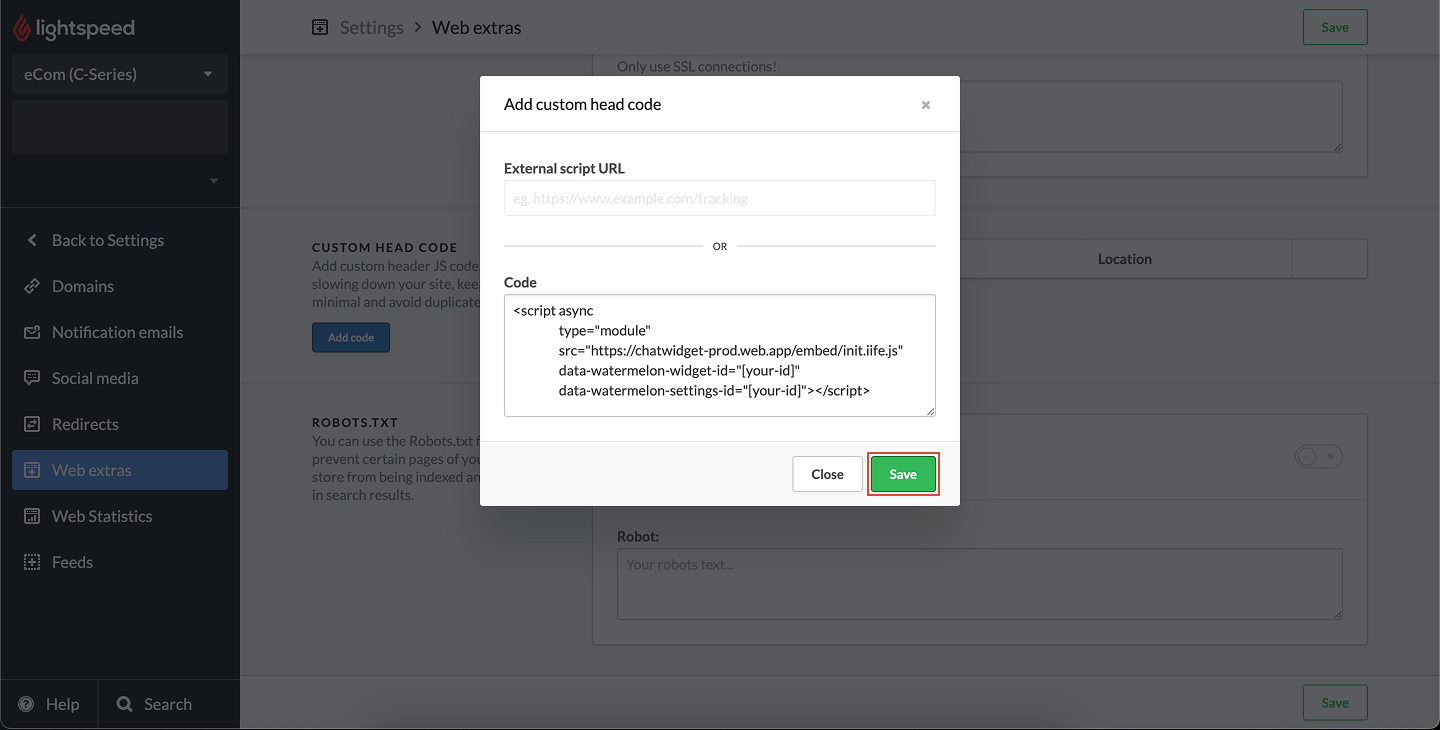
Paste your chat widget script or URL in the field.Code added here is injected into the <head> section on every page of your website.Lightspeed eCom C-Series does not support page-specific custom code.
Save your changes
Click Save to apply your code. Preview your live store
Open your website in a browser to confirm that your chat widget appears.Custom code may not appear in previews — always check your live store.
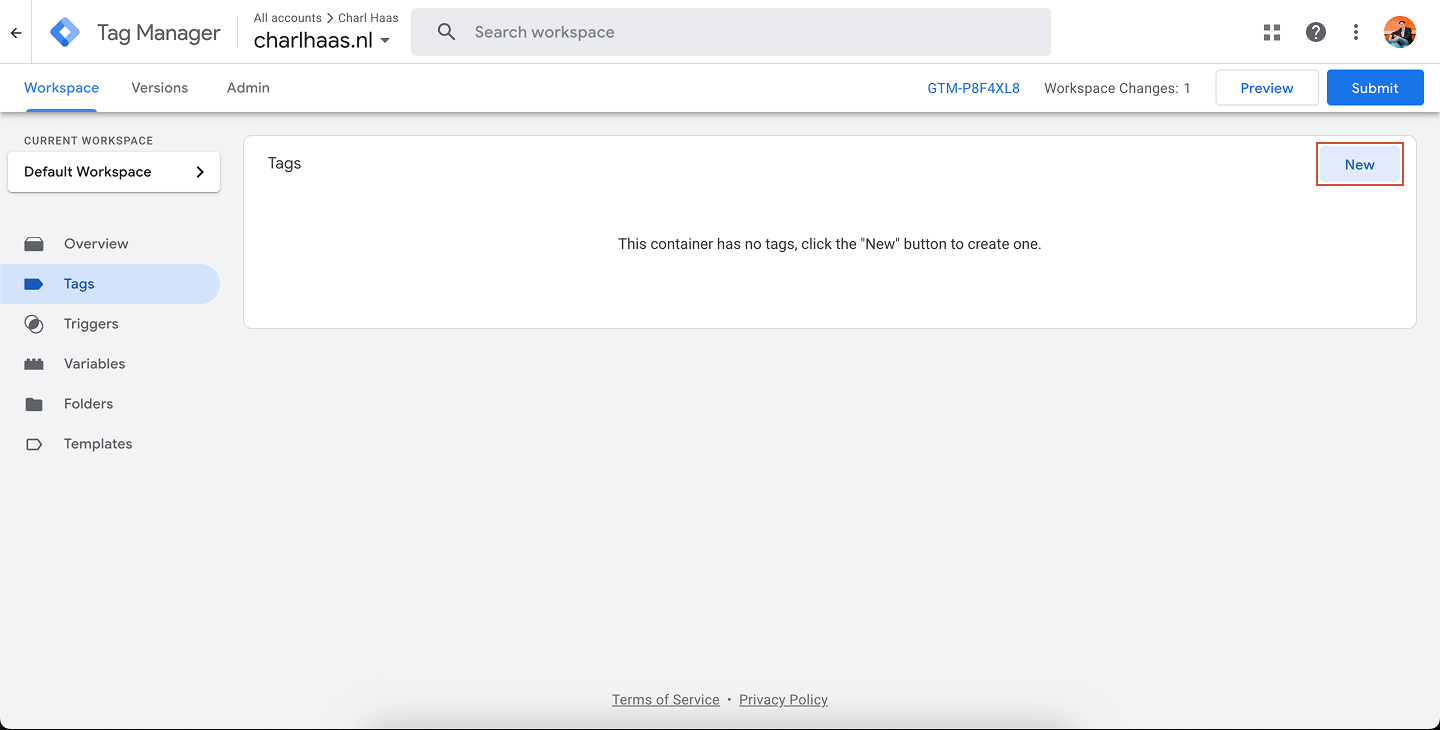
With GTM, you can install your widget across your entire website or only on selected pages using triggers.Create a new tag
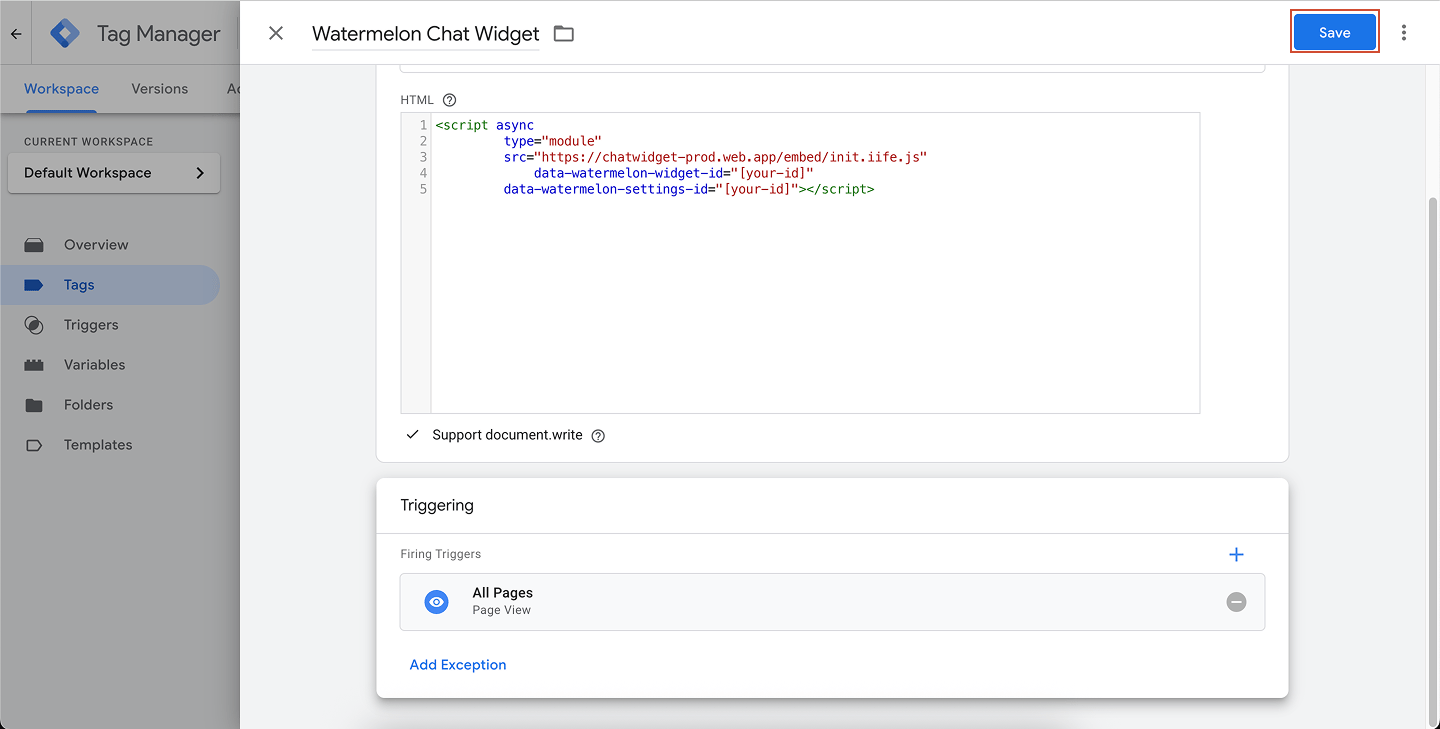
In the left-hand menu, click Tags → New. Configure your tag
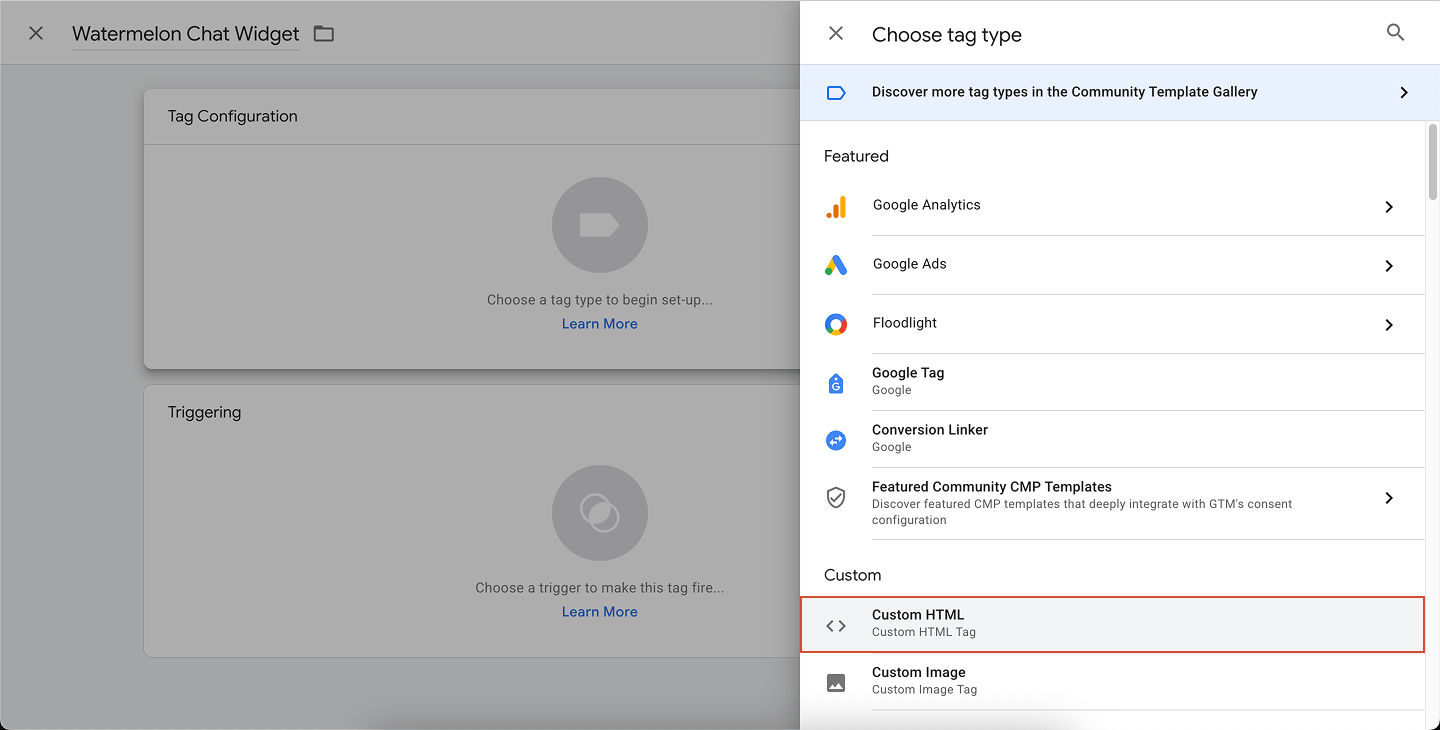
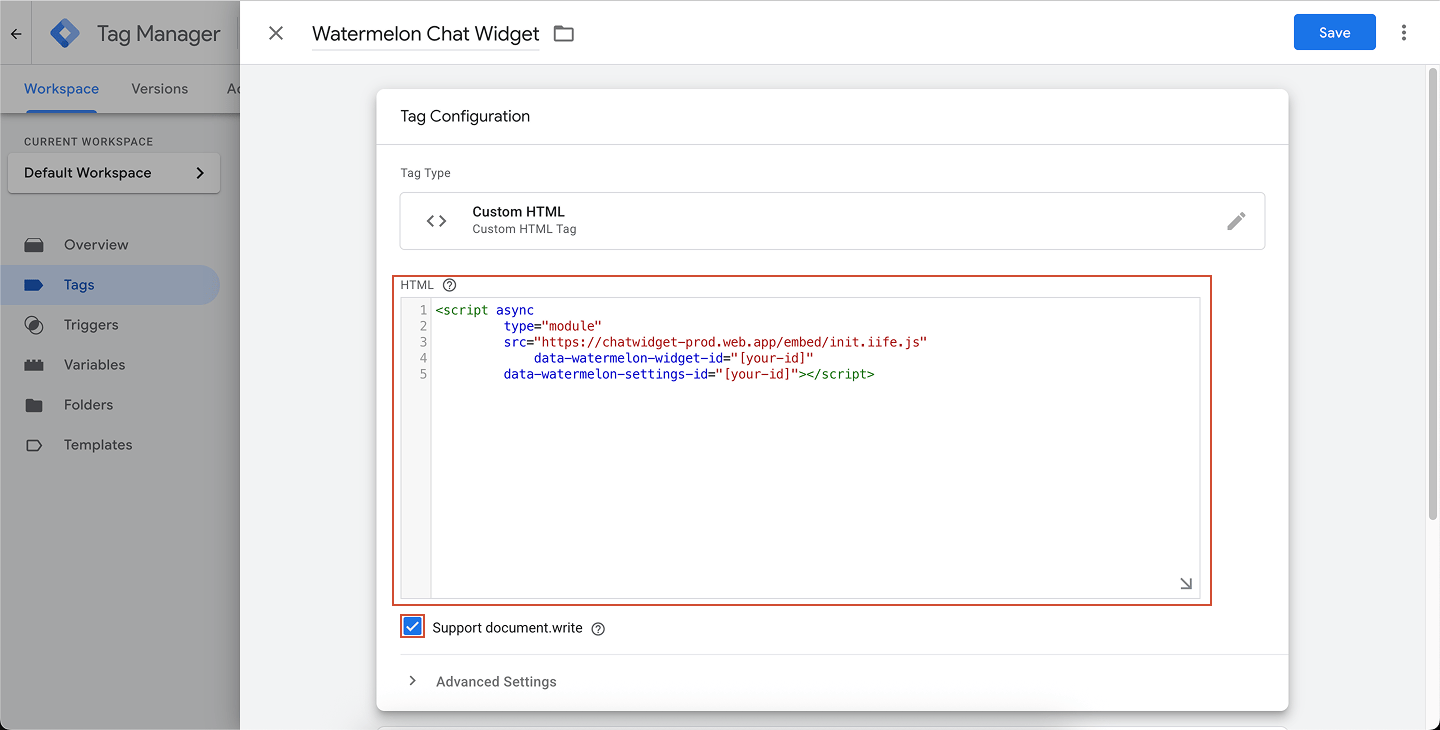
Click Tag Configuration and choose Custom HTML.Paste your chat widget code into the HTML field. Set the trigger
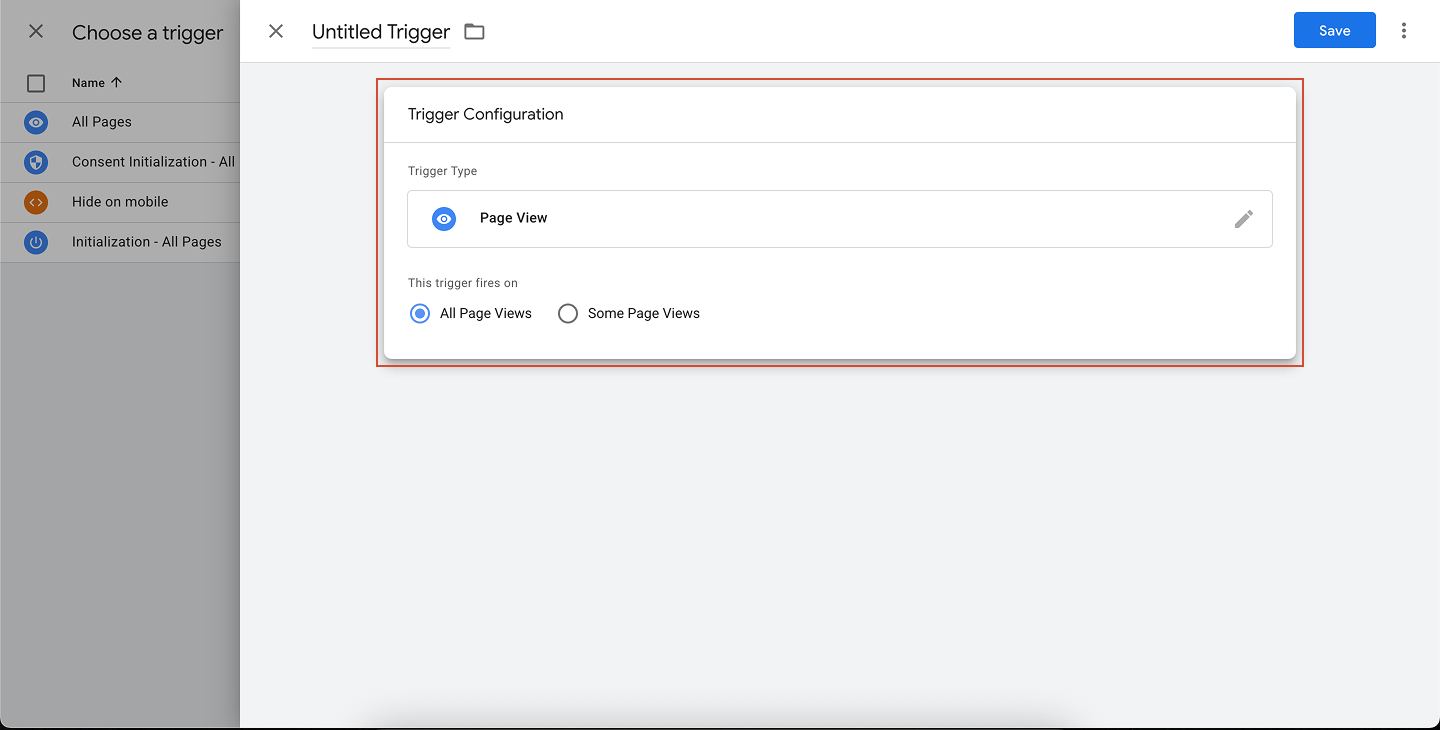
Click Triggering → All Pages.This will load your chat widget everywhere your GTM container is installed. Save and publish
Click Save, then Submit in the top right to publish your changes.Your chat widget is now active across your entire website. Add your chat widget to specific pages
If you want your widget to appear only on one or more selected pages, you can use a page view trigger.Create a new tag
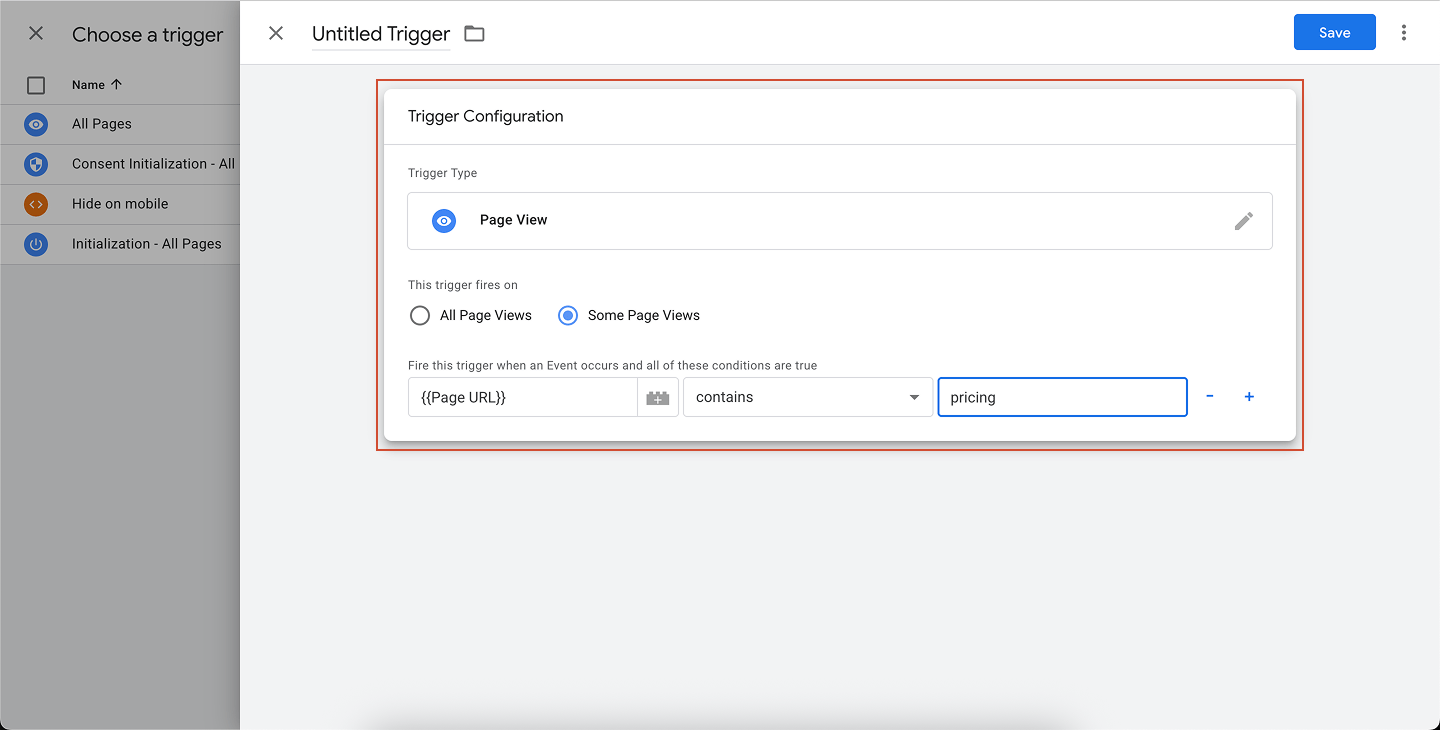
Go to Tags → New, choose Custom HTML, and paste your chat widget code. Create a page-specific trigger
Click Triggering → + → Page View.Set the trigger to:
-
Some Page Views
-
Page URL → contains/equal → your-page-url
Examples:
- Show only on the contact page → Page URL contains “/contact”
- Show only on the pricing page → Page URL contains “/pricing”
You can add multiple conditions for multiple pages.
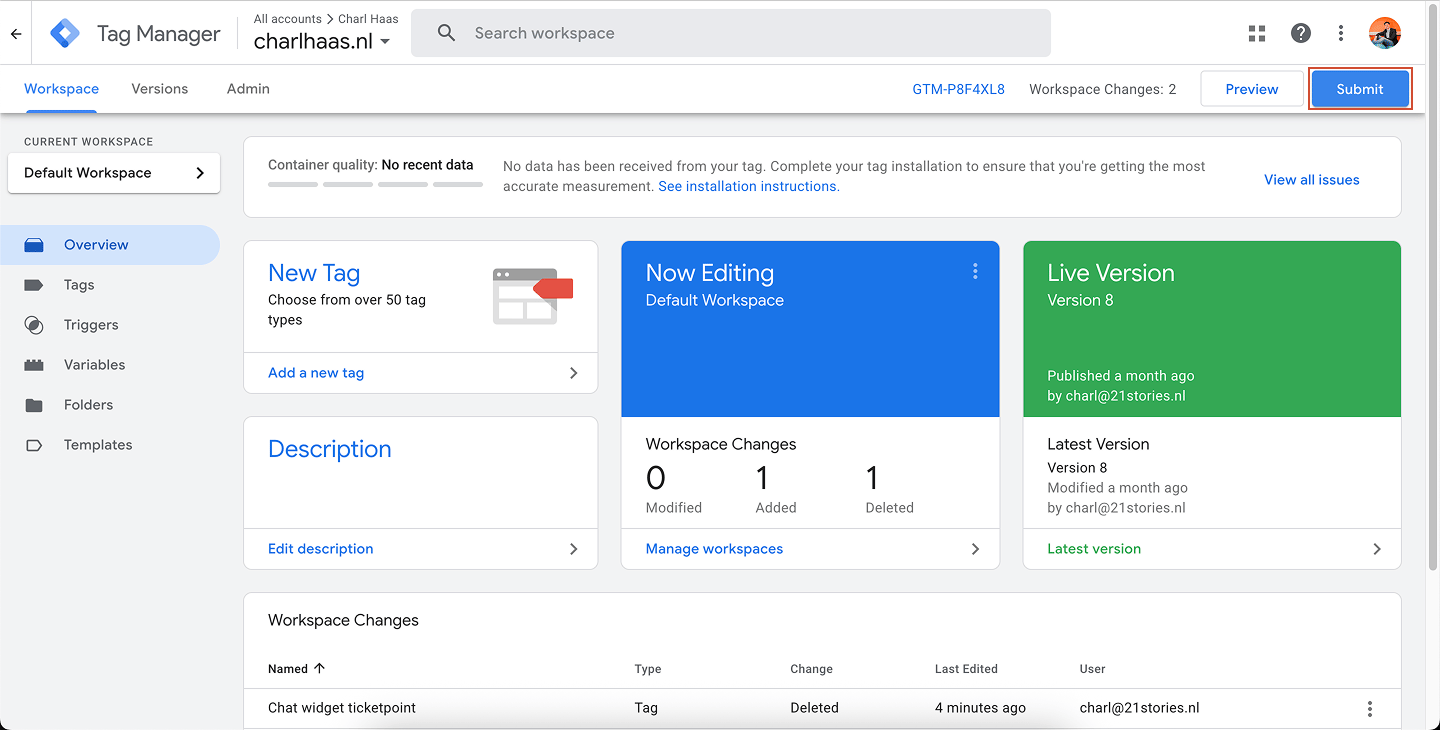
Save and publish
Click Save, then Submit in the top right to publish your changes.Your chat widget is now active across your entire website. Verify the installation
Use GTM Preview ModeClick Preview in Google Tag Manager and open your website to confirm your tag is firing correctly.Check on your live website
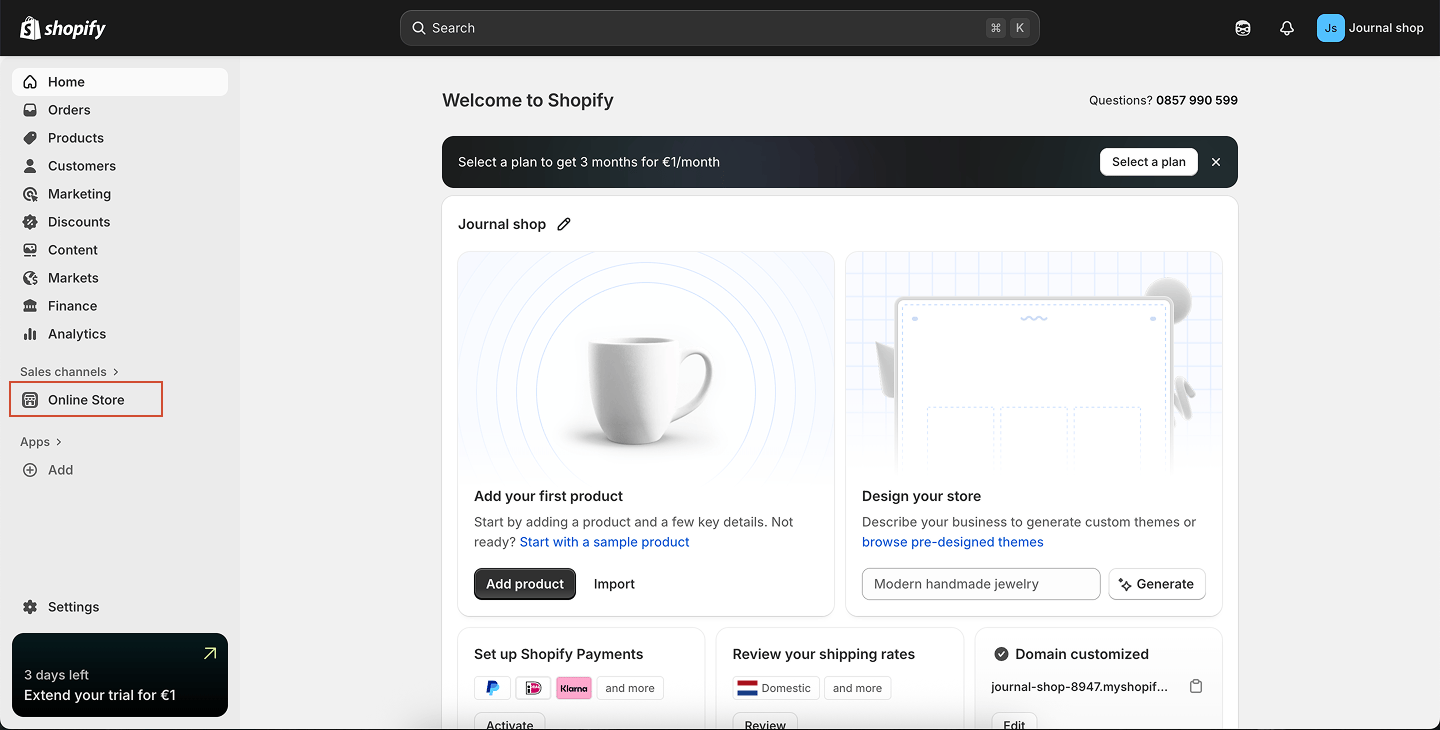
Open your published website in a browser and confirm the widget appears in the correct places. Add your chat widget to your Shopify store and let visitors chat directly with your team or AI Agent.You can install your widget across your entire website, or place it on a single page only whichever fits your use case.Open your theme
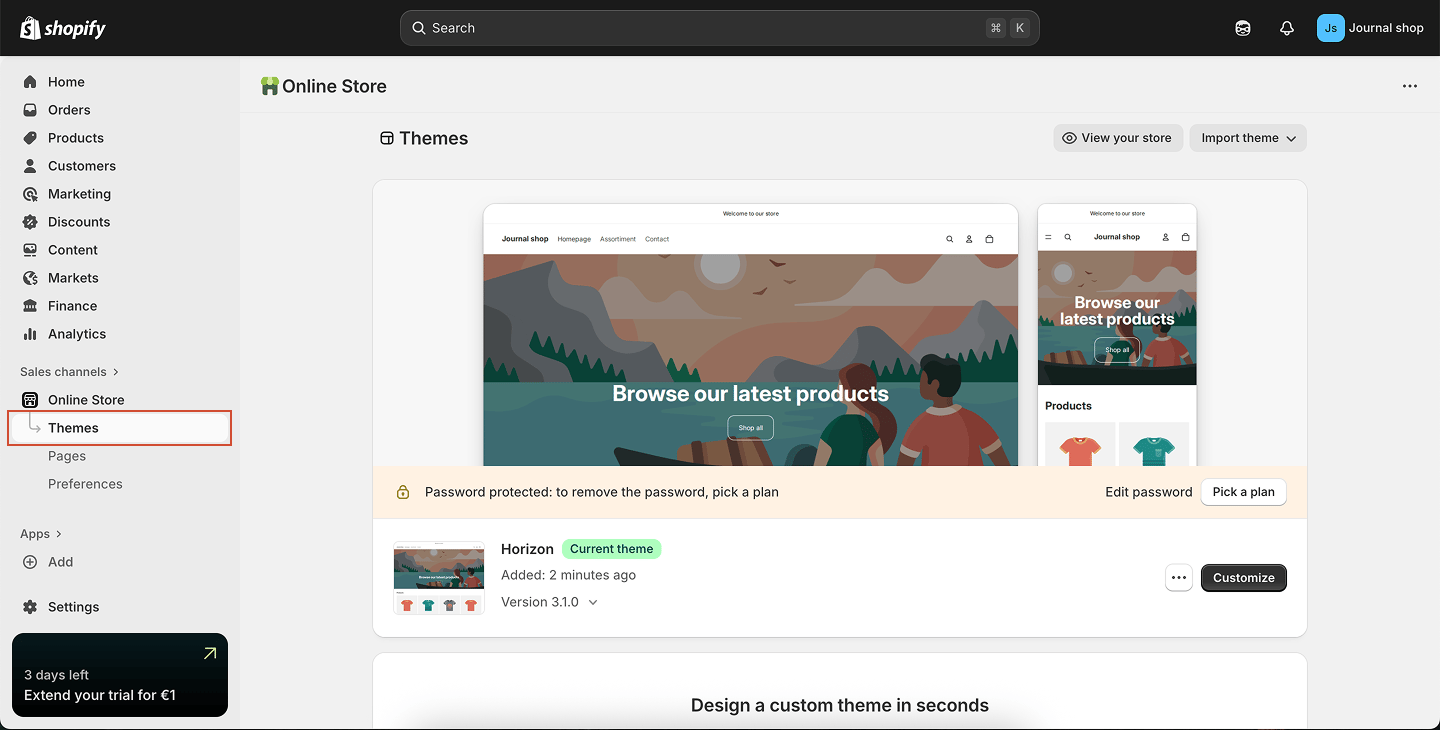
From your Shopify admin, navigate to Online Store → Themes. Open the code editor
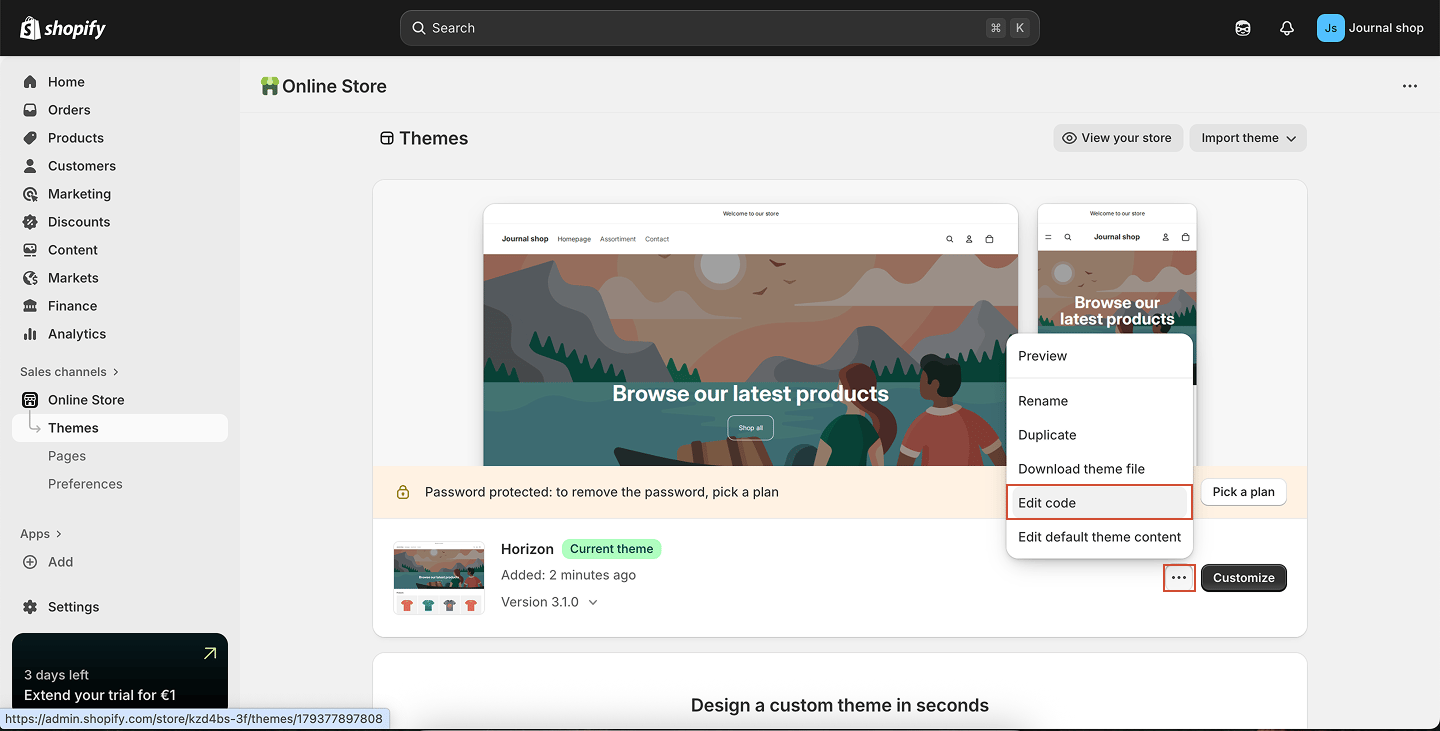
On your active theme, click … → Edit code. Open the theme.liquid file
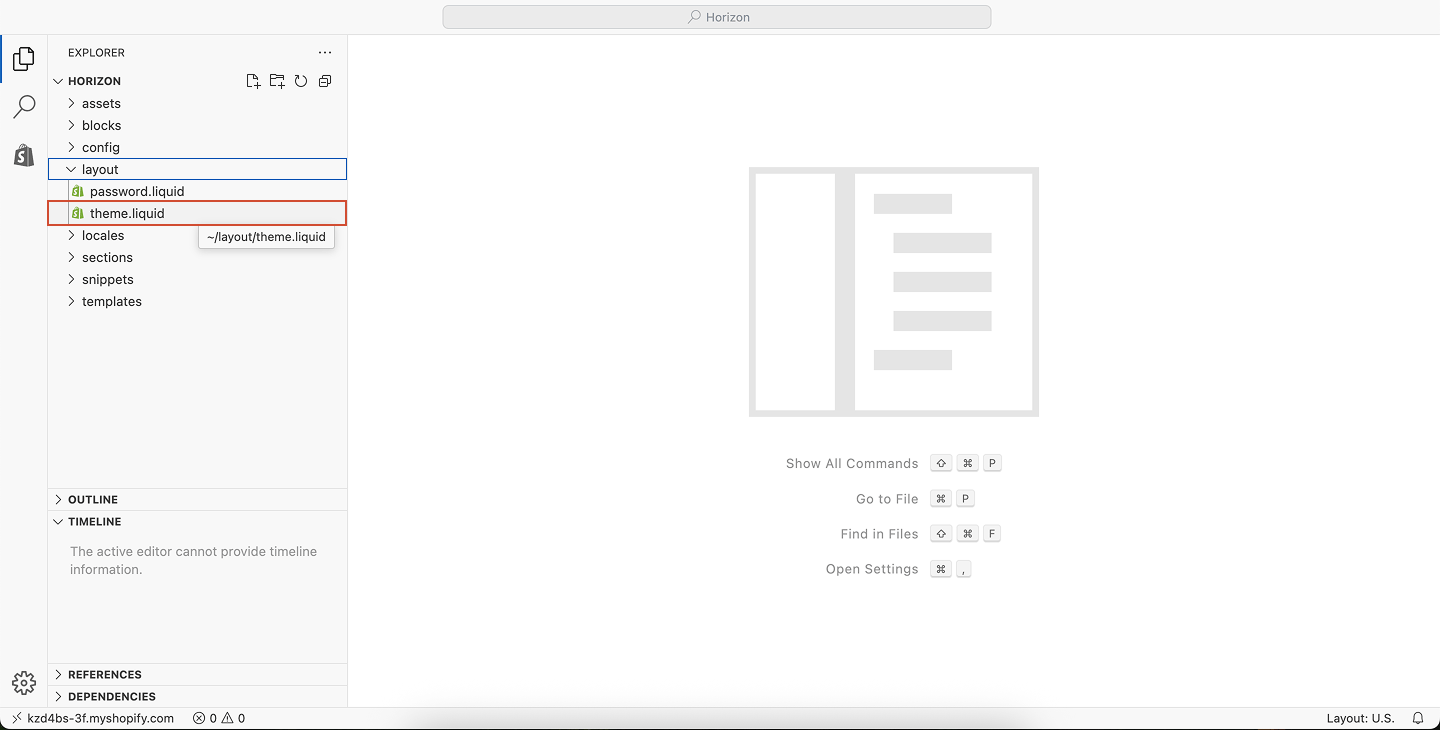
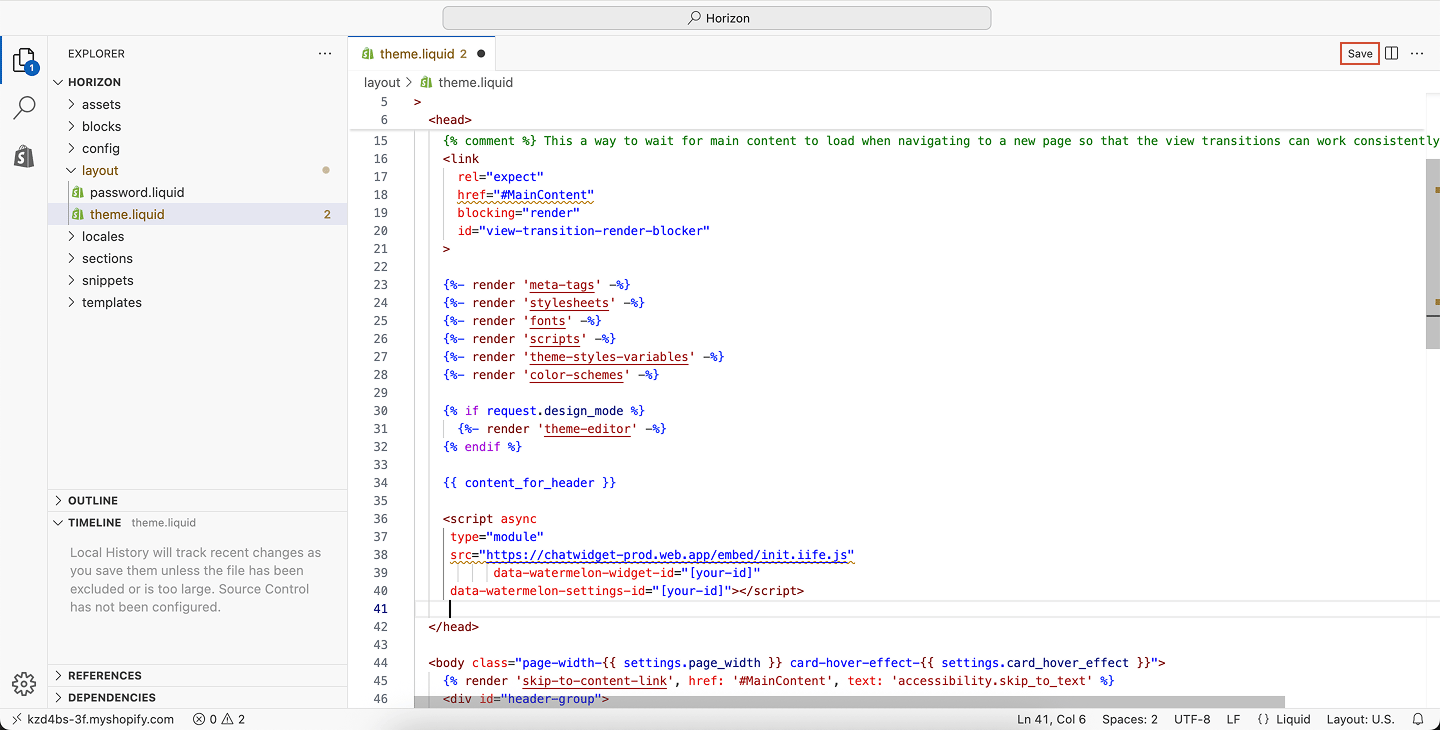
In the left sidebar, expand the Layout folder and select theme.liquid. Paste your chat widget code
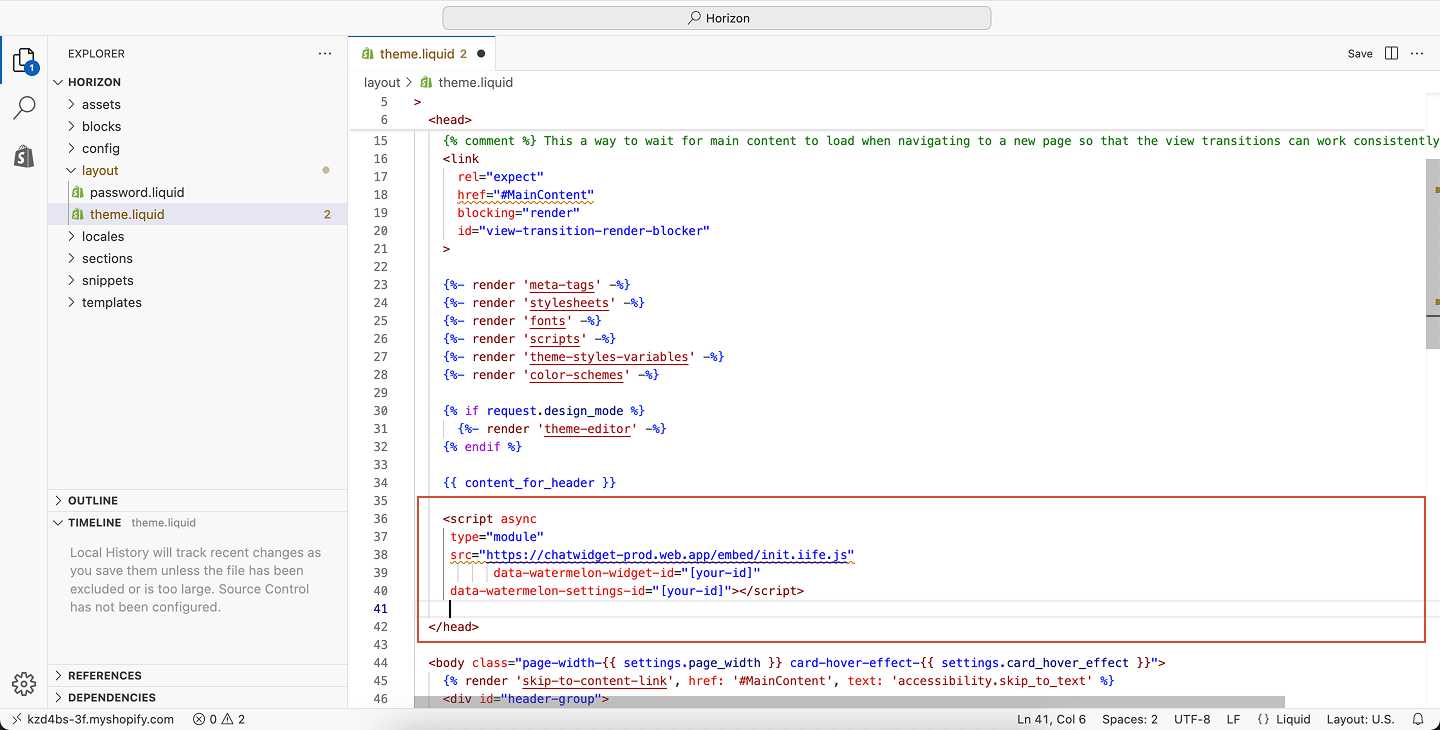
Scroll until you find the <head> tag.Paste your chat widget code inside the <head> section.Placing your script in the <head> ensures that the widget loads correctly on every page of your store.
Save your changes
Click Save in the top-right corner.Your chat widget is now added to your entire Shopify website. Add your Chat Widget to a specific page
If you only want your Chat Widget to appear on certain pages, follow these steps instead.Create or open a page
Go to Online Store → Pages and select an existing page or create a new one.
Open the HTML editor
In the page content toolbar, click the <> icon to switch to HTML editing mode.
Paste your chat widget code
Paste your chat widget code into the HTML area, wrapped inside <script>…</script> tags.This method only adds the chat widget to that one specific page.It won’t appear elsewhere on your store unless added to theme.liquid.
Save and preview
Click Save, then open your page in a browser to confirm that the widget appears.
You can easily place your chat widget by adding a short code snippet to your Joomla site’s template file.Log in to your Joomla admin panel
Open your Joomla Administrator panel and log in with your admin credentials.
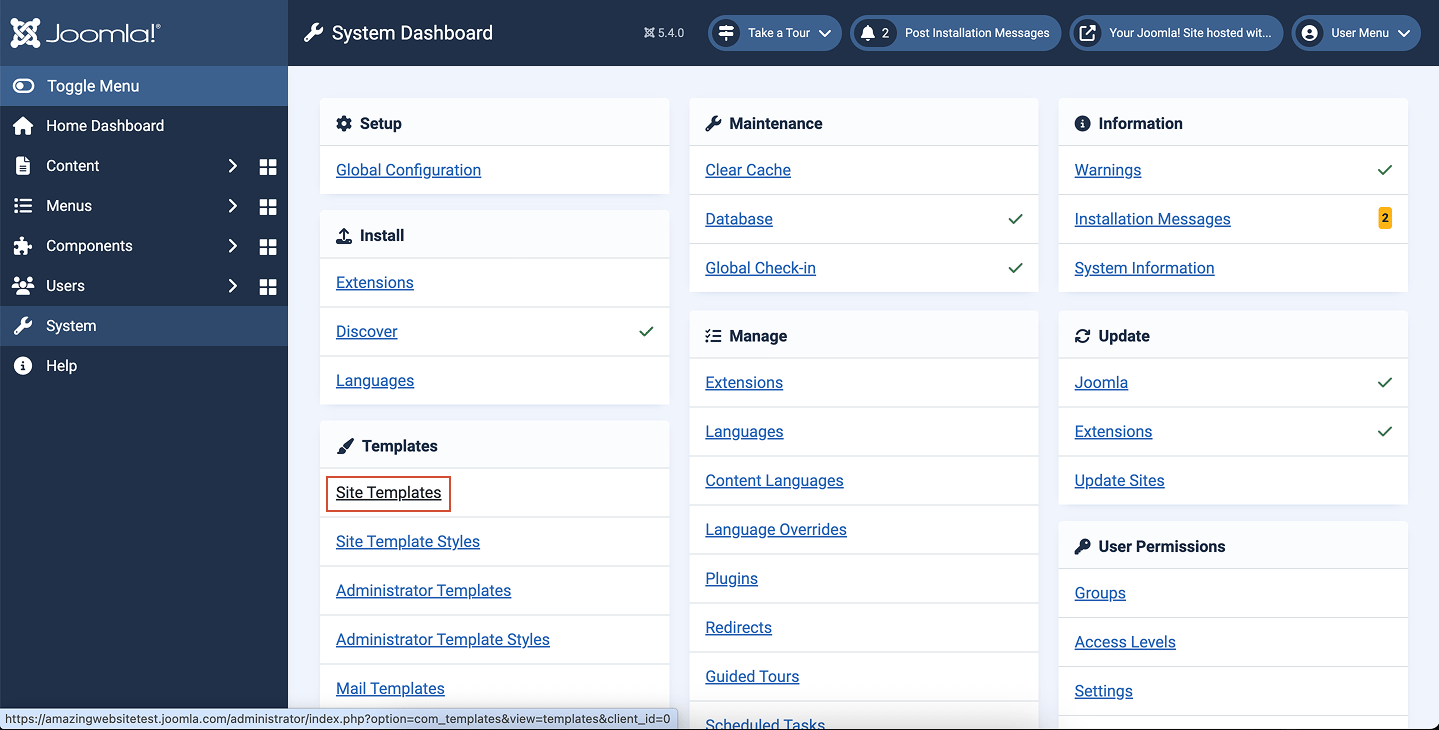
Go to System settings
From the left-hand menu, navigate to System. Open Site Templates
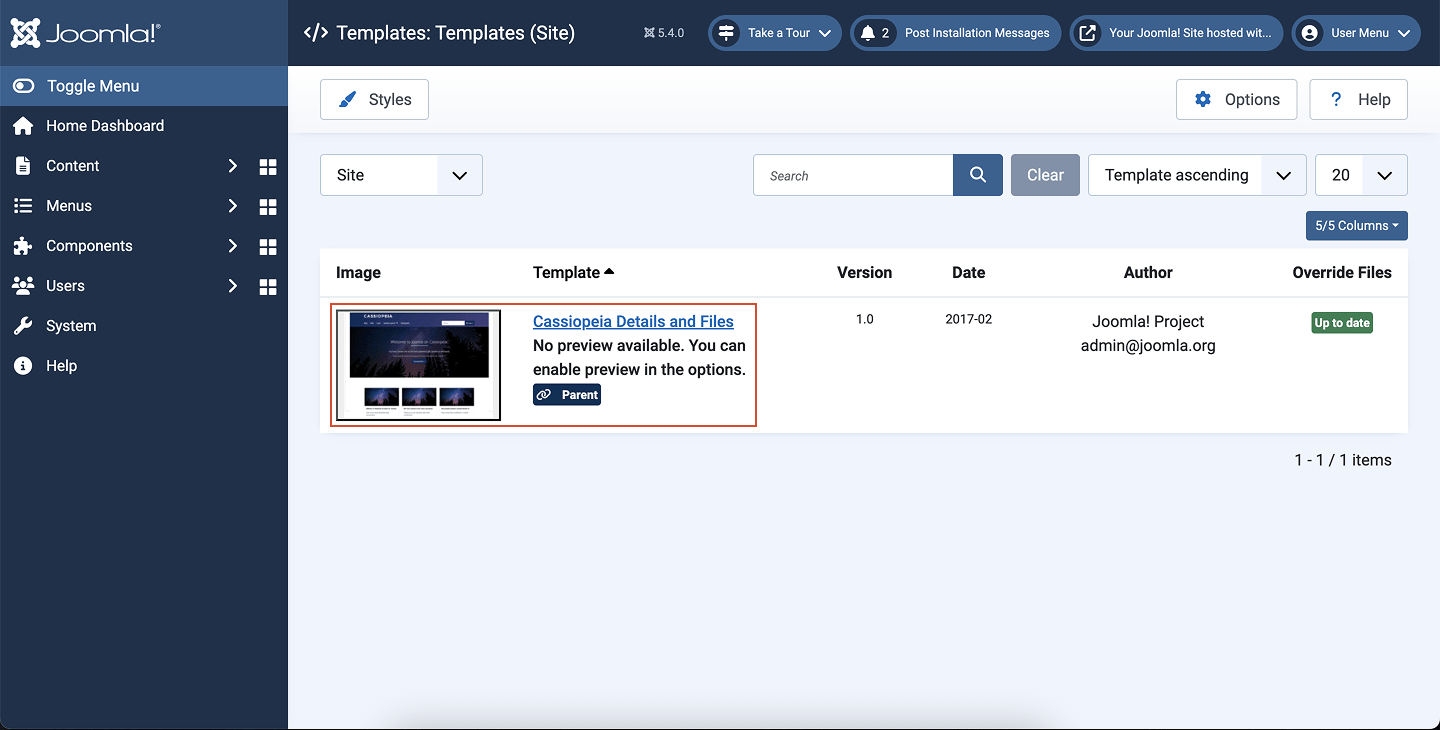
Under the Templates section, click Site Templates. Select your active template
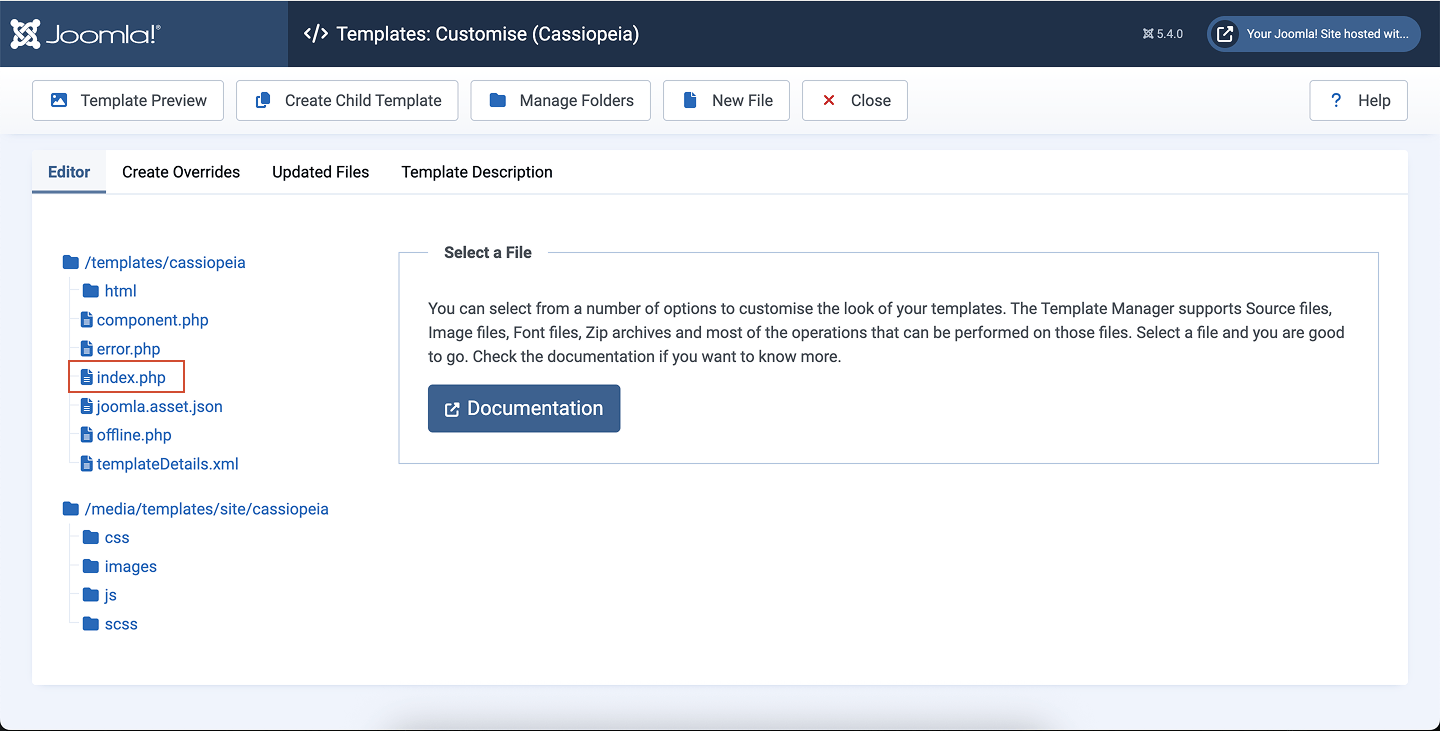
Choose the template you want to add your chat widget to. Edit the index.php file
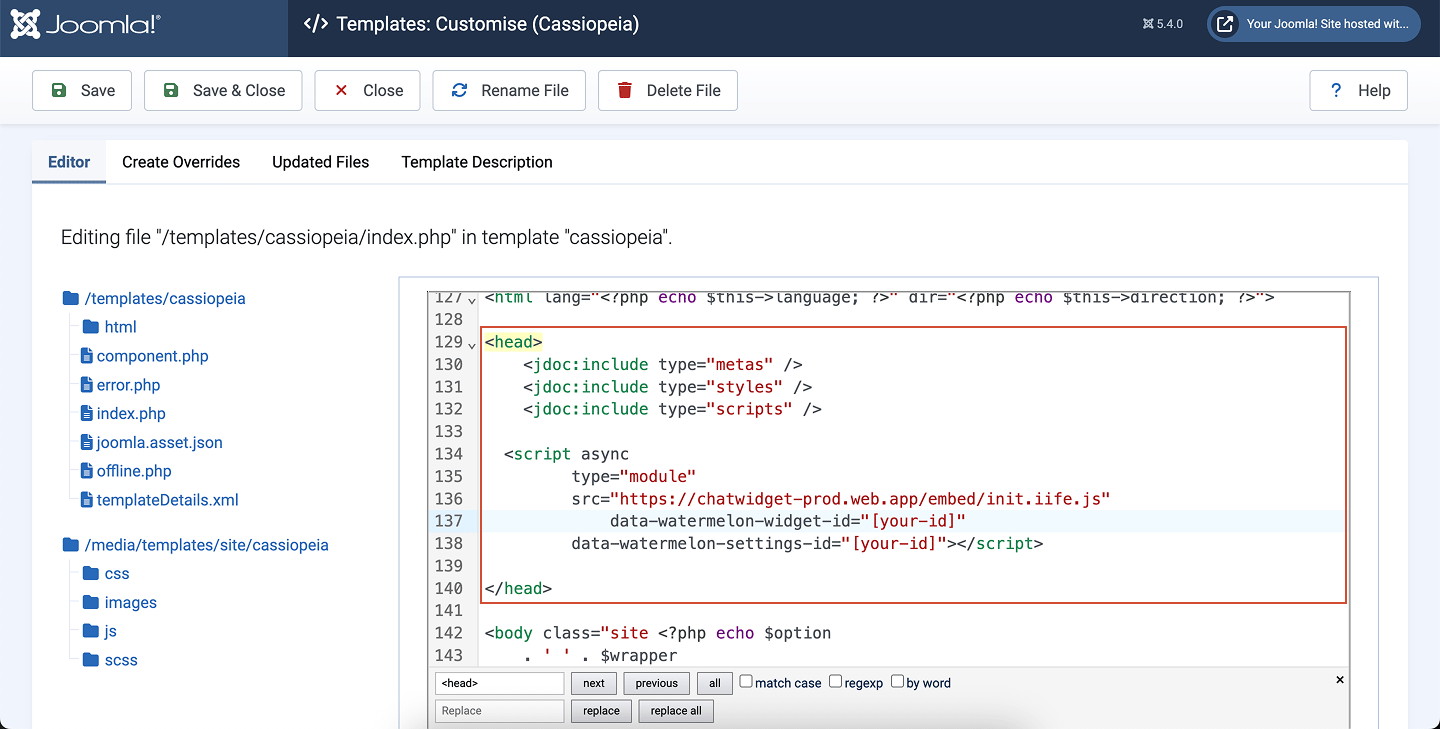
In your template’s file editor, locate and open the index.php file. Paste your chat widget code
Scroll to the middle of the index.php file and paste your chat widget embed code **just before the closing **</head>tag .Tip: You can also use the search function on the bottom left and type in <head> to go to the correct spot in the index.php file to add your code, as seen in the screenshot above.
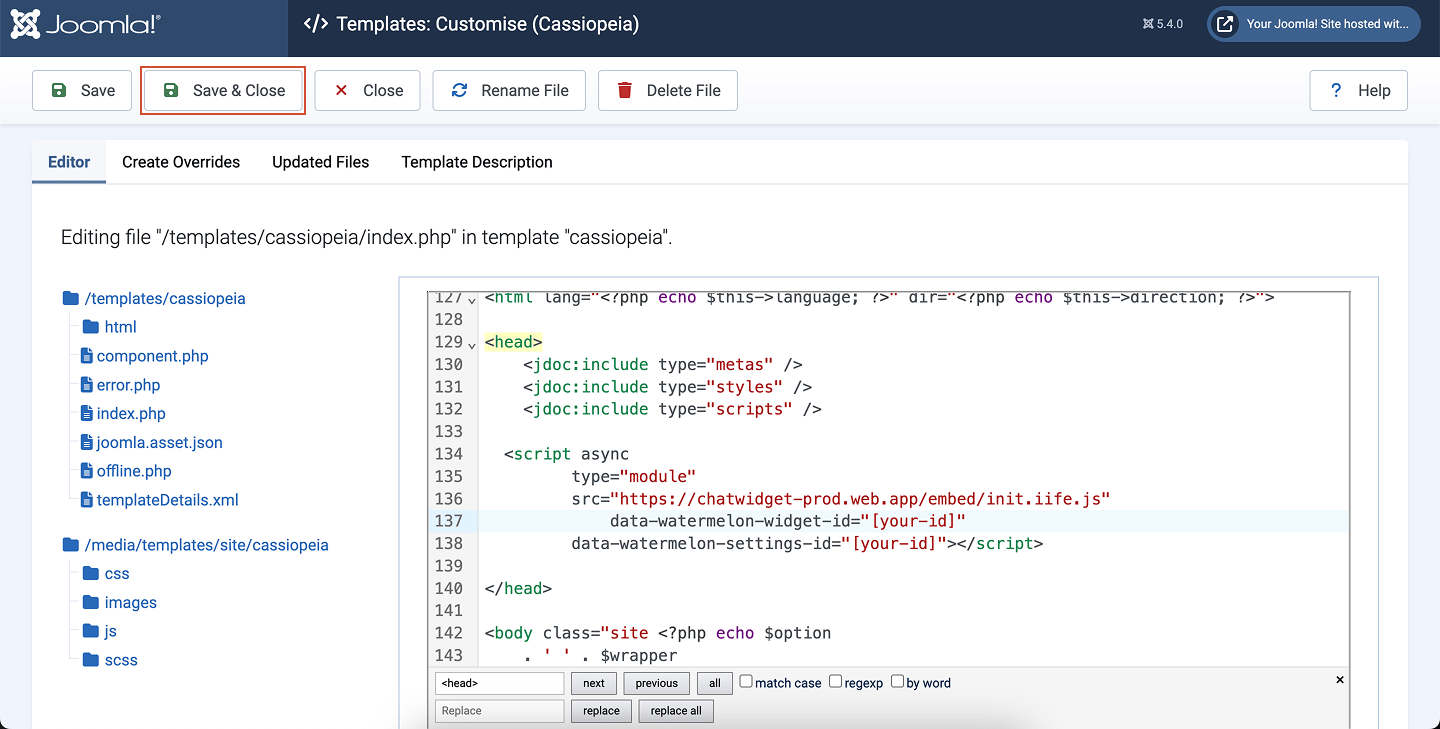
Save your changes
Click Save & Close to apply your changes. To use Code Injection, make sure your site is on one of the following plans:
Core, Plus, Advanced, Business, Commerce Basic, or Commerce Advanced.
Open Settings
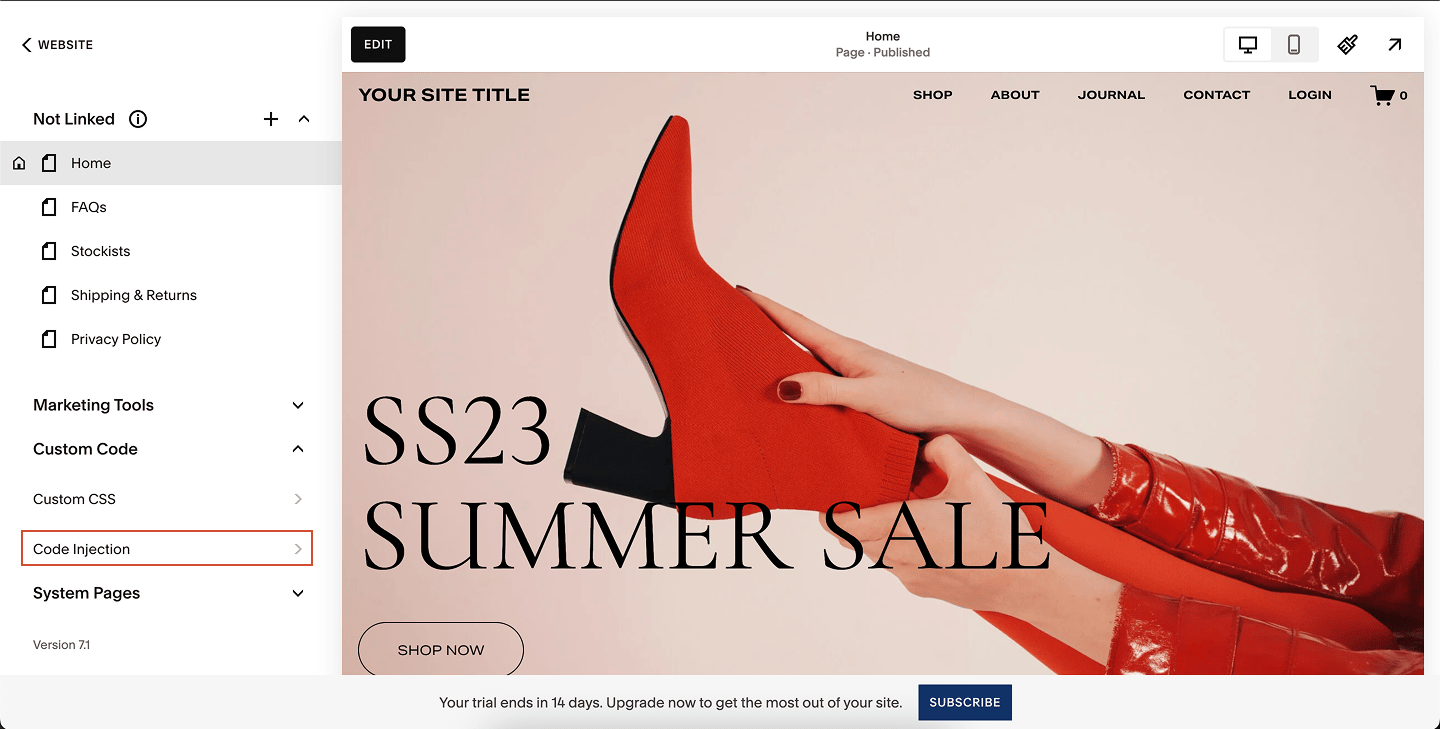
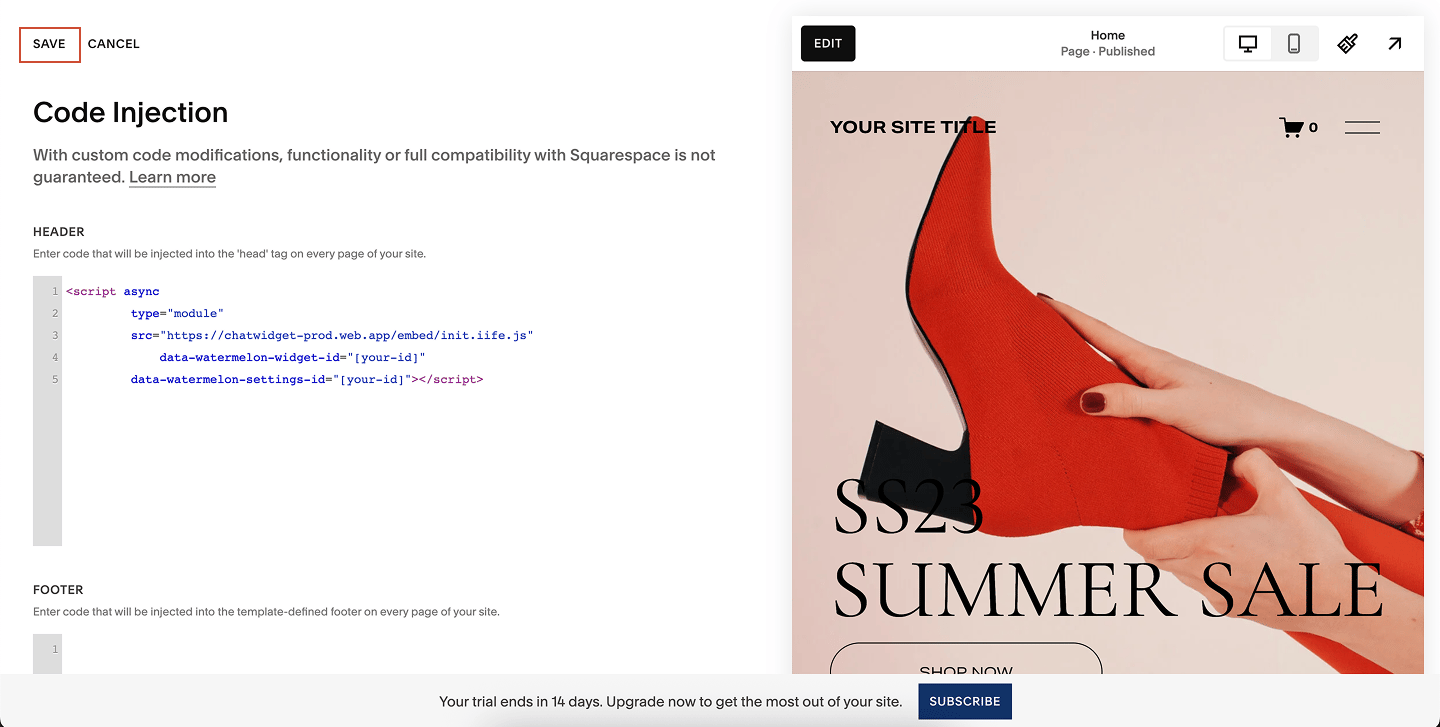
From your Squarespace dashboard, click Website. Go to Custom Code → Code Injection
In the menu, select Custom Code, then click Code Injection. Add your widget code
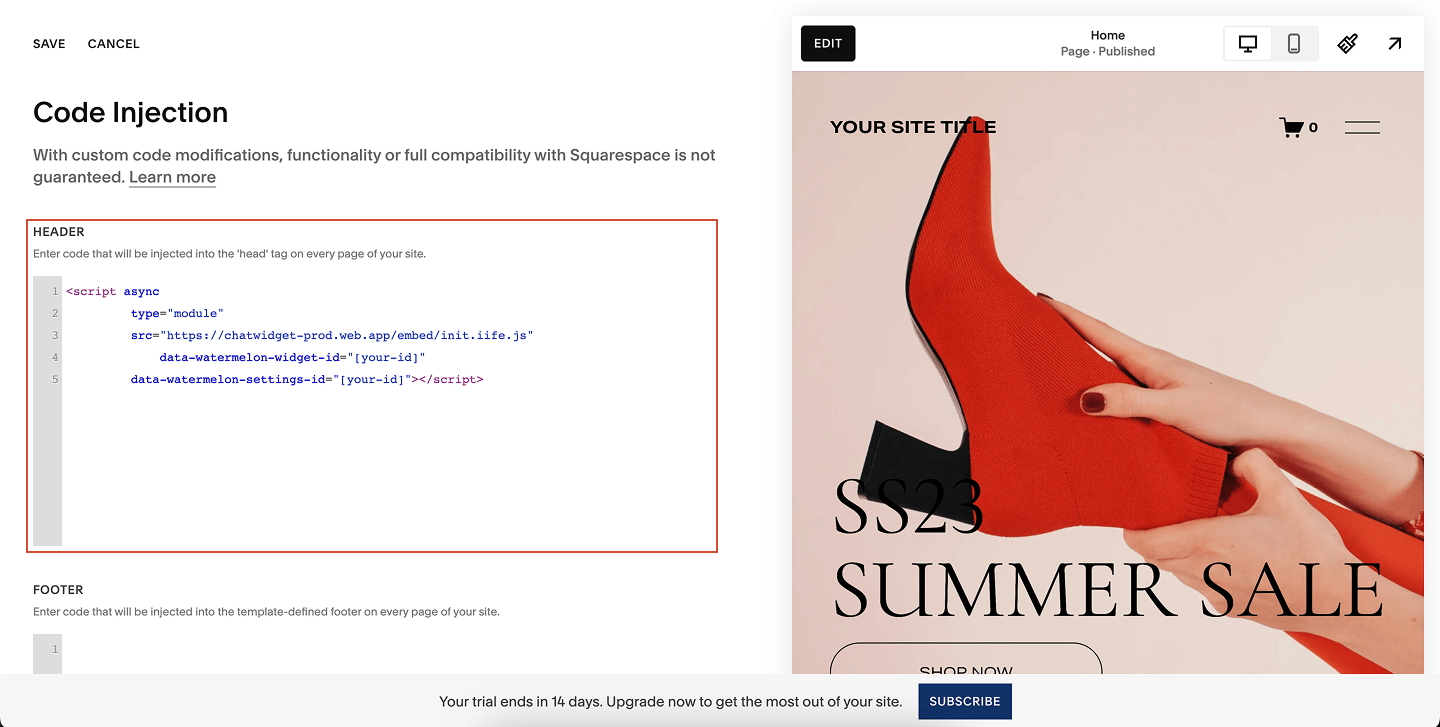
Under Header, paste your chat widget code.
This will inject the widget into the <head> tag on every page of your site.The Header field adds the code to all pages.If you prefer, you can also add your code to the Footer section — this loads the widget before the closing </body> tag, which can slightly improve page performance.
Save your changes
Click Save to apply your chat widget code. If you don’t see the widget check if the selected chat widget is set on “Show on website”.
Add the chat widget to a specific page (optional)
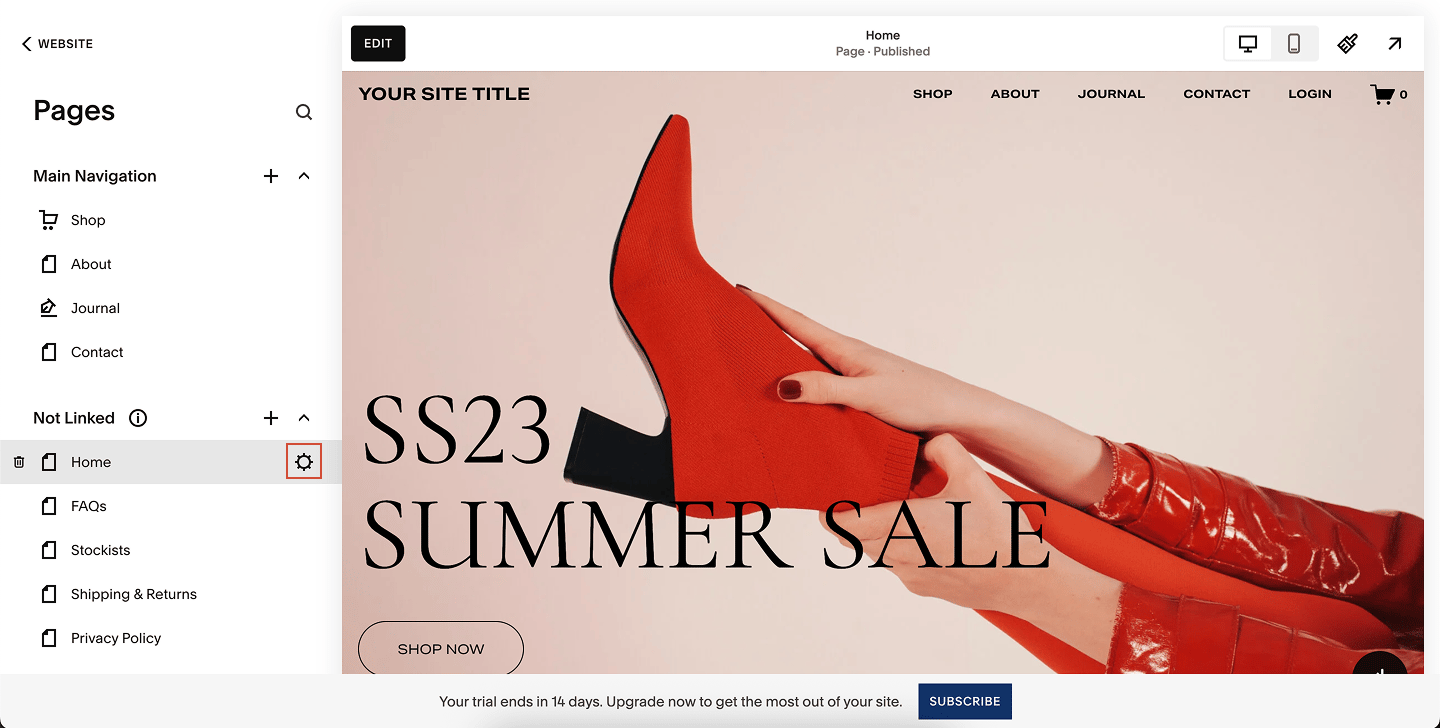
If you’d like to add the chat widget only to certain pages, follow these steps:Open the Pages panel
In your Squarespace dashboard, go to Website and click on Pages.Then hover over the page you want to edit and click the gear icon to open Page Settings. Inject the code on the page
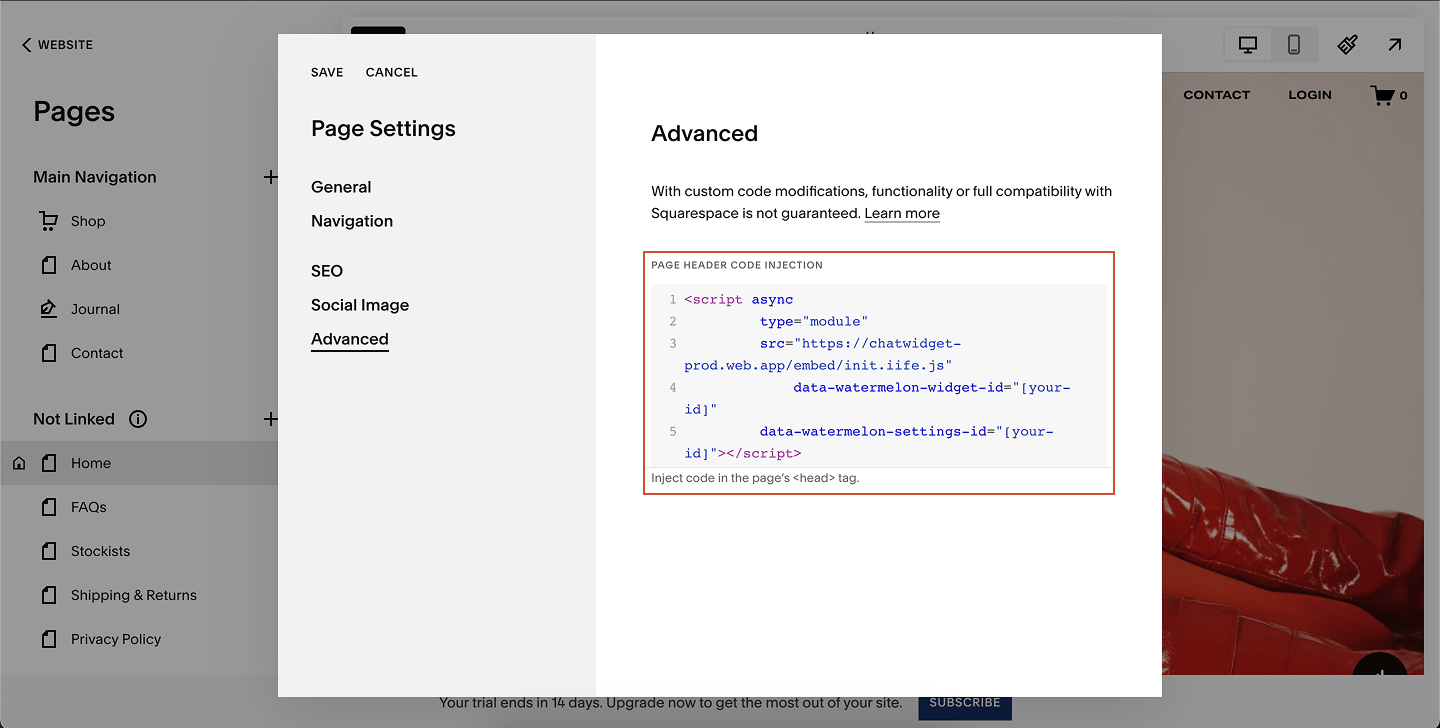
Click Advanced, then scroll to Page Header Code Injection. Paste your chat widget code here.The code you add here is injected into the <head> tag of this specific page.Blog pages also include a Post Blog Item Code Injection option if you want the widget on each post.
Save and publish
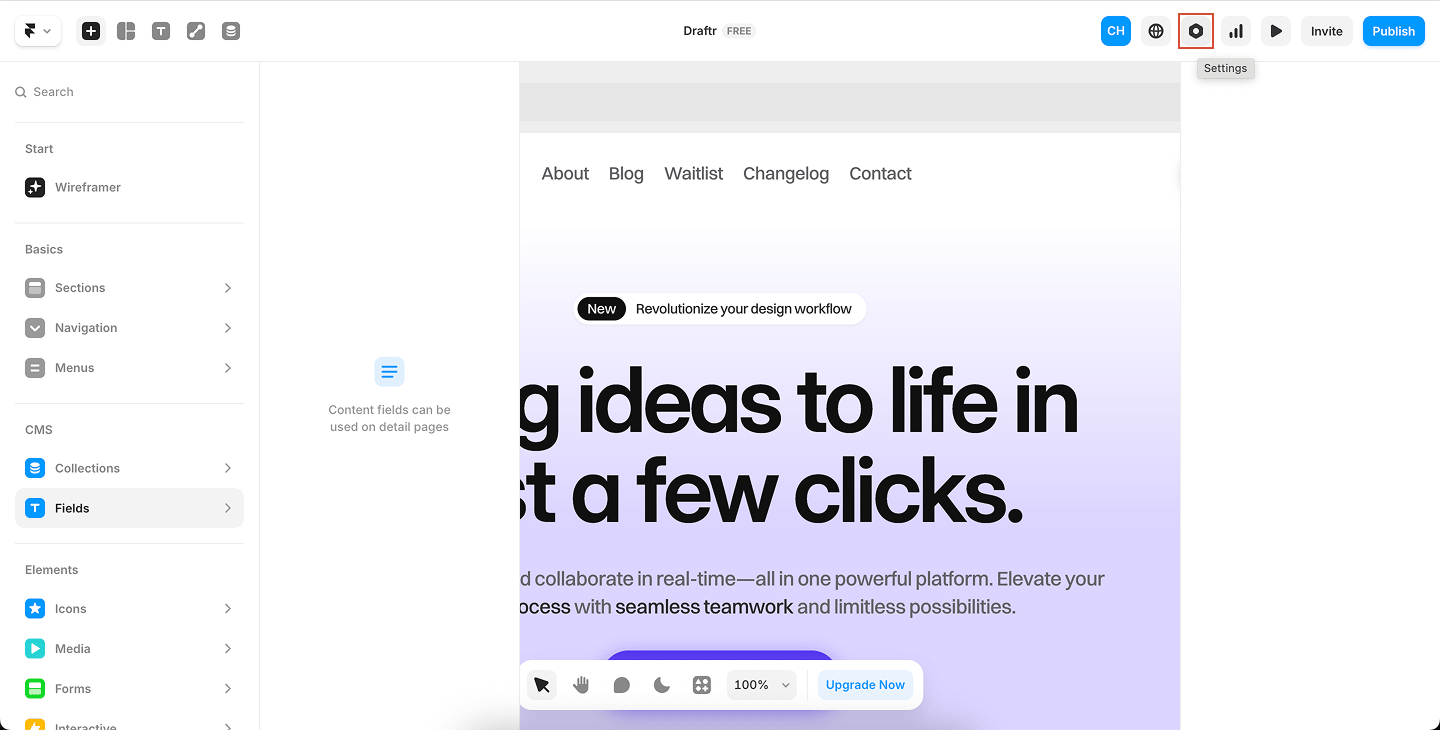
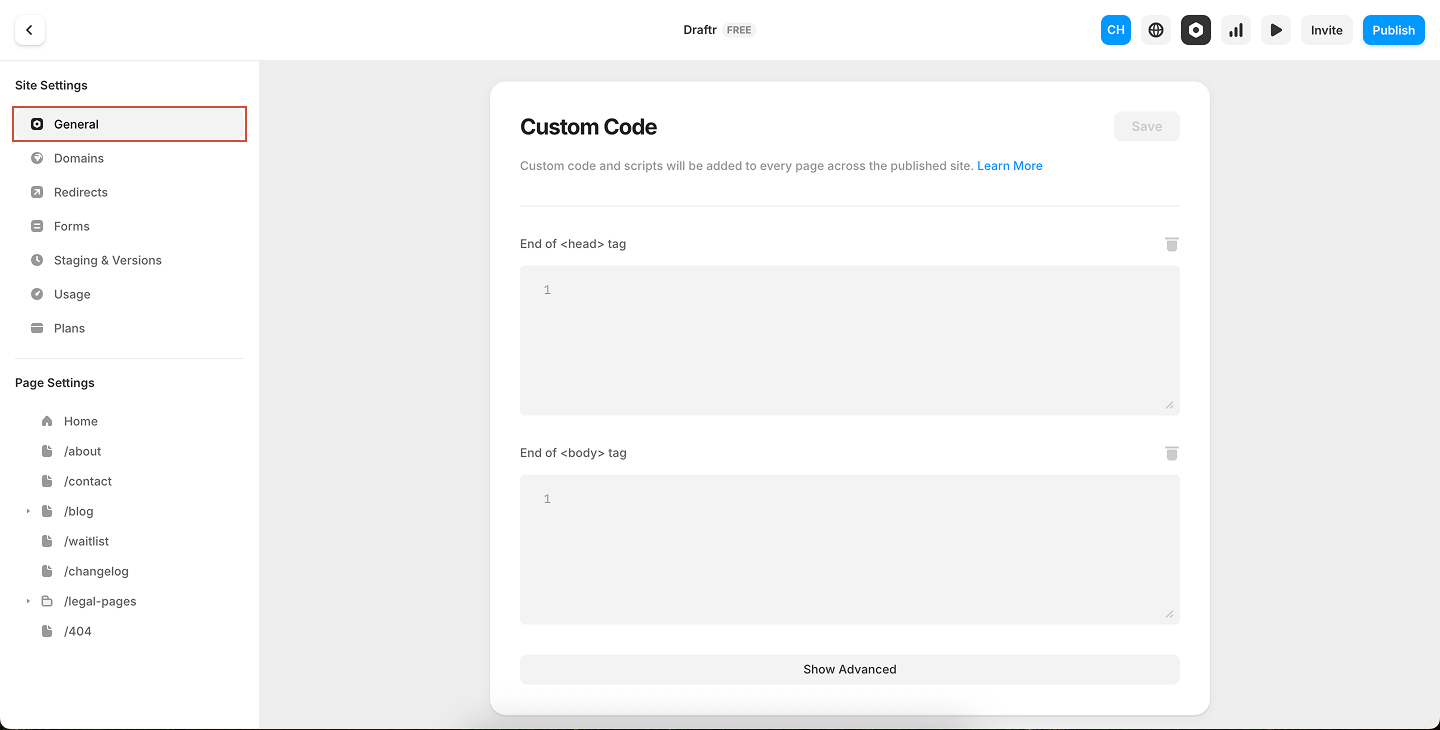
Click Save, then Publish your site. Open the page in your browser to confirm that your Watermelon chat widget appears correctly. Now that you have your chat widget code, follow the steps below to add it to your Framer website.Open project settings
In Framer, click Project Settings in the top right corner of your dashboard. Open the General tab
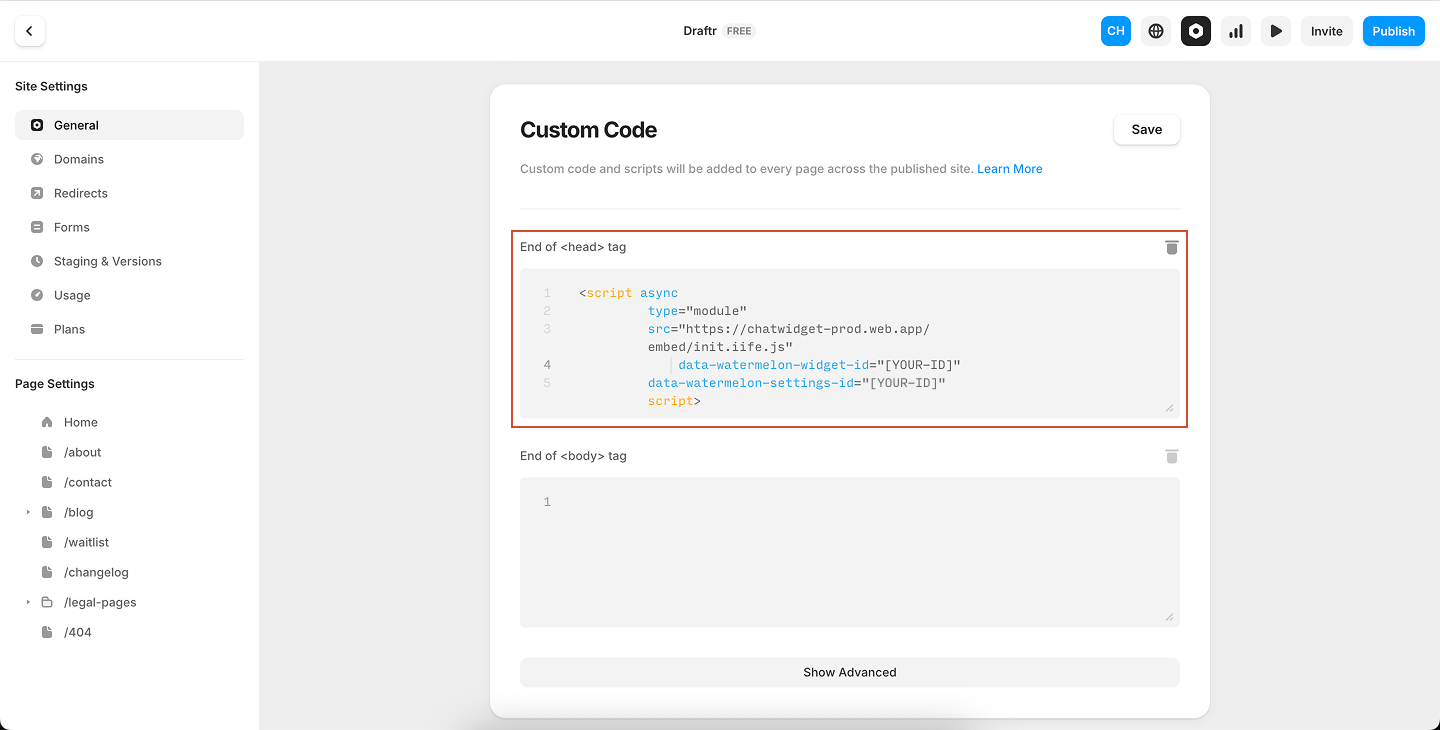
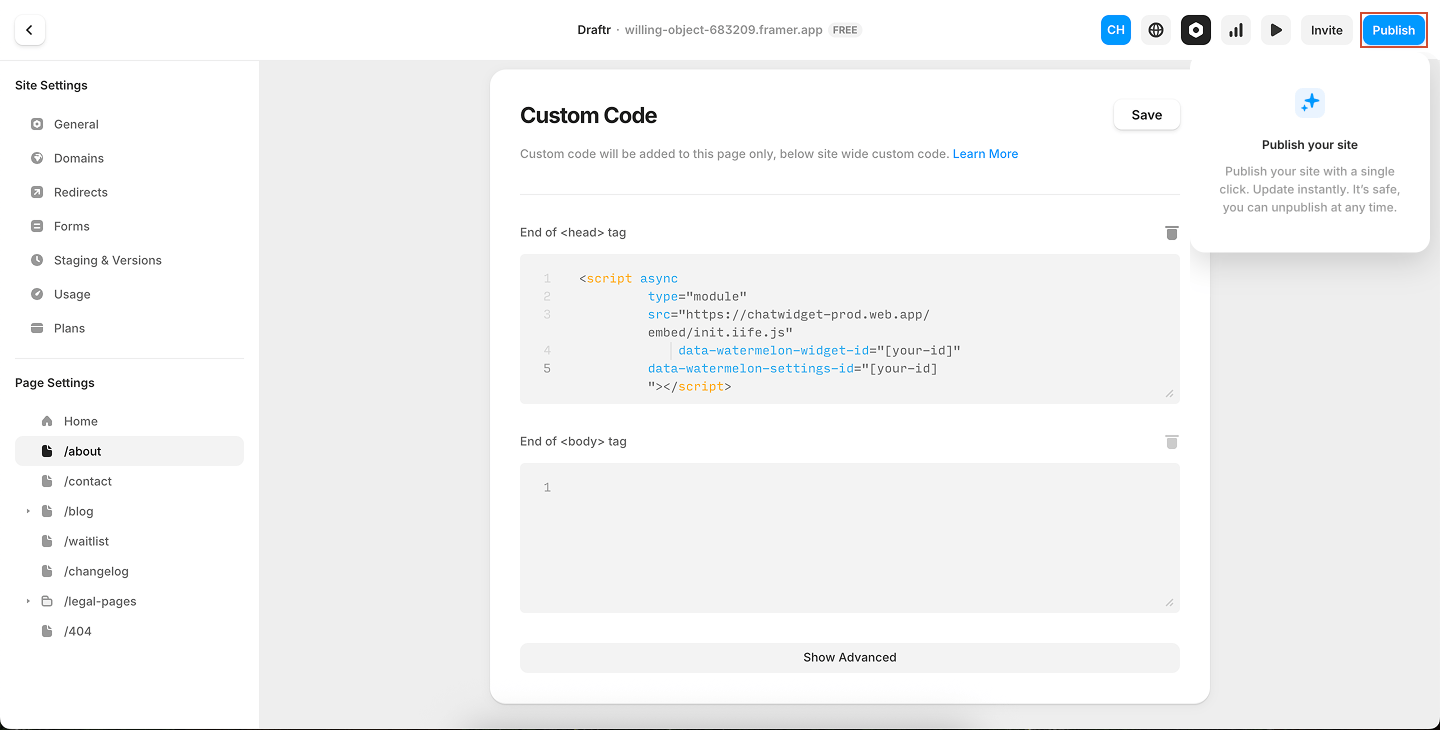
Navigate to the General tab and scroll down to the Custom Code section. Add your chat widget code
In the Custom Code section, you’ll see fields for adding code to the Head, Body, and Footer.Paste your Watermelon chat widget code at the **start of the **<head>tag code area. Save changes
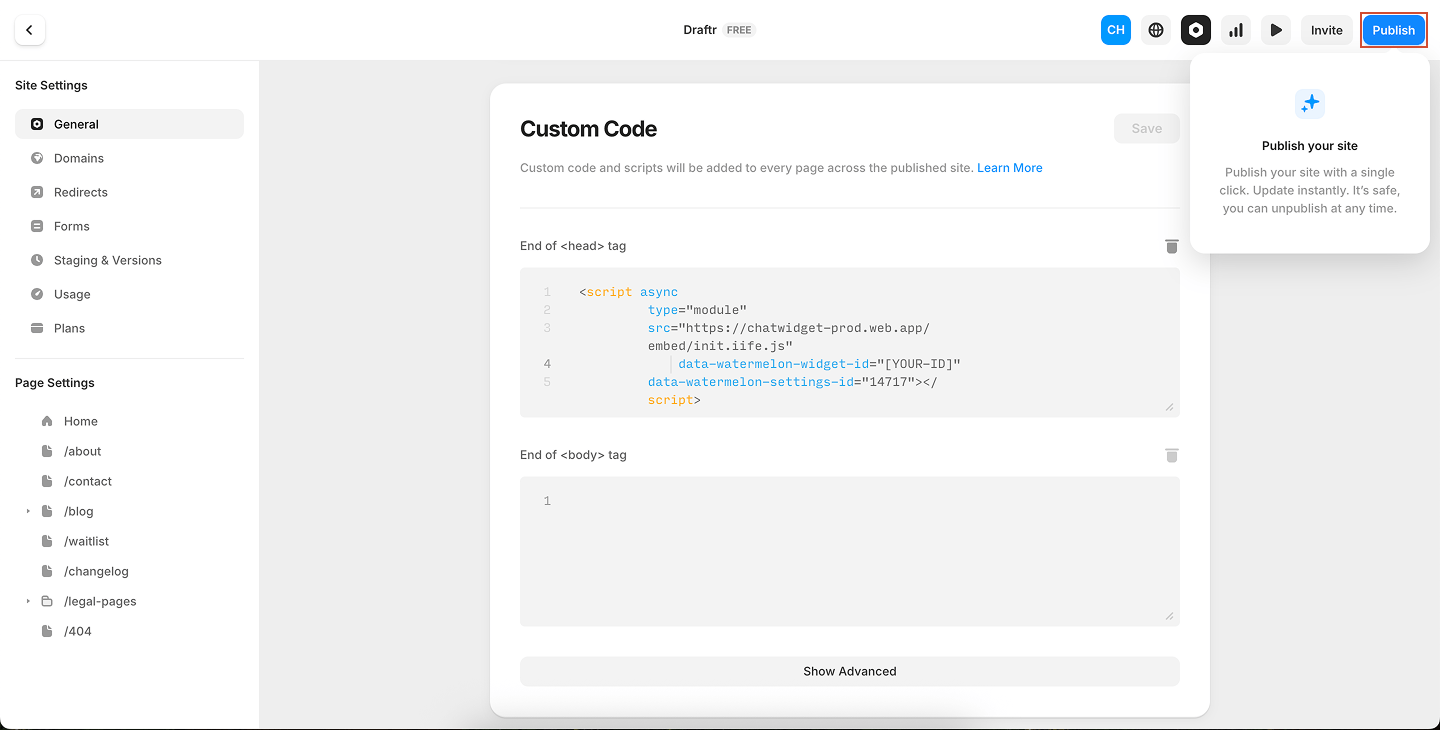
Your script will now run across the entire website after you publish your project.Tip: The custom code will only appear after publishing your website.The chat widget won’t show up in Framer’s preview — open your live site in a browser to see it in action.
If you don’t see the widget, double-check if you have published your website. And also check if the selected chat widget is set on “Show on website”
Add the widget to a specific page (optional)
If you prefer to display the chat widget on a single page instead of the whole site, follow these steps:Go to project settings
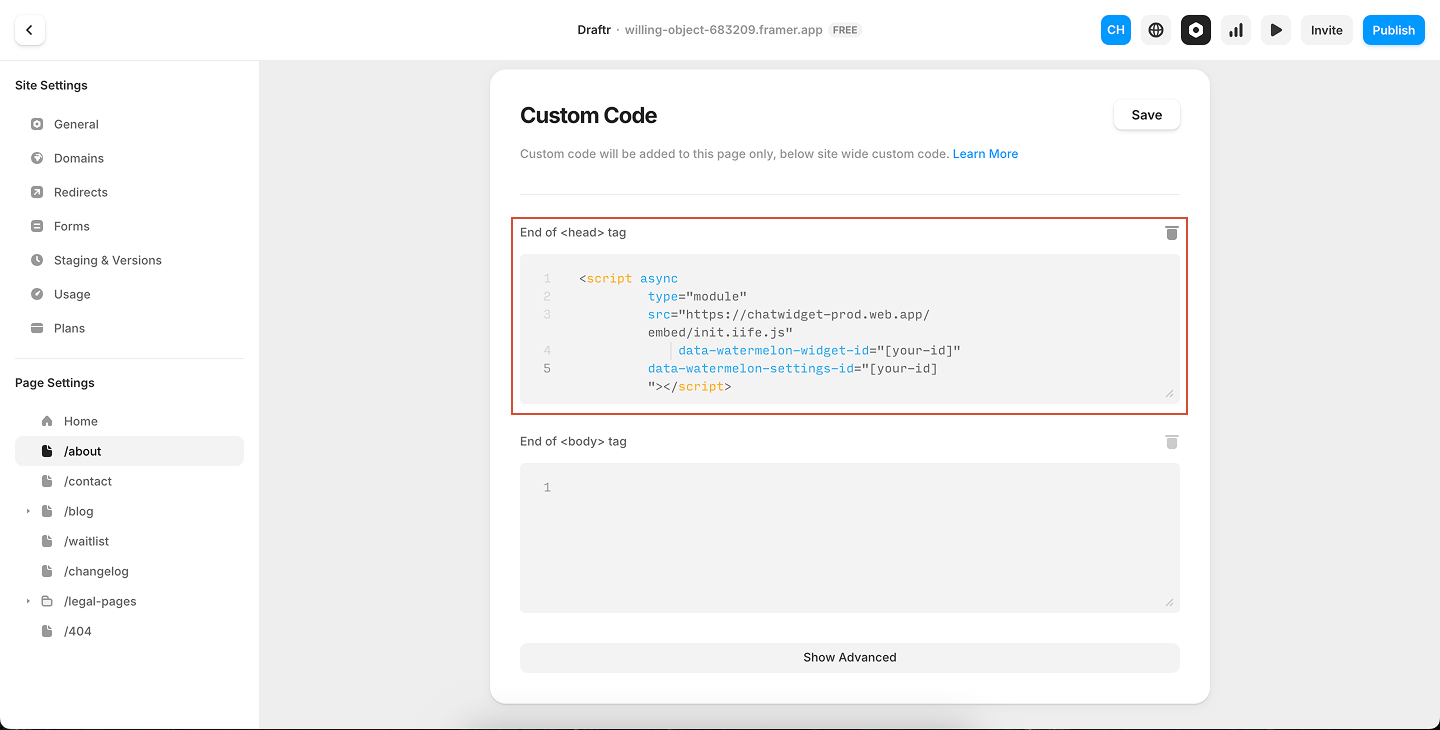
Click Project Settings in the top right corner. Select your page
Open Page Settings and select the page where you want to add the chat widget. Paste your code
In the Custom Code section for that page, paste your Watermelon chat widget code inside the <head> tag code area. Save and publish
Click Save, then Publish your project.Your Watermelon chat widget will now appear on the selected page.Just like with the full-site setup, the widget only appears after publishing — it won’t be visible in the preview.
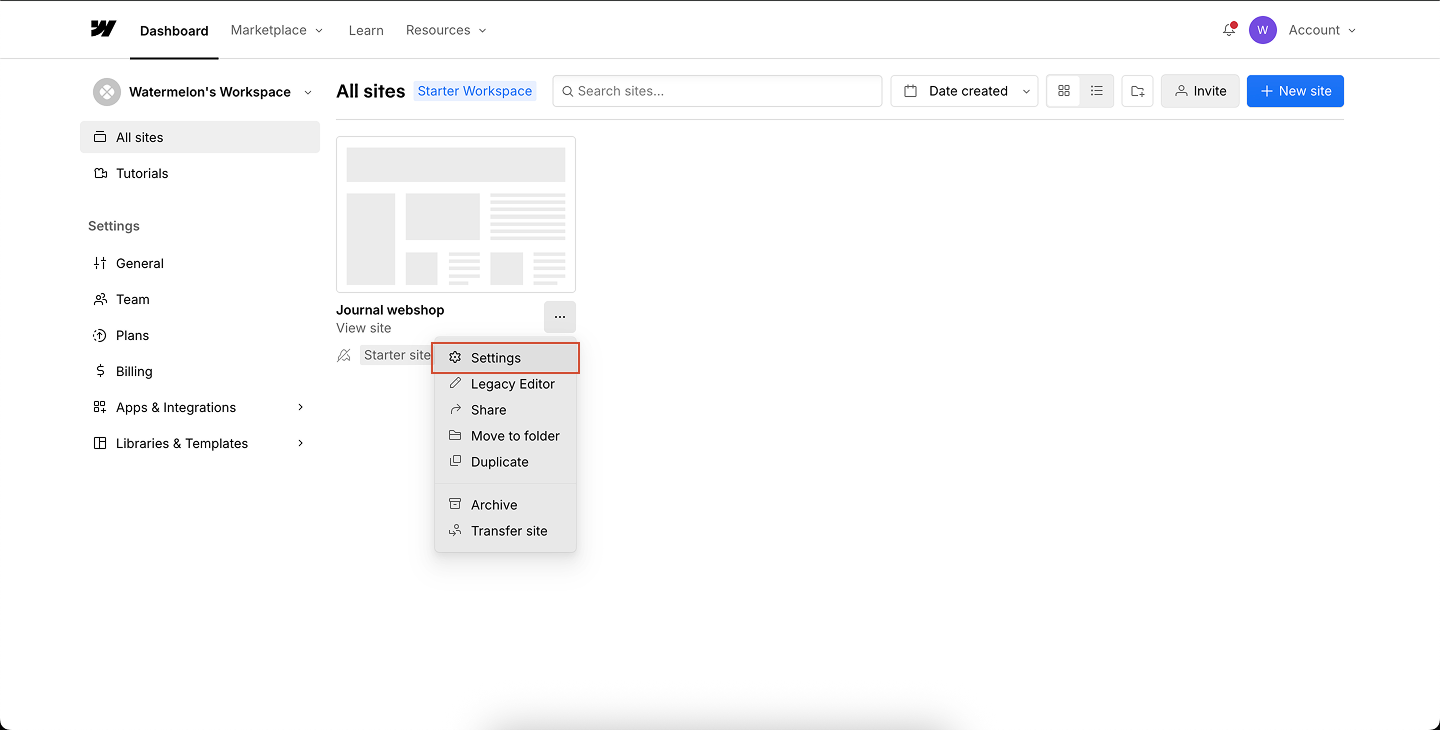
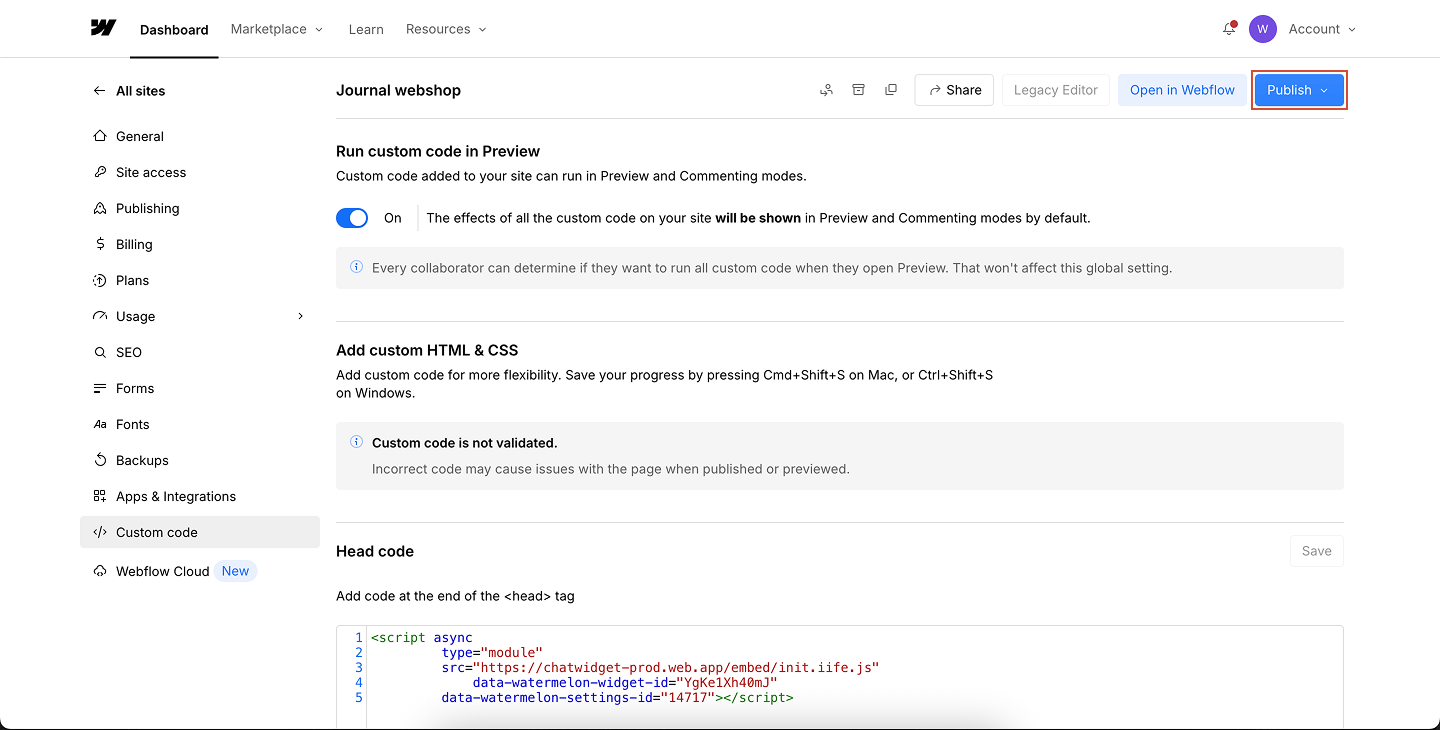
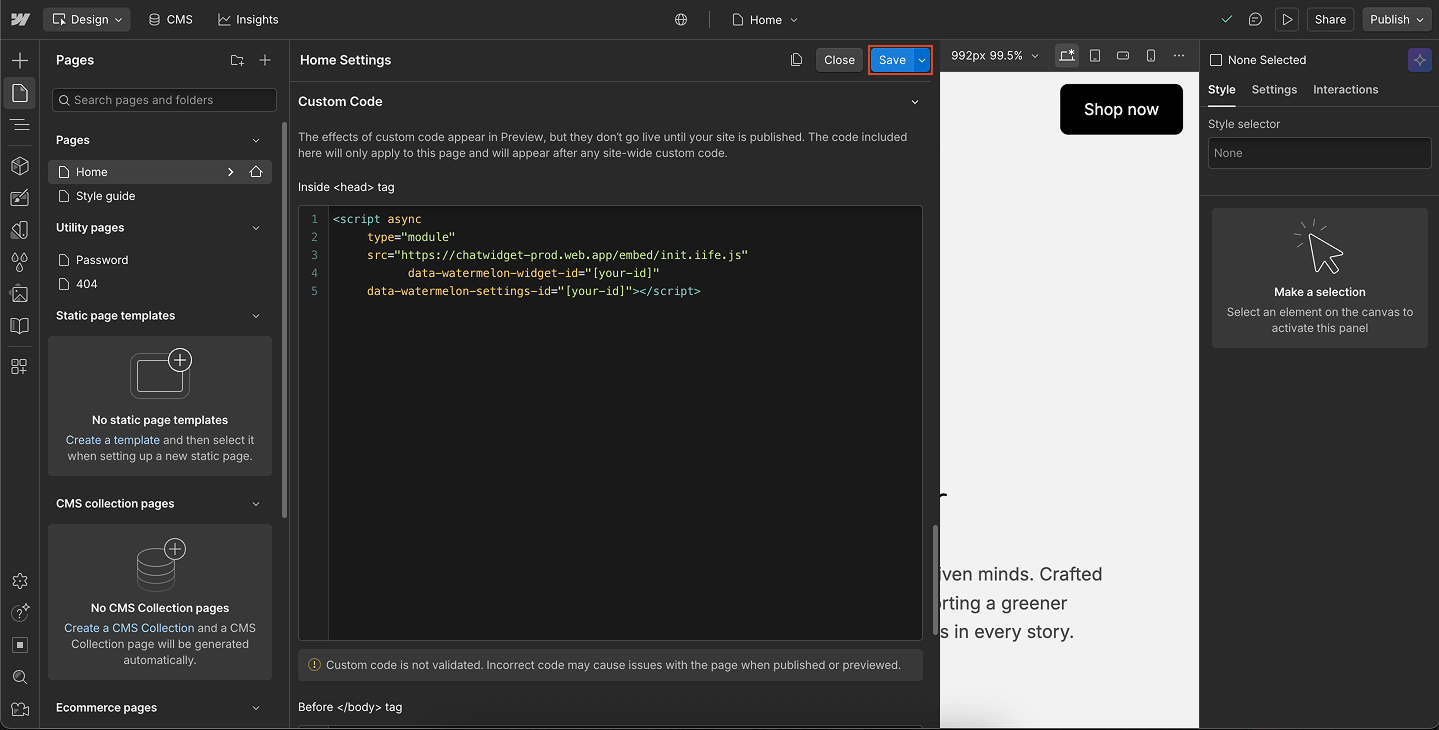
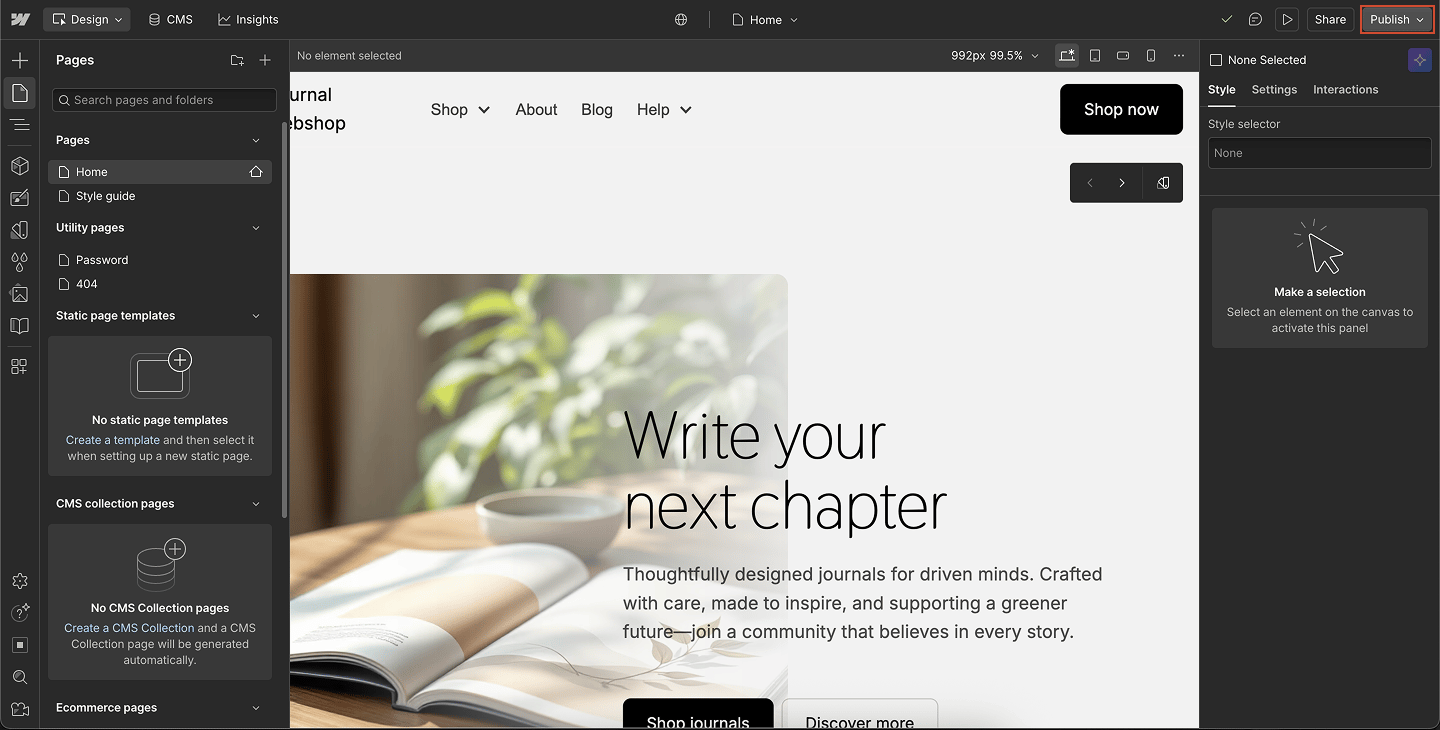
Now that you have your chat widget code, follow the steps below to add it to your Webflow website.Open your Webflow project
From your Webflow dashboard, find your project thumbnail and click the three dots icon to view more options. Open project settings
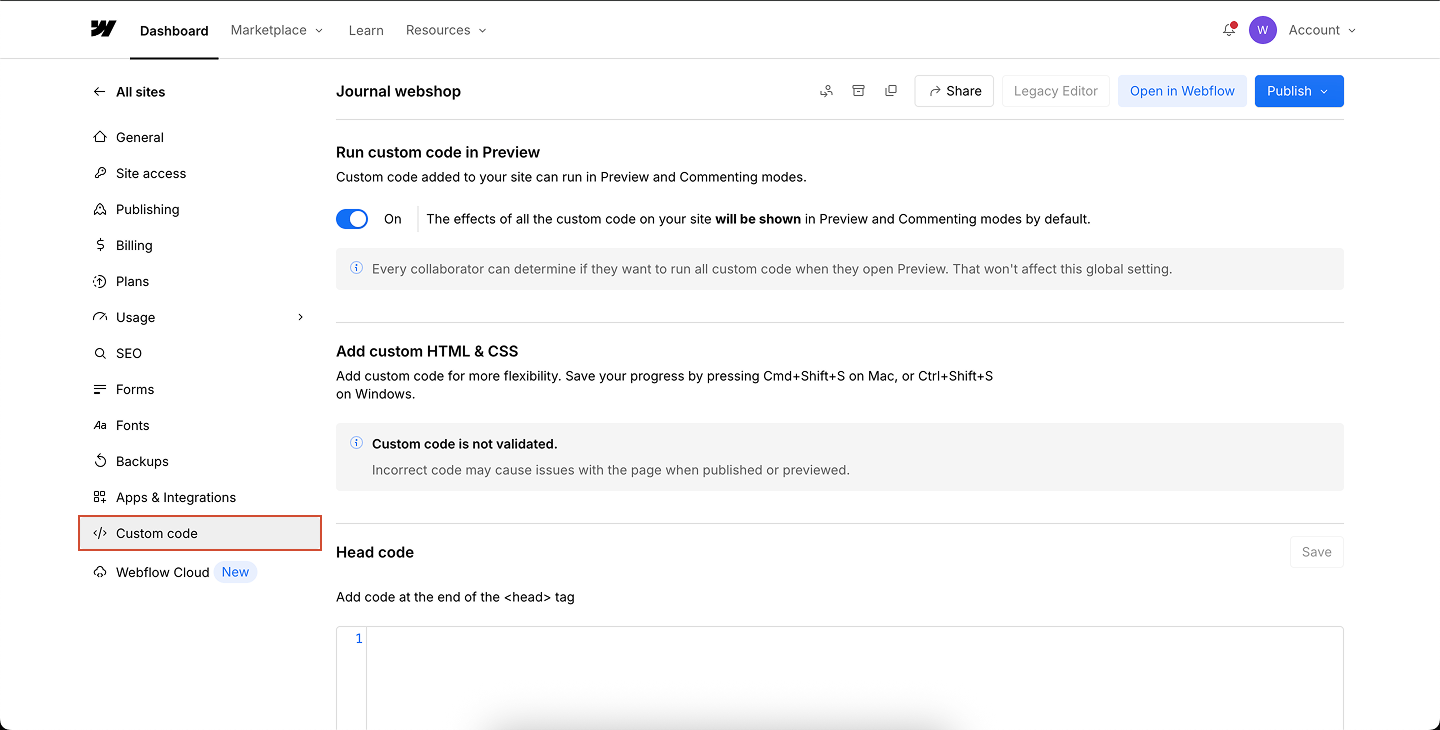
Click Settings to open the project configuration page. Go to Custom Code
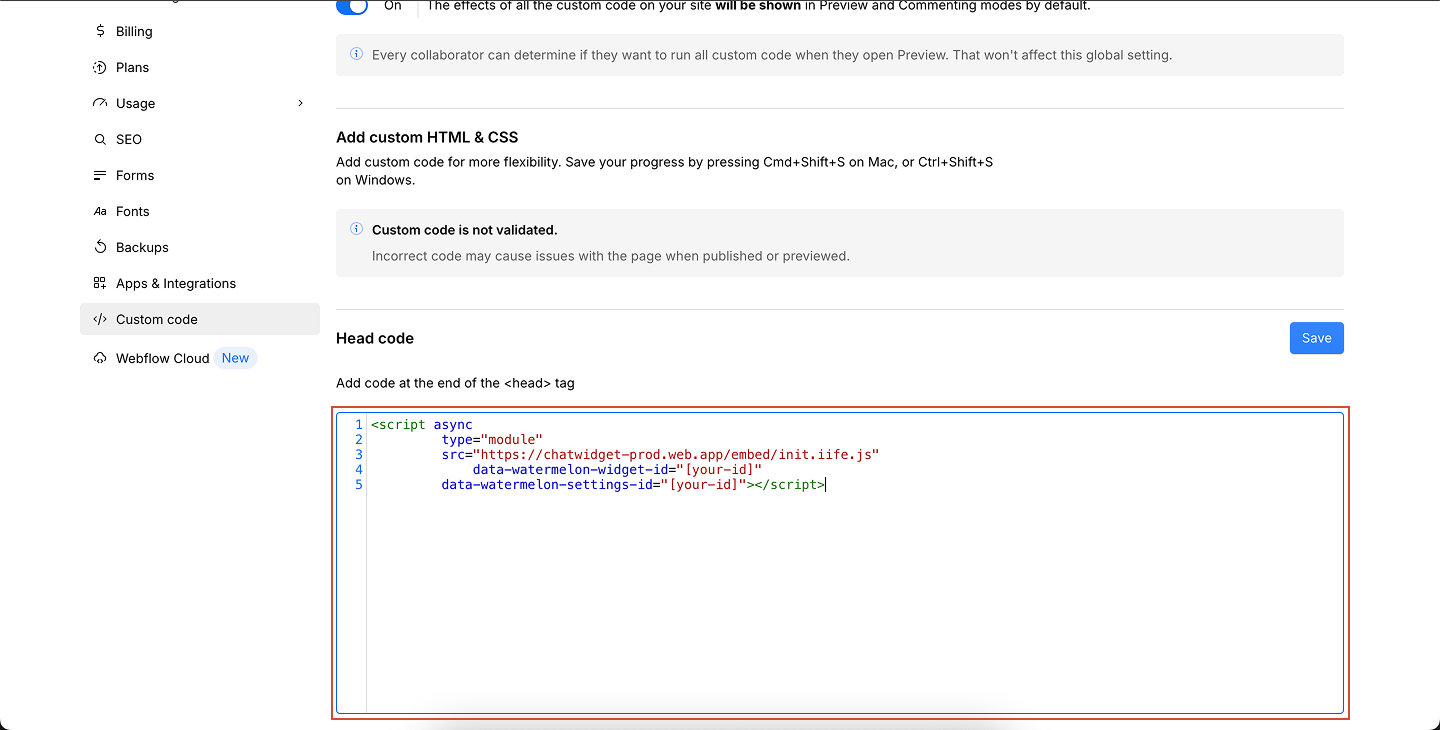
From the left sidebar, navigate to Custom Code. Add your widget code
Scroll down to the section **Add code in the **<head>tag and paste your chat widget code here.Tip: For best performance, place your code before the closing <footer> tag instead of in the head. This makes sure your site loads faster while the widget still appears correctly.
<script> and </script> tags. Do not include <body> or </body> tags — Webflow automatically places your code inside them. Save changes
Any code added here will be applied to all pages of your Webflow project. If you don’t see the widget, double-check that you selected “All pages” in the Script Manager and that the full code was pasted correctly. And also check if the selected chat widget is set on “Show on website”
Add the widget to a specific page (optional)
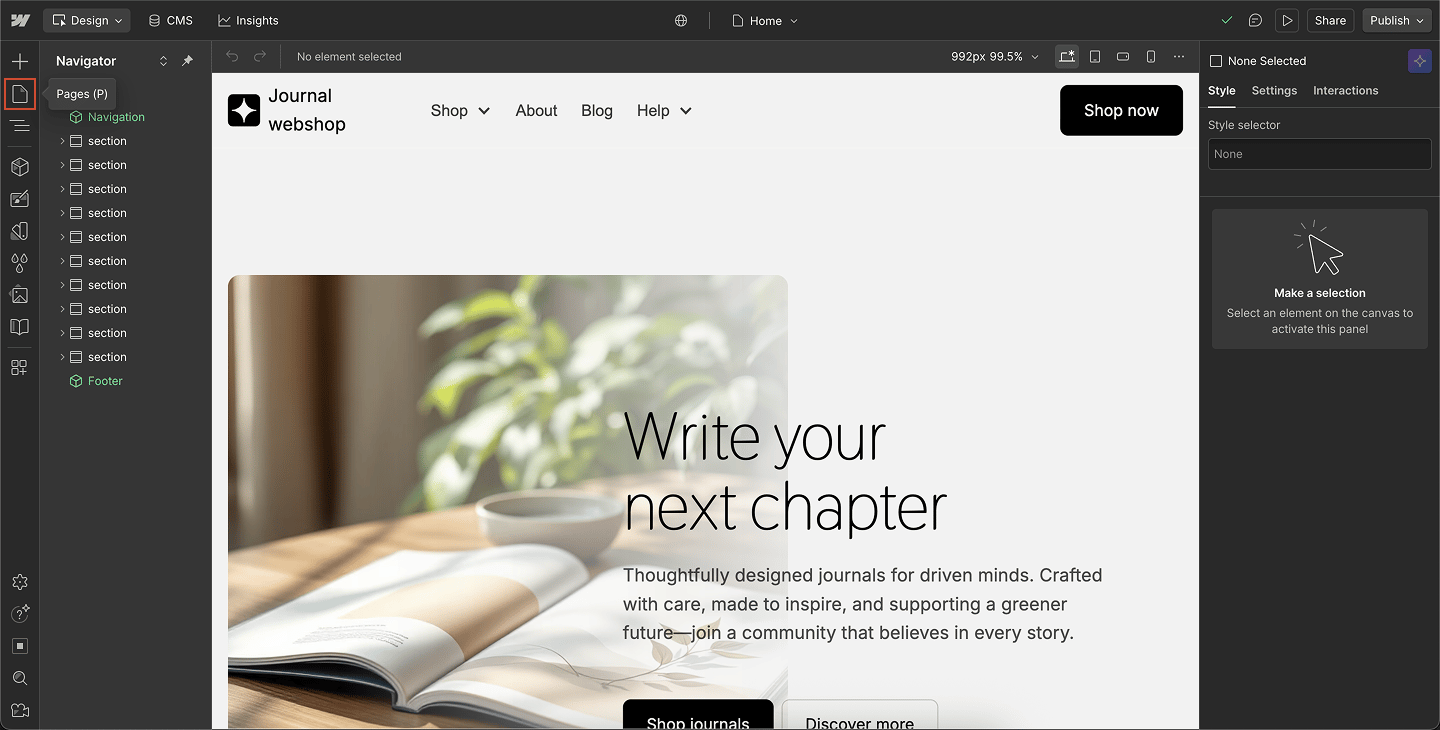
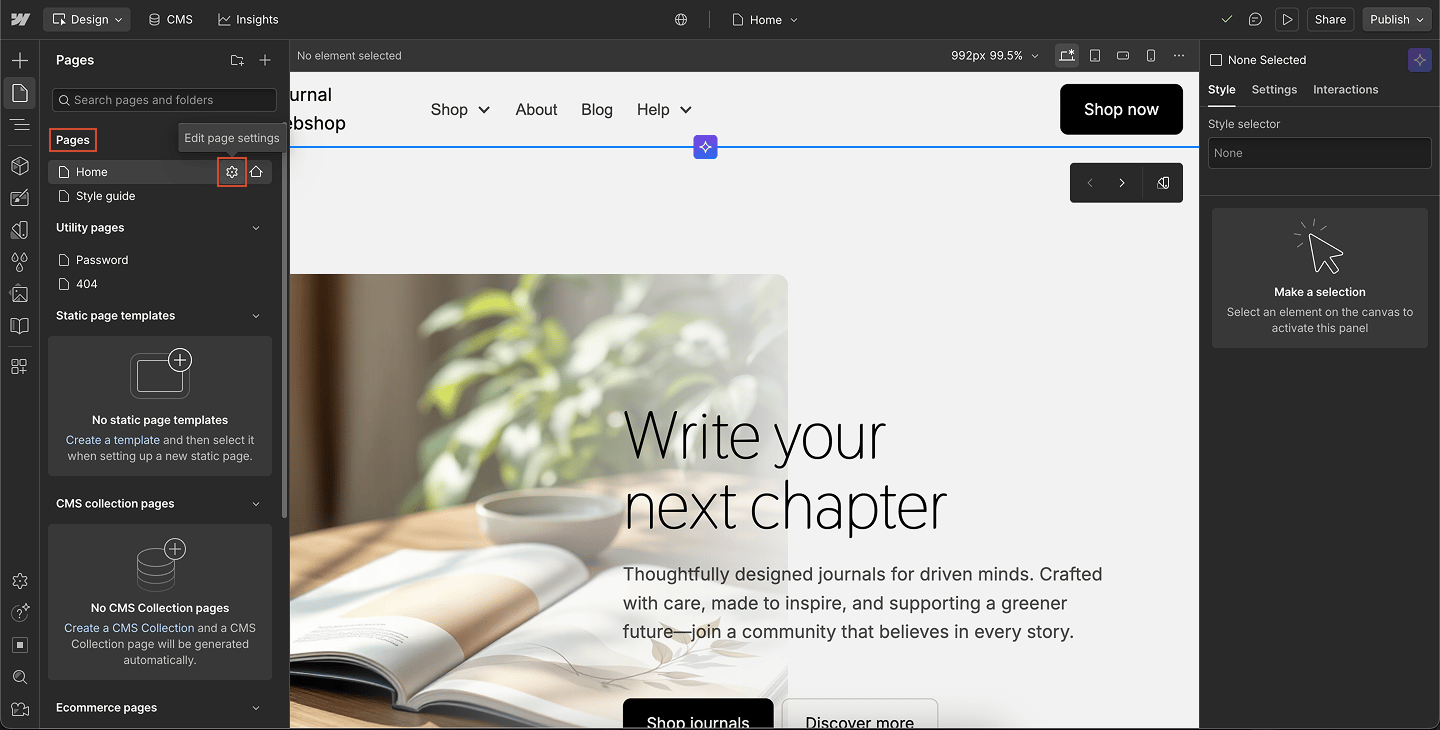
If you want to display the chat widget on just one page, follow these steps instead:Open the page settings
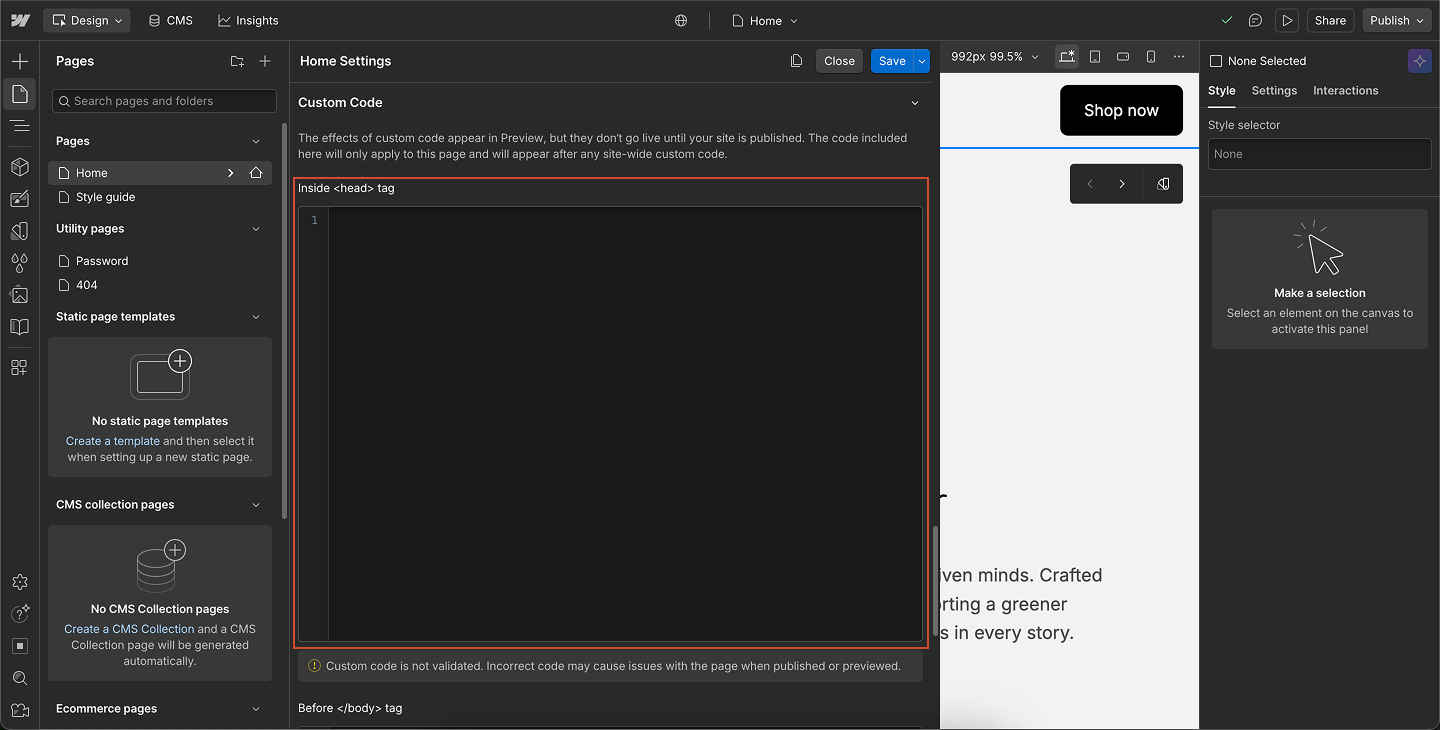
In the Webflow Designer, open the Pages tab from the left sidebar.Hover over the page name and click the gear icon to open Page Settings. Add custom code to the page
Scroll down to Custom Code → Before tag.
Paste your Watermelon chat widget code inside this sectionTip: Just like before, make sure your code is wrapped inside <script> tags and do not include <body> tags.
Save and publish
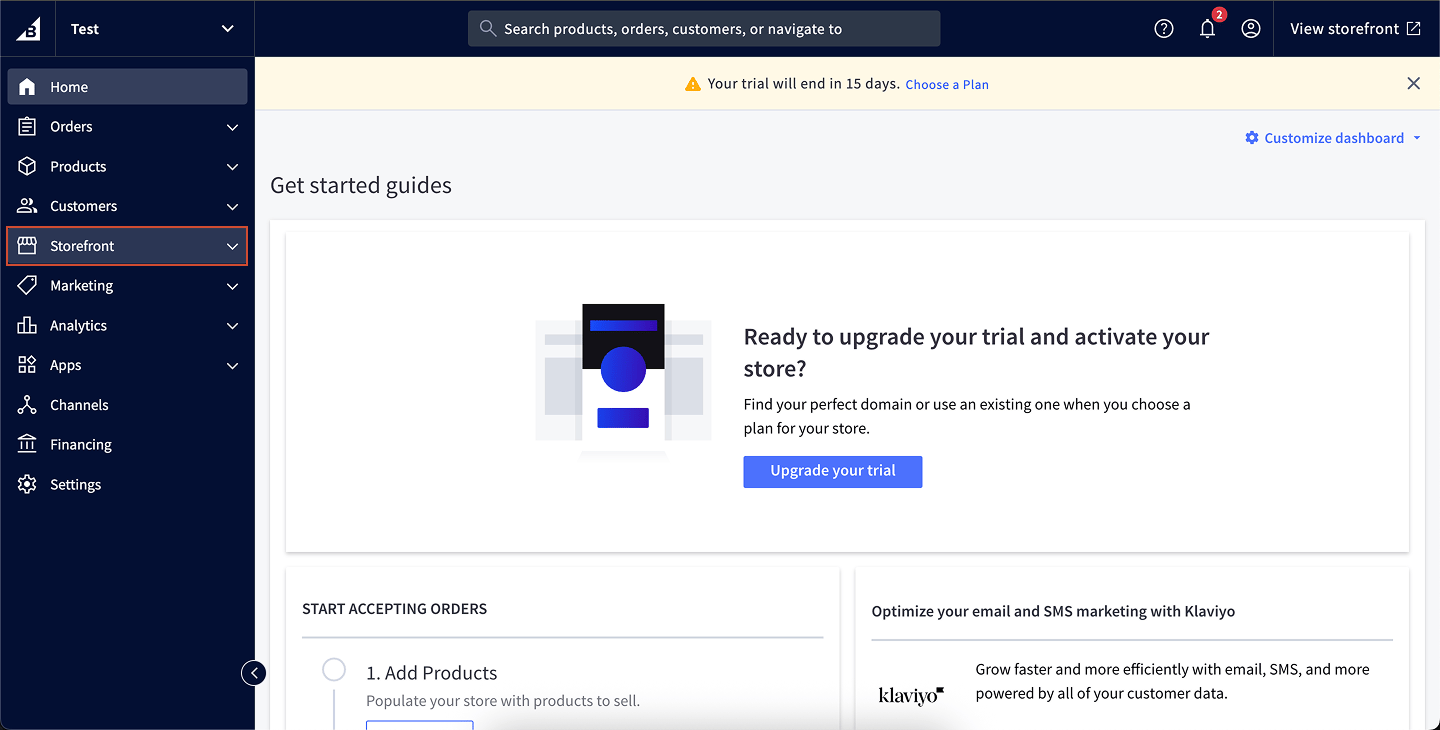
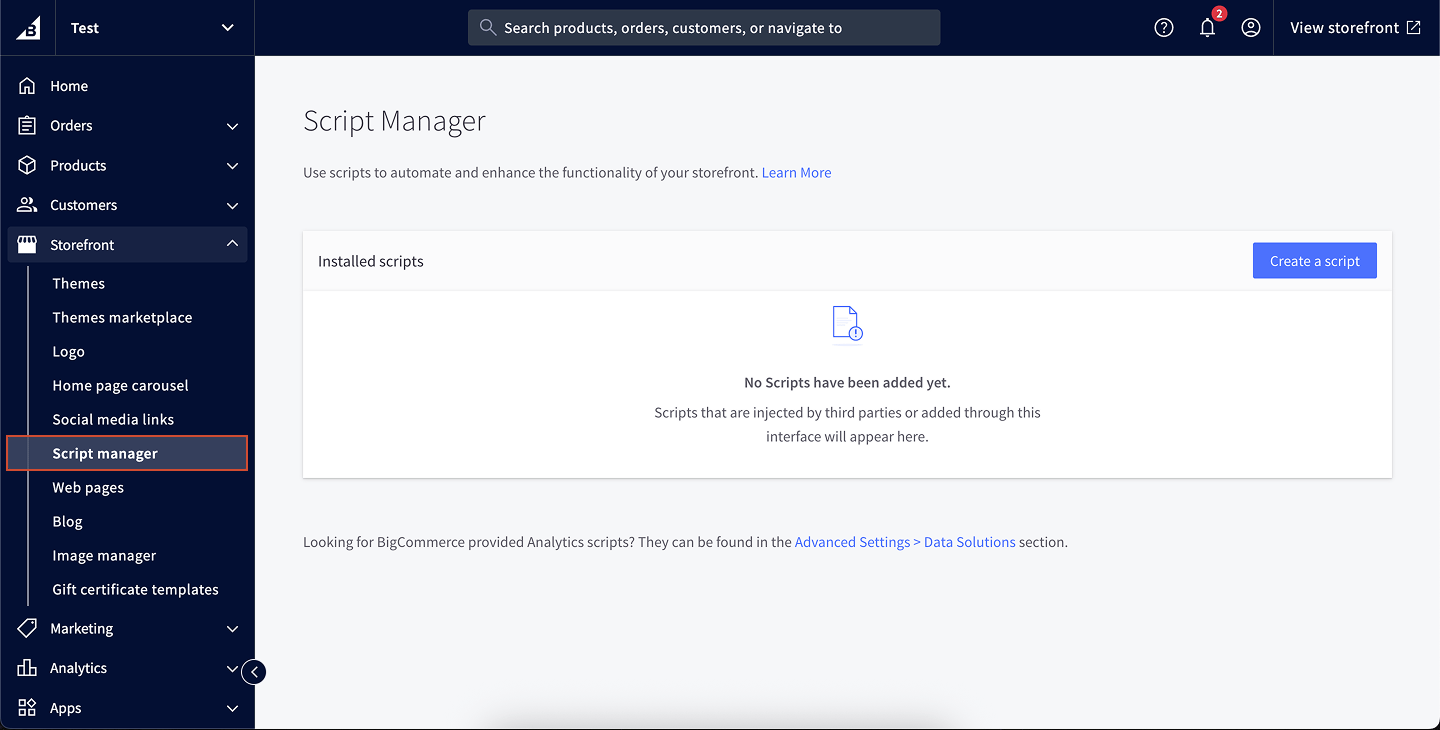
After adding the code, click Save.And lastly, Publish your project to make the chat widget live on your website. Now that you have your chat widget code, follow the steps below to add it to your BigCommerce store.Open Script Manager
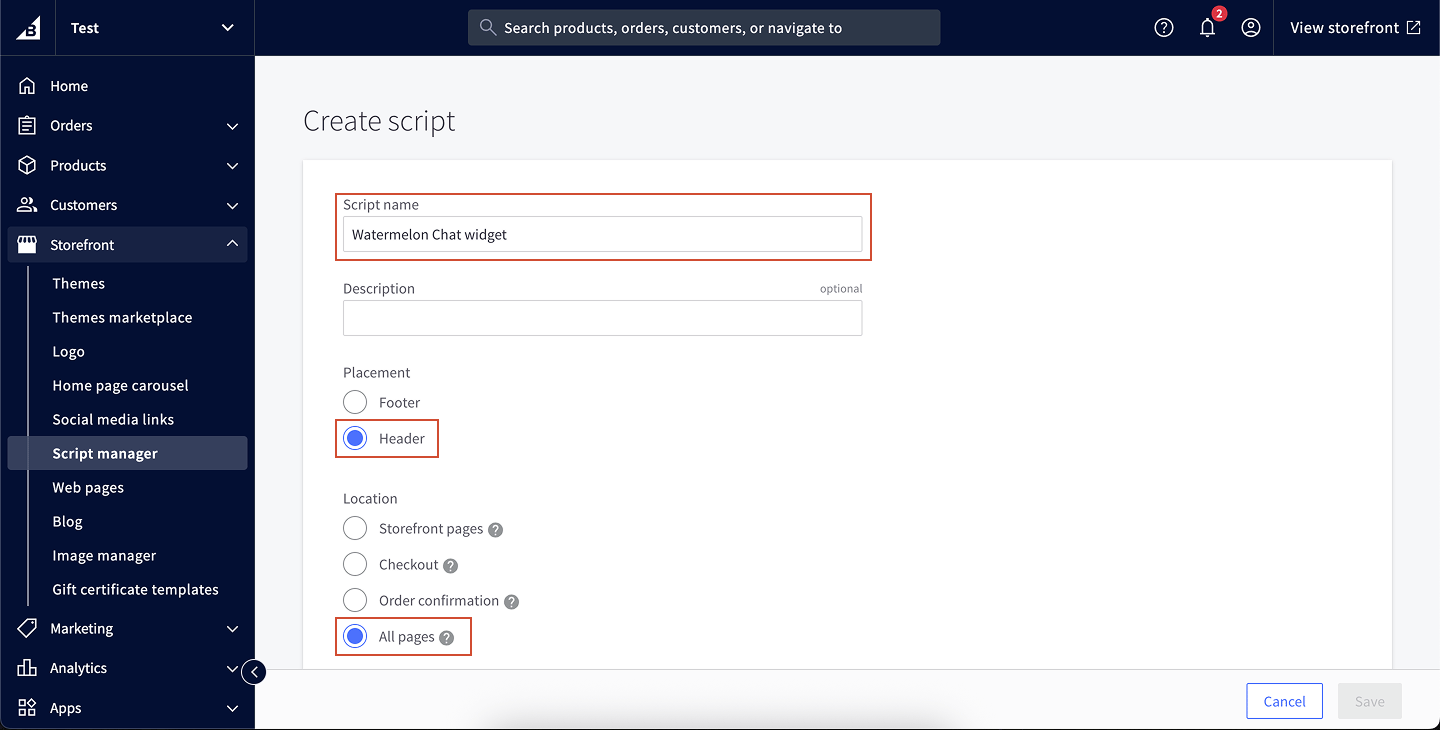
In your BigCommerce control panel, go to Storefront → Script Manager. Create a new script
Click on Create a Script. Enter script details
- Name: Watermelon Chat Widget
- Location on page: Header (recommended), for faster page loads, you can also paste the script in the Footer.
- Select pages where script will be added: All pages (or select a specific page you want the widget to show)
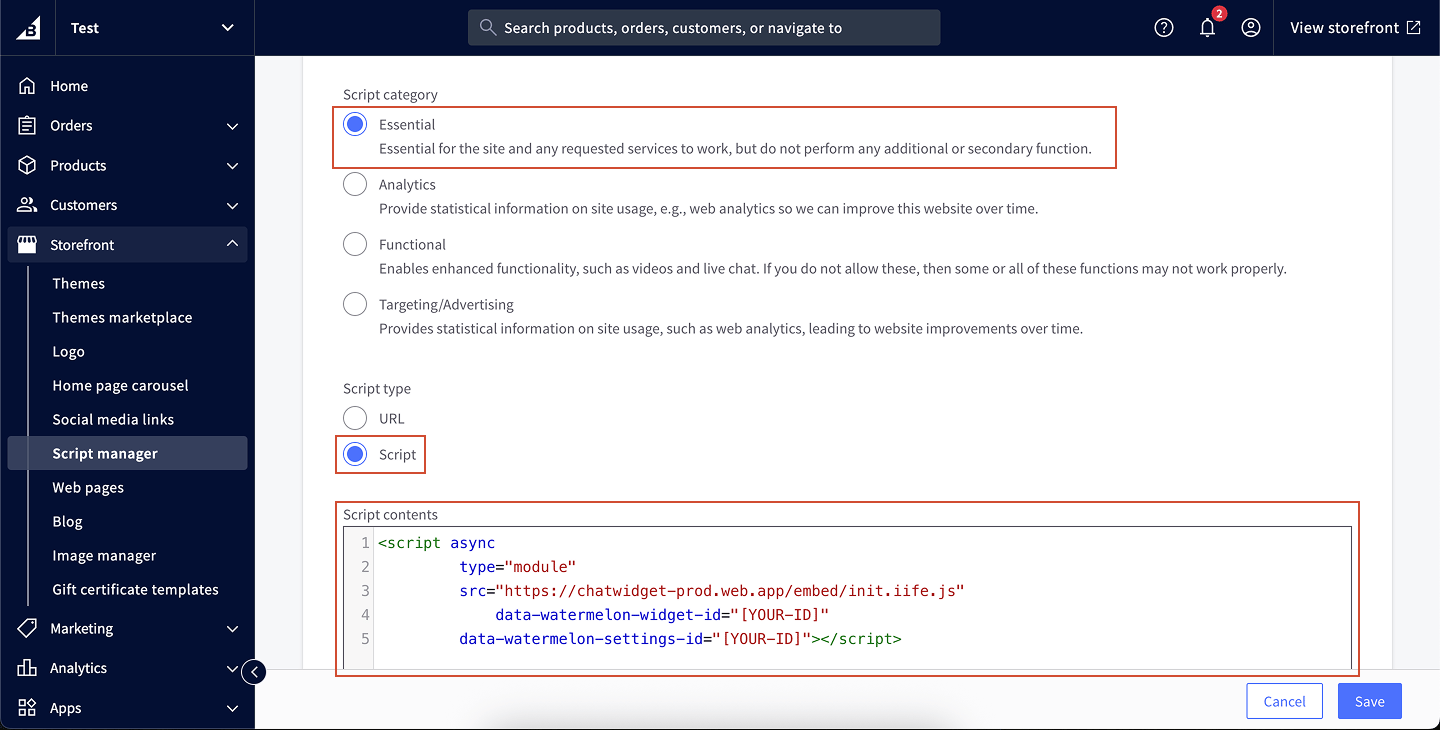
- Script type: Script
Paste your widget code
In the Script contents field, paste the chat widget code you copied from Watermelon. Save your script
Click Save to apply your changes.
Verify installation
Visit your BigCommerce store and refresh the page. Your chat widget should now appear in the bottom corner of your website.
If you don’t see the widget, double-check that you selected “All pages” in the Script Manager and that the full code was pasted correctly. And also check if the selected chat widget is set on “Show on website”
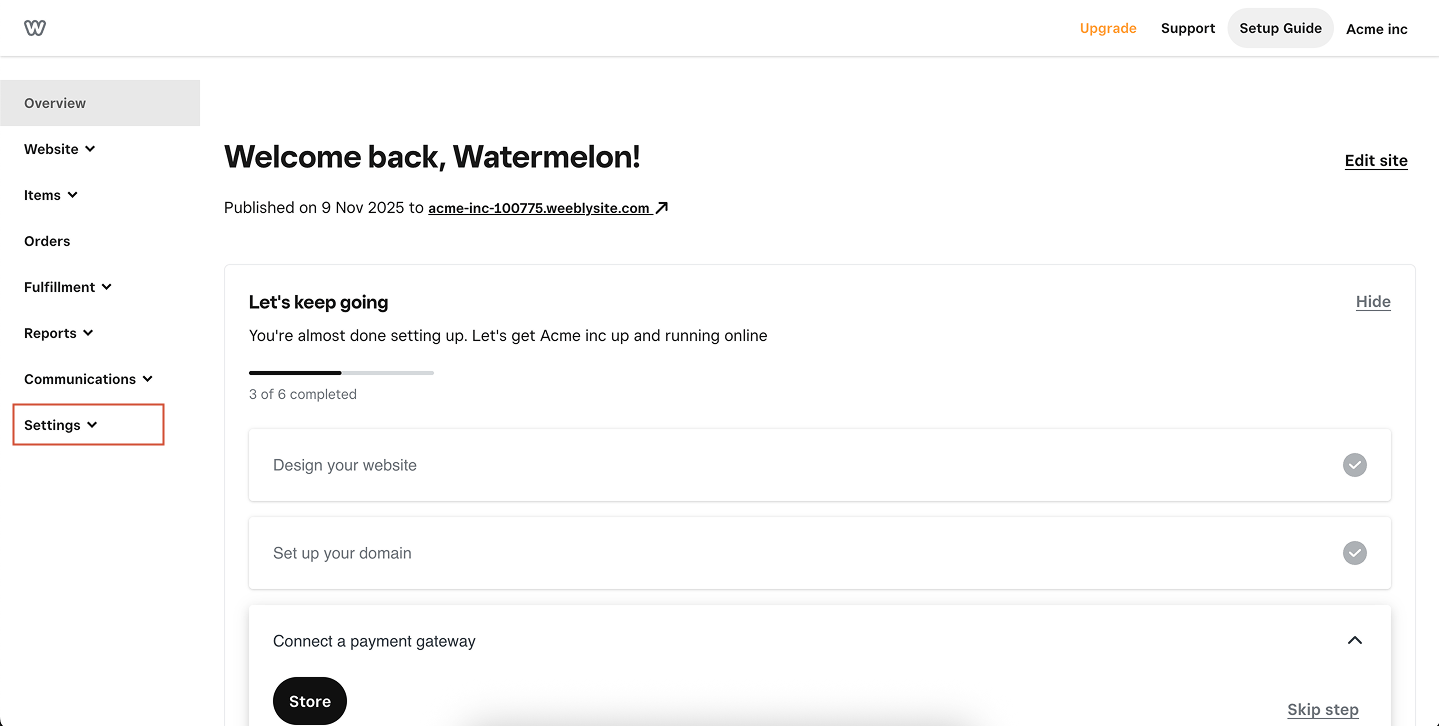
Now that you have your chat widget code, follow the steps below to add it to your Weebly website.Open Settings
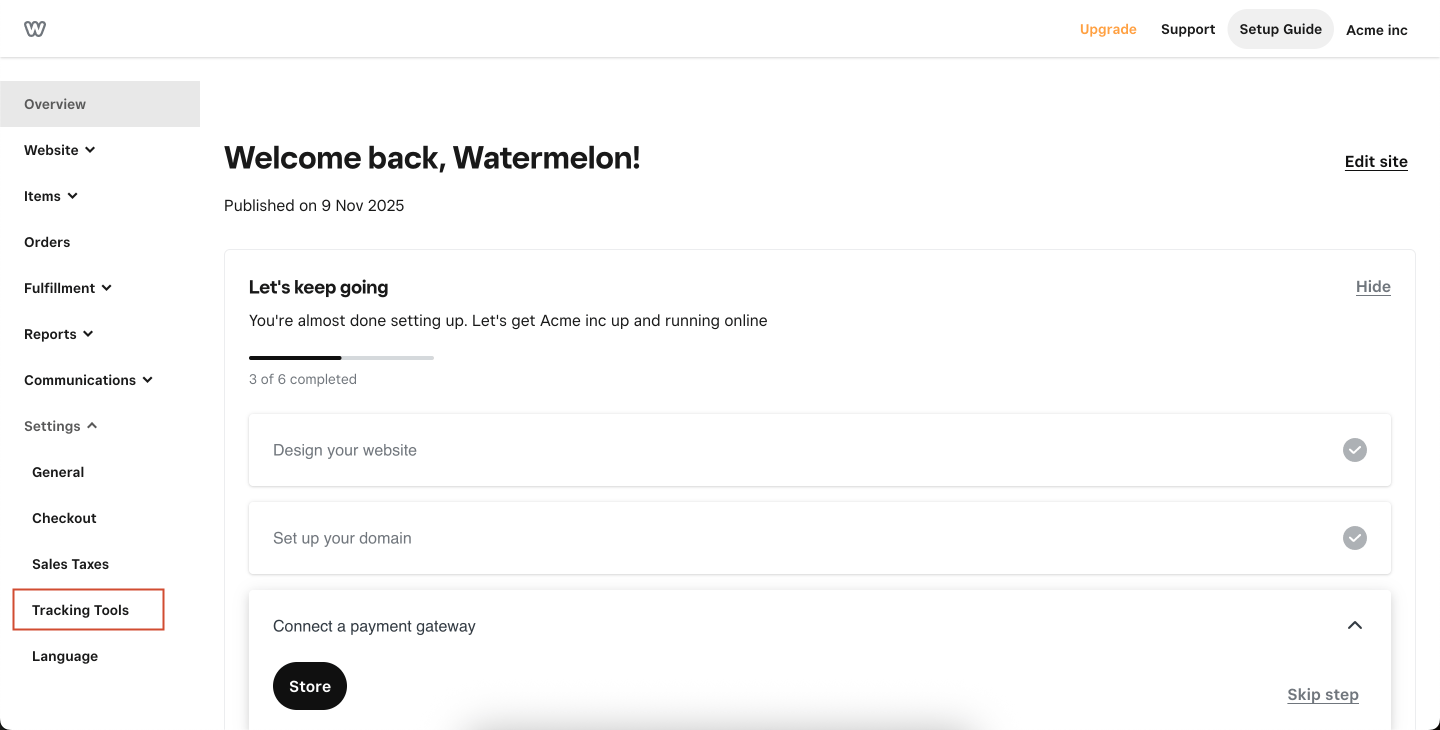
In your Weebly dashboard, click Settings in the left-hand menu. Select Tracking Tools
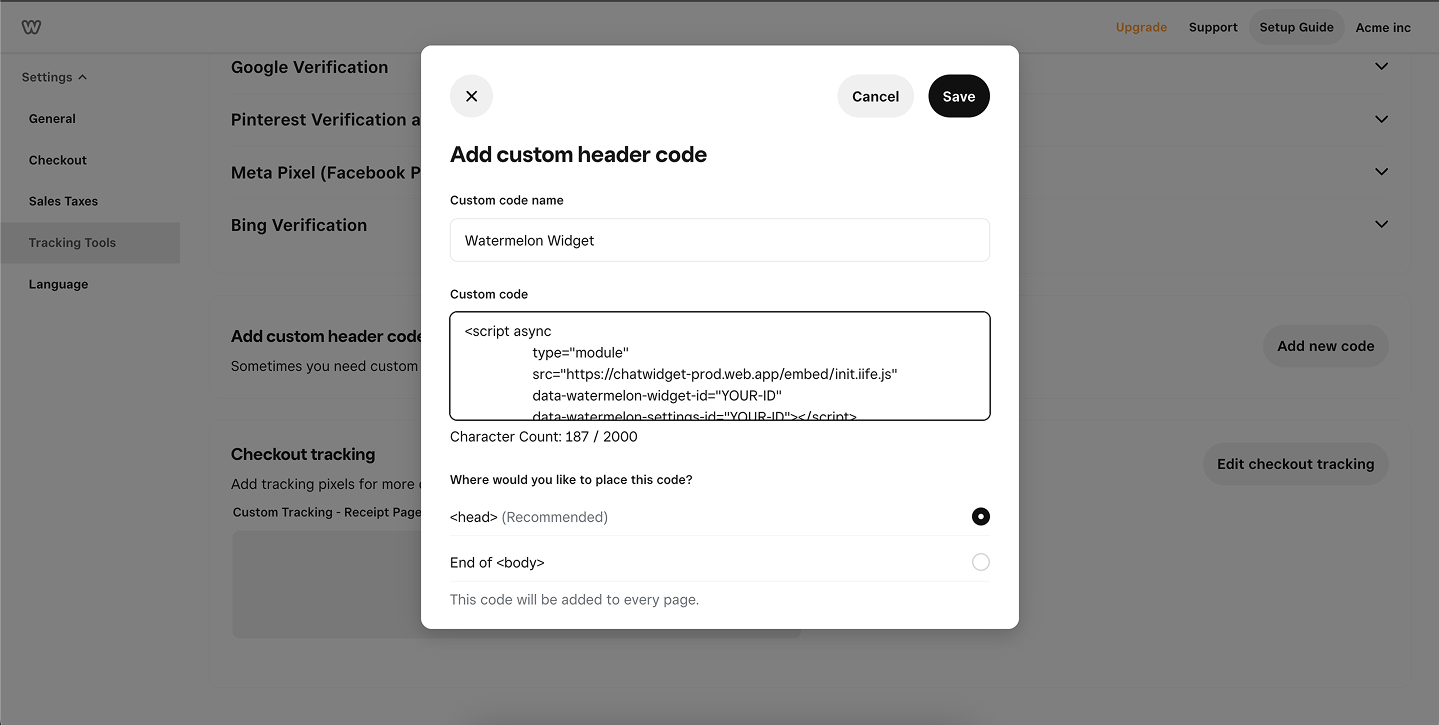
Go to Tracking Tools in the settings menu. Add custom header code
Scroll down to Add custom header code and click Add new code. Paste your chat widget code
Fill in a name — for example, Watermelon Chat Widget.
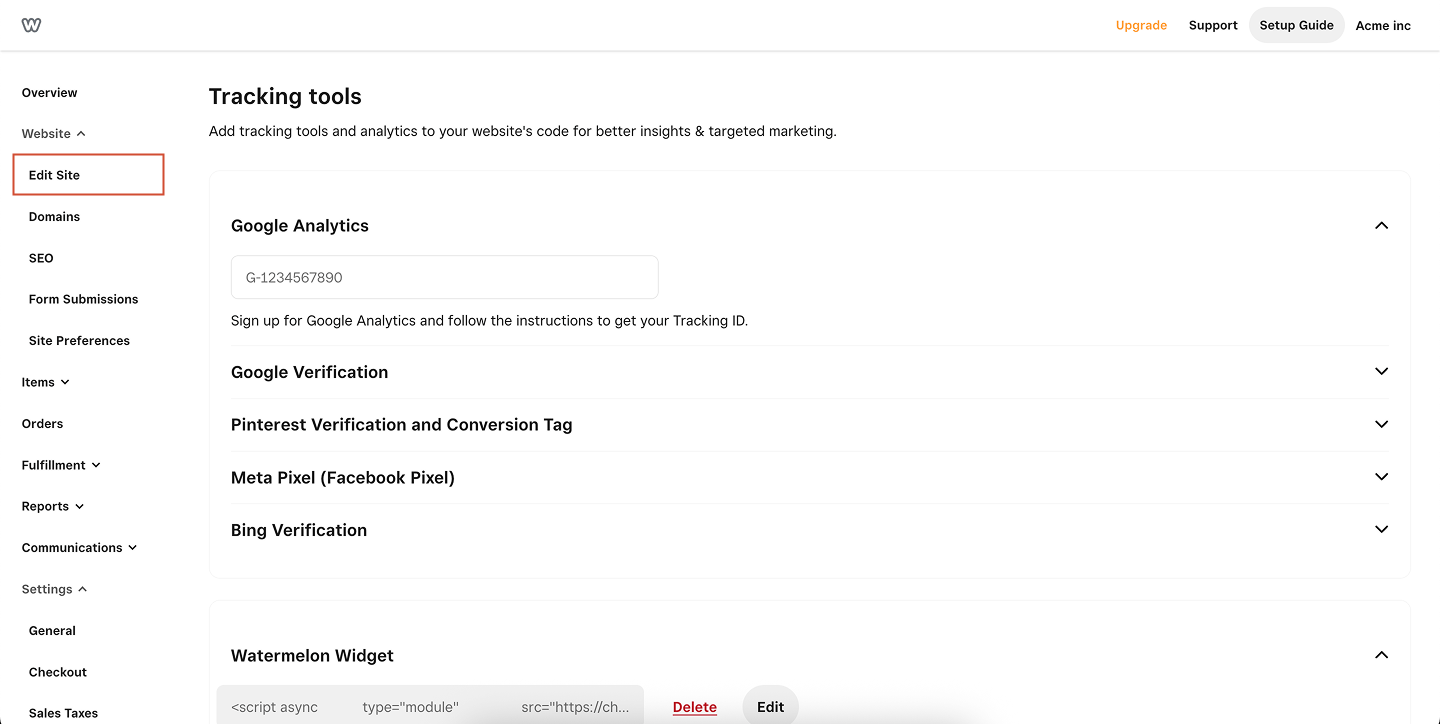
Paste your Watermelon chat widget script into the code box.Make sure is selected under Where would you like to place this code? (this is selected by default). Save changes and open your site
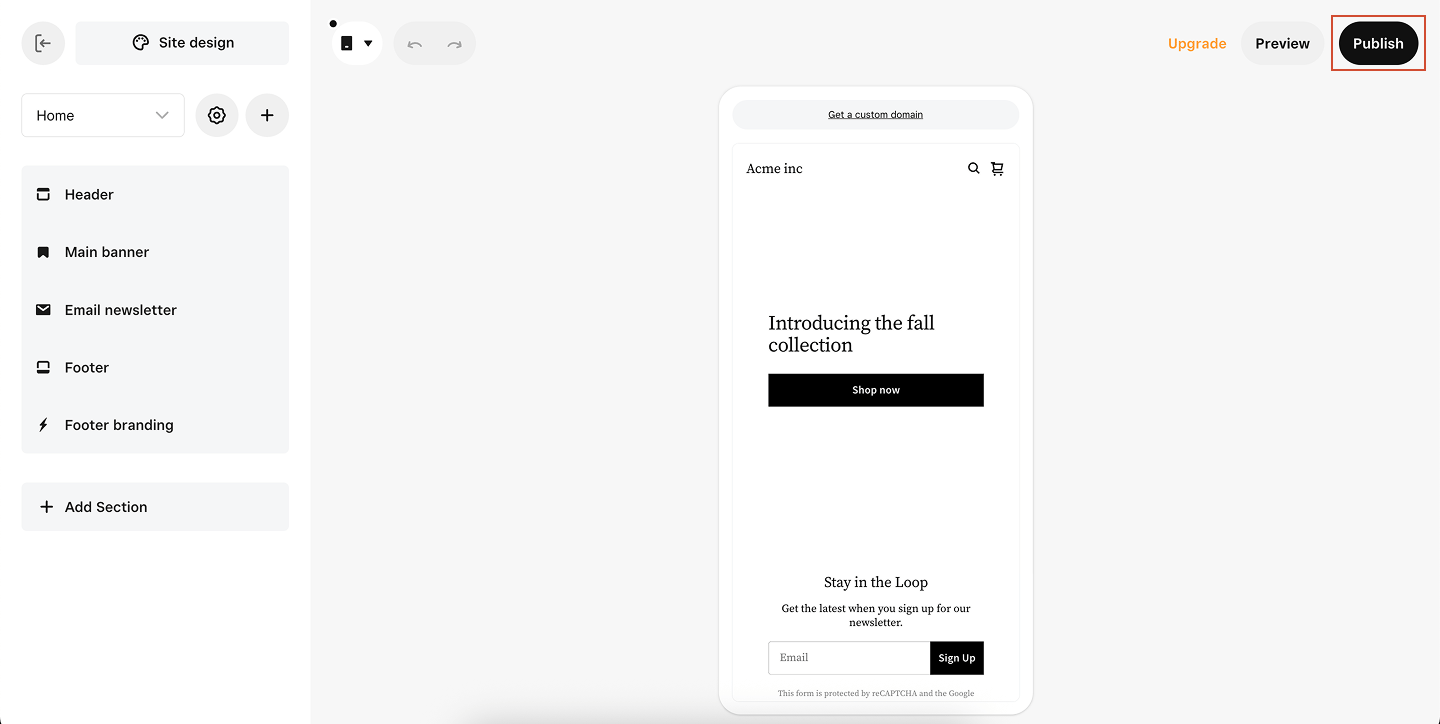
Click Save, then navigate to Website → Edit Site. Publish your website
Click Publish to make the chat widget live on your website.Tip: The widget won’t appear in preview mode — open your published site in a browser to see it active.
If you don’t see the widget, double-check if you have published your website. And also check if the selected chat widget is set on “Show on website”
Ask your developer to help (optional)
If you’d prefer someone else from your team to take care of the installation, you can add them to Watermelon so they have direct access to the code. Alternatively, you can share the code and this documentation guide with a developer, they’ll be able to handle it from there.
You can install the widget directly using our NPM package, which works with any framework. The package includes a script to embed the widget into your application.
Add Watermelon to your application using the following command in your terminal:
npm install watermelon-widget-injection --legacy-peer-deps
user_id is a required field to store conversation history accross devices and browsers
// ----- These are variables comming from your request ---- //
const first = response.me.first_name
const last = response.me.last_name
const email = response.me.email
const phone = response.me.phone_number
const userId = response.me.id.toString() // Required
import {injectWidget} from "watermelon-widget-injection"; in the component

// Initialize and assign variables first before passing them to the function

injectWidget(widgetId, settingsId, 'stage', first, last, email, phone, userId)
setTimeout(() => {
  const iframe = document.querySelector('.watermelon-embed-frame') as HTMLIFrameElement;
  iframe.contentWindow.postMessage(
   {
    type: 'login',
    payload: {
     first_name: first,
     last_name: last,
     email: email,
     phone: phone,
     user_id: userId,
    }
   },
   '*' // Security target origin
  );
}, 10000)
The timeout is set to 10 seconds in this example. Replace with the duration that represents how long it takes before the user is logged in, in milliseconds
</body> tag on every page you want the Widget to appear on your app and/or website.
Then edit the code to send Watermelon the email address, name, or phone number of the user who is currently logged in.
After adding the code, open your app and the Widget will appear.
Shut down your user sessions on user logout
This step should take place either right before or after the logout call — the order doesn’t matter.
Two postMessage calls are required:
- The first one hides the widget from the top-level iframe.
- The second one tells the iframe app to clear everything from local storage and reset its state, such as conversation ID and contact ID.
const iframe = document.querySelector('.watermelon-embed-frame') as HTMLIFrameElement;
window.postMessage(
  {
   type: 'logout',
   payload: {}
  },
  '*'
);
// @ts-ignore
iframe.contentWindow.postMessage(
  {
   type: 'logout'
  },
  '*'
);