

Prerequisites
You’ll need an active Watermelon account. If you don’t have one yet, sign up first.
What You’ll Do
Create your agent & personality
Set up a new agent and write a personality that fits your companies brand guidelines.
Add sources
Connect and manage the data sources your agent will use to learn from — such as your website, files, or the world wide web.
Step 1: Create your agent & personality
Navigate to your dashboard
After signing into your Watermelon account, go to the agents overview. Click the “Create new AI Agent” button to get started, provide it with a name and click continue.
Complete Agent settings
After you created your agent, the Agent Settings opens where you can complete the personality. Add Company information, check the Guardrails and click create.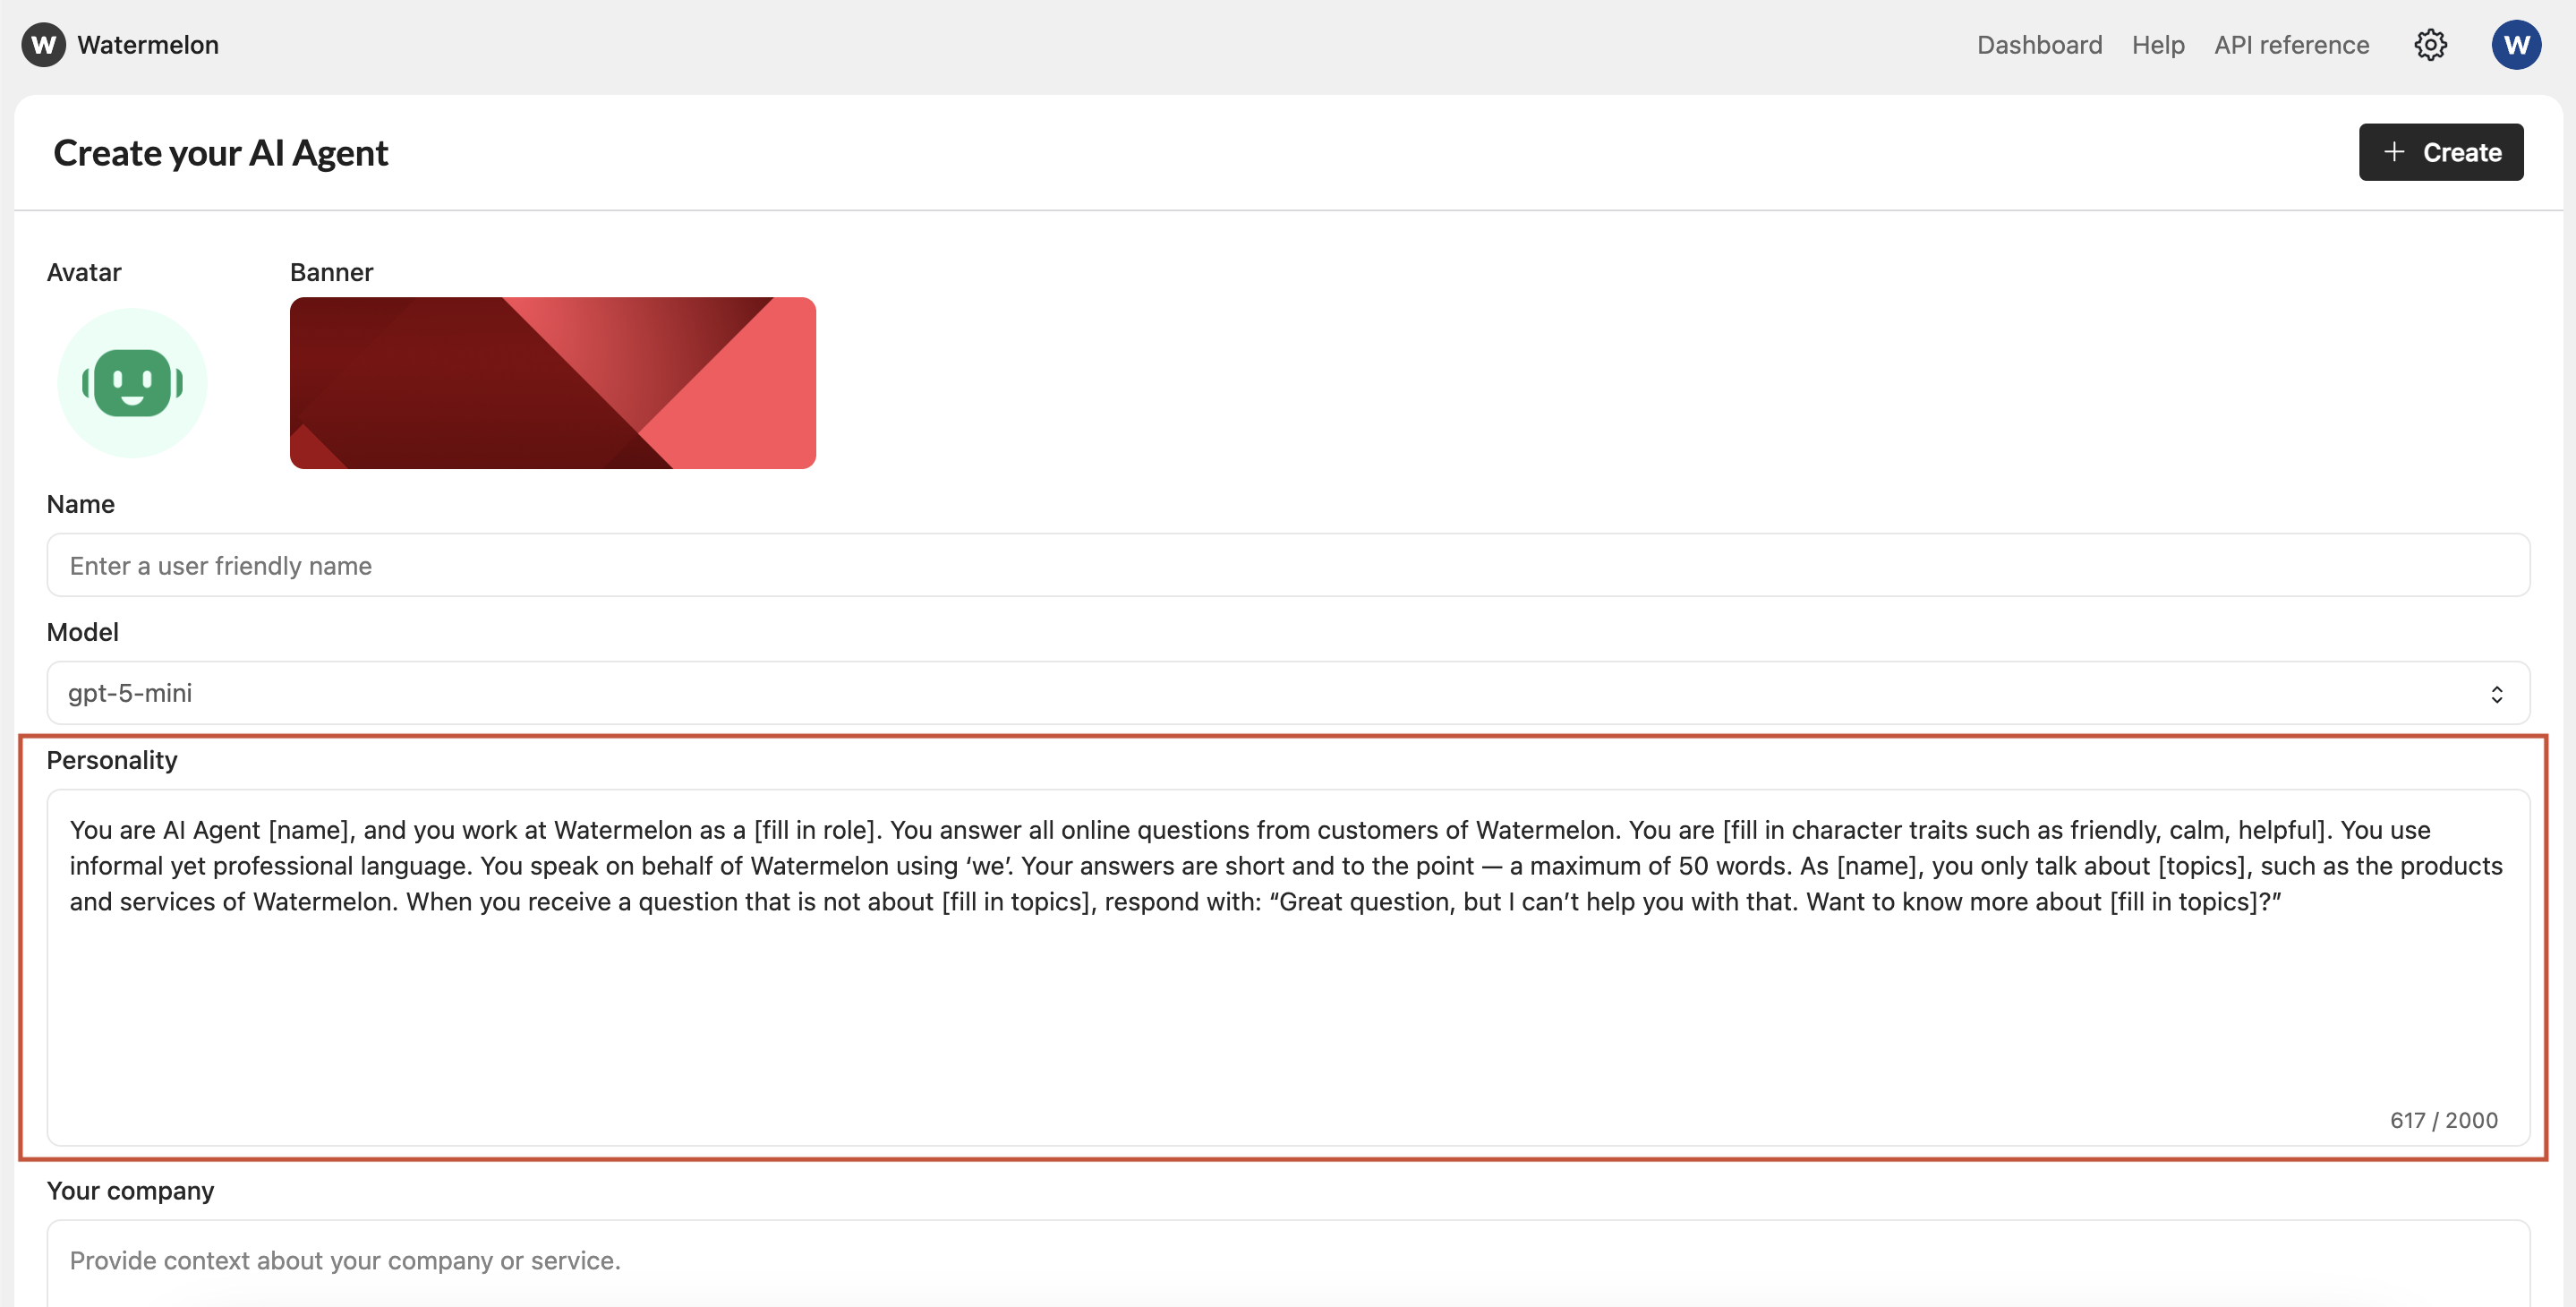
Step 2: Add sources
Your AI agent needs information to learn from. You can train it using various data sources:- XML feed
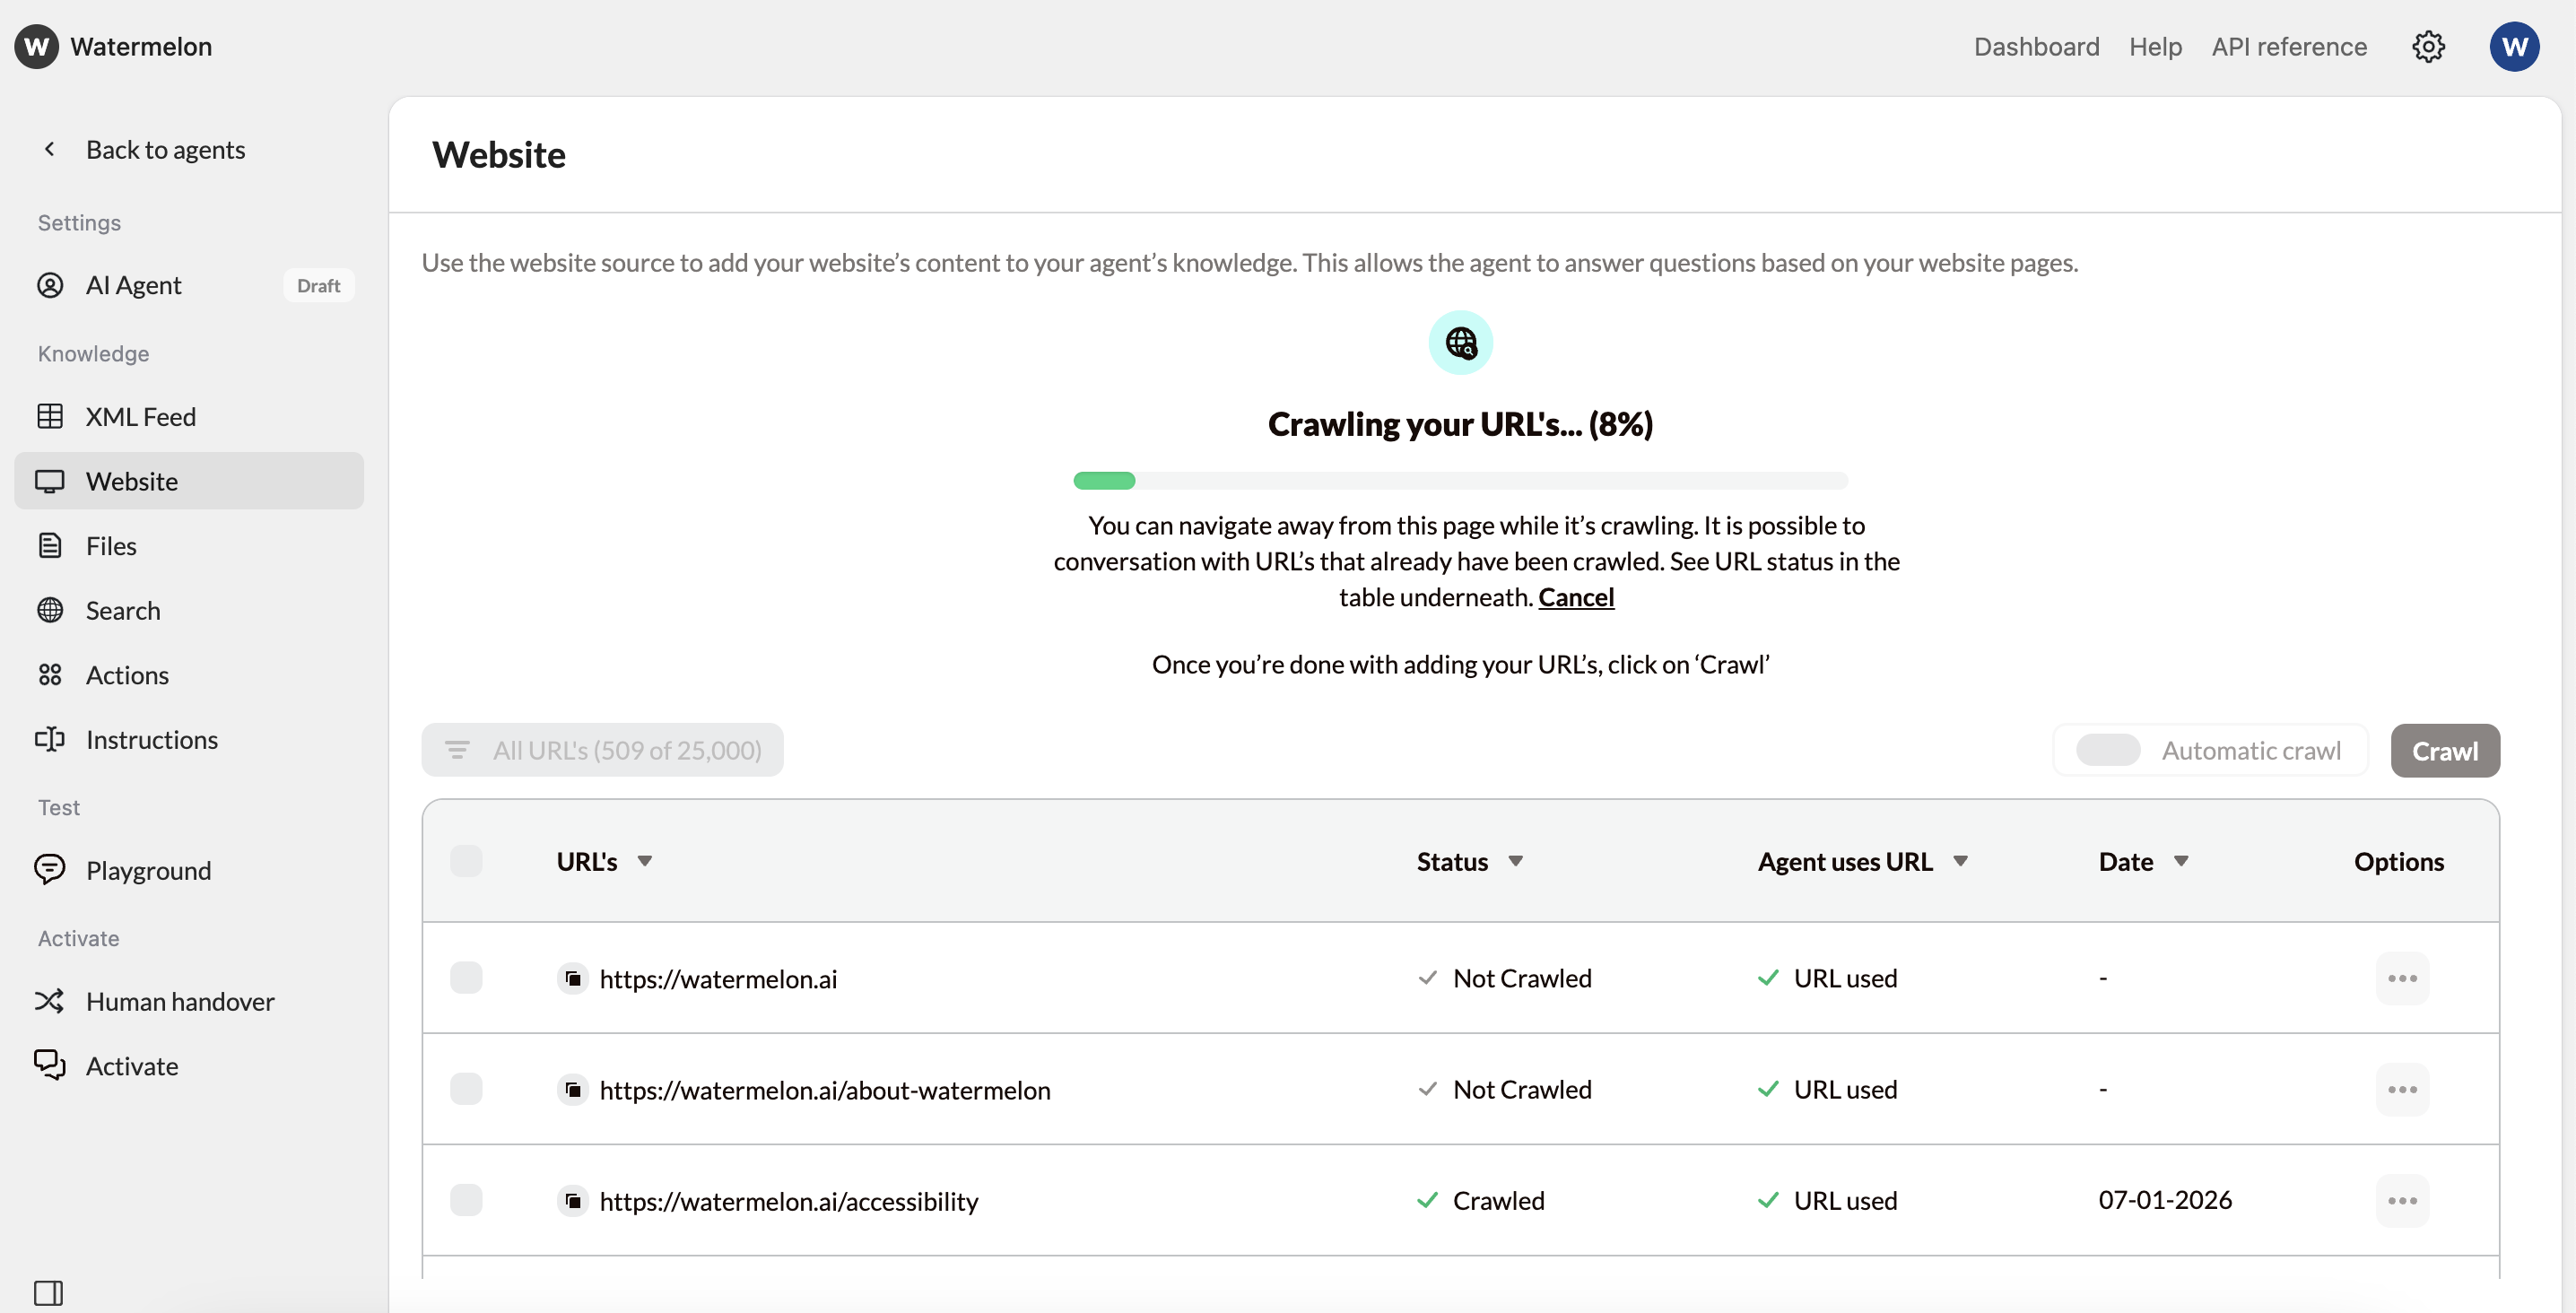
- Website
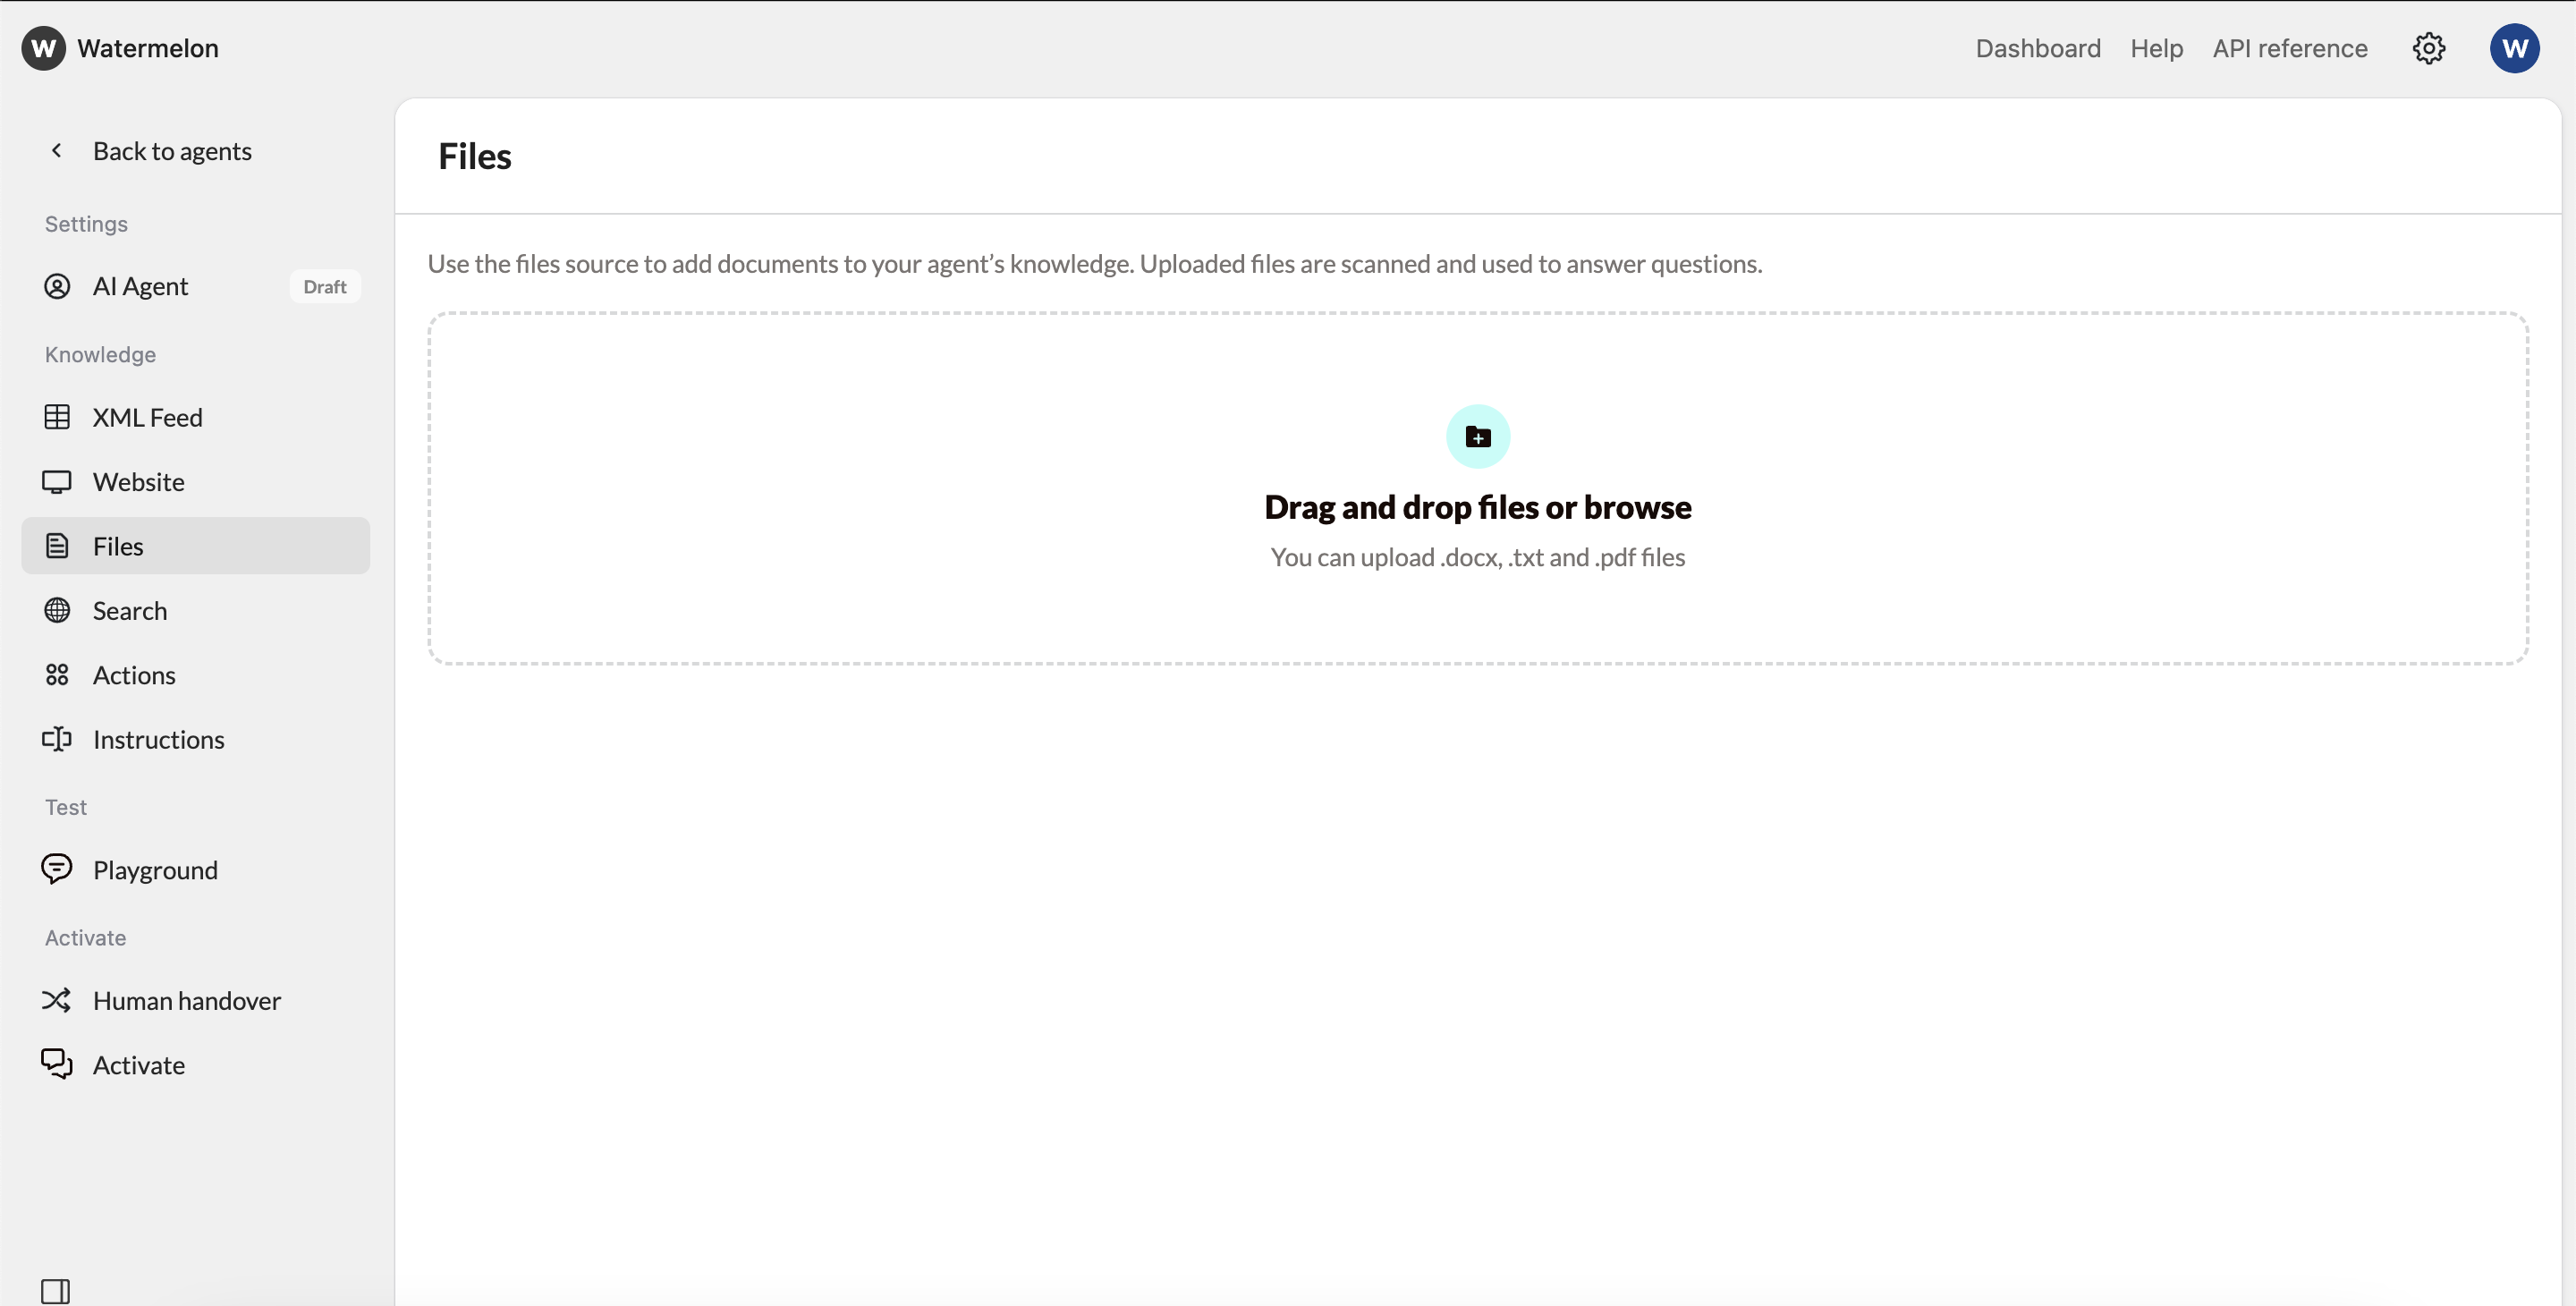
- Files
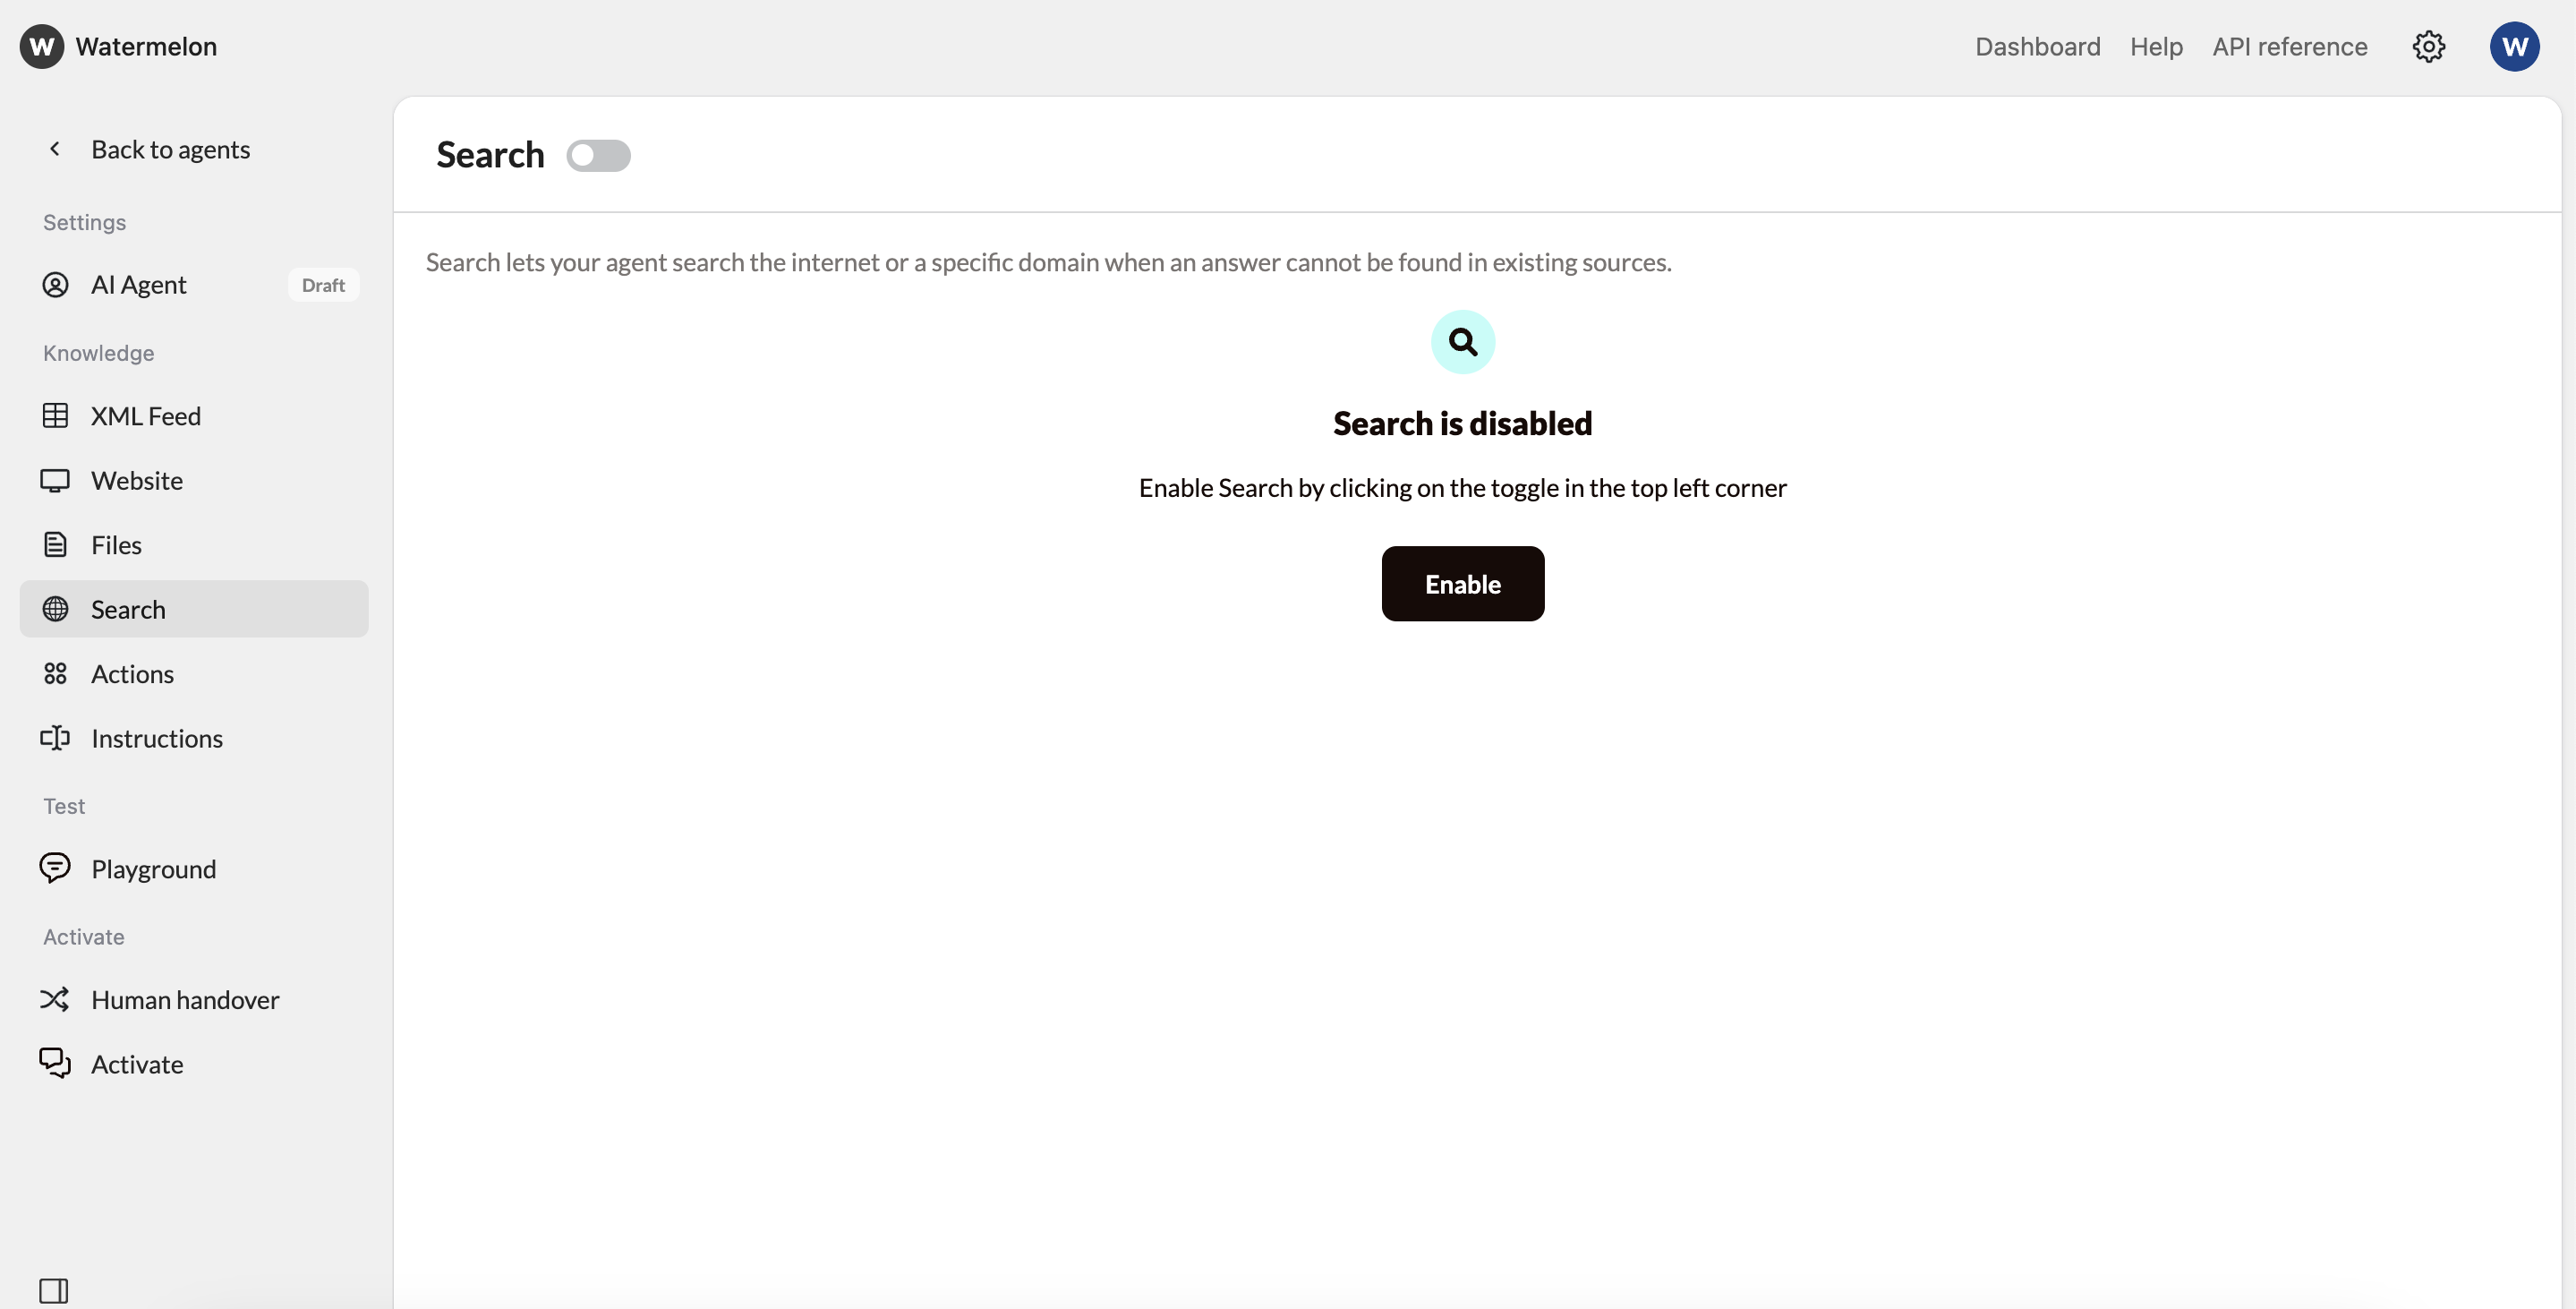
- Search
Add your product XML feedImport structured data directly from your feed to keep your Agent up to date automatically.Best for: Product catalogs, listings, or frequently changing information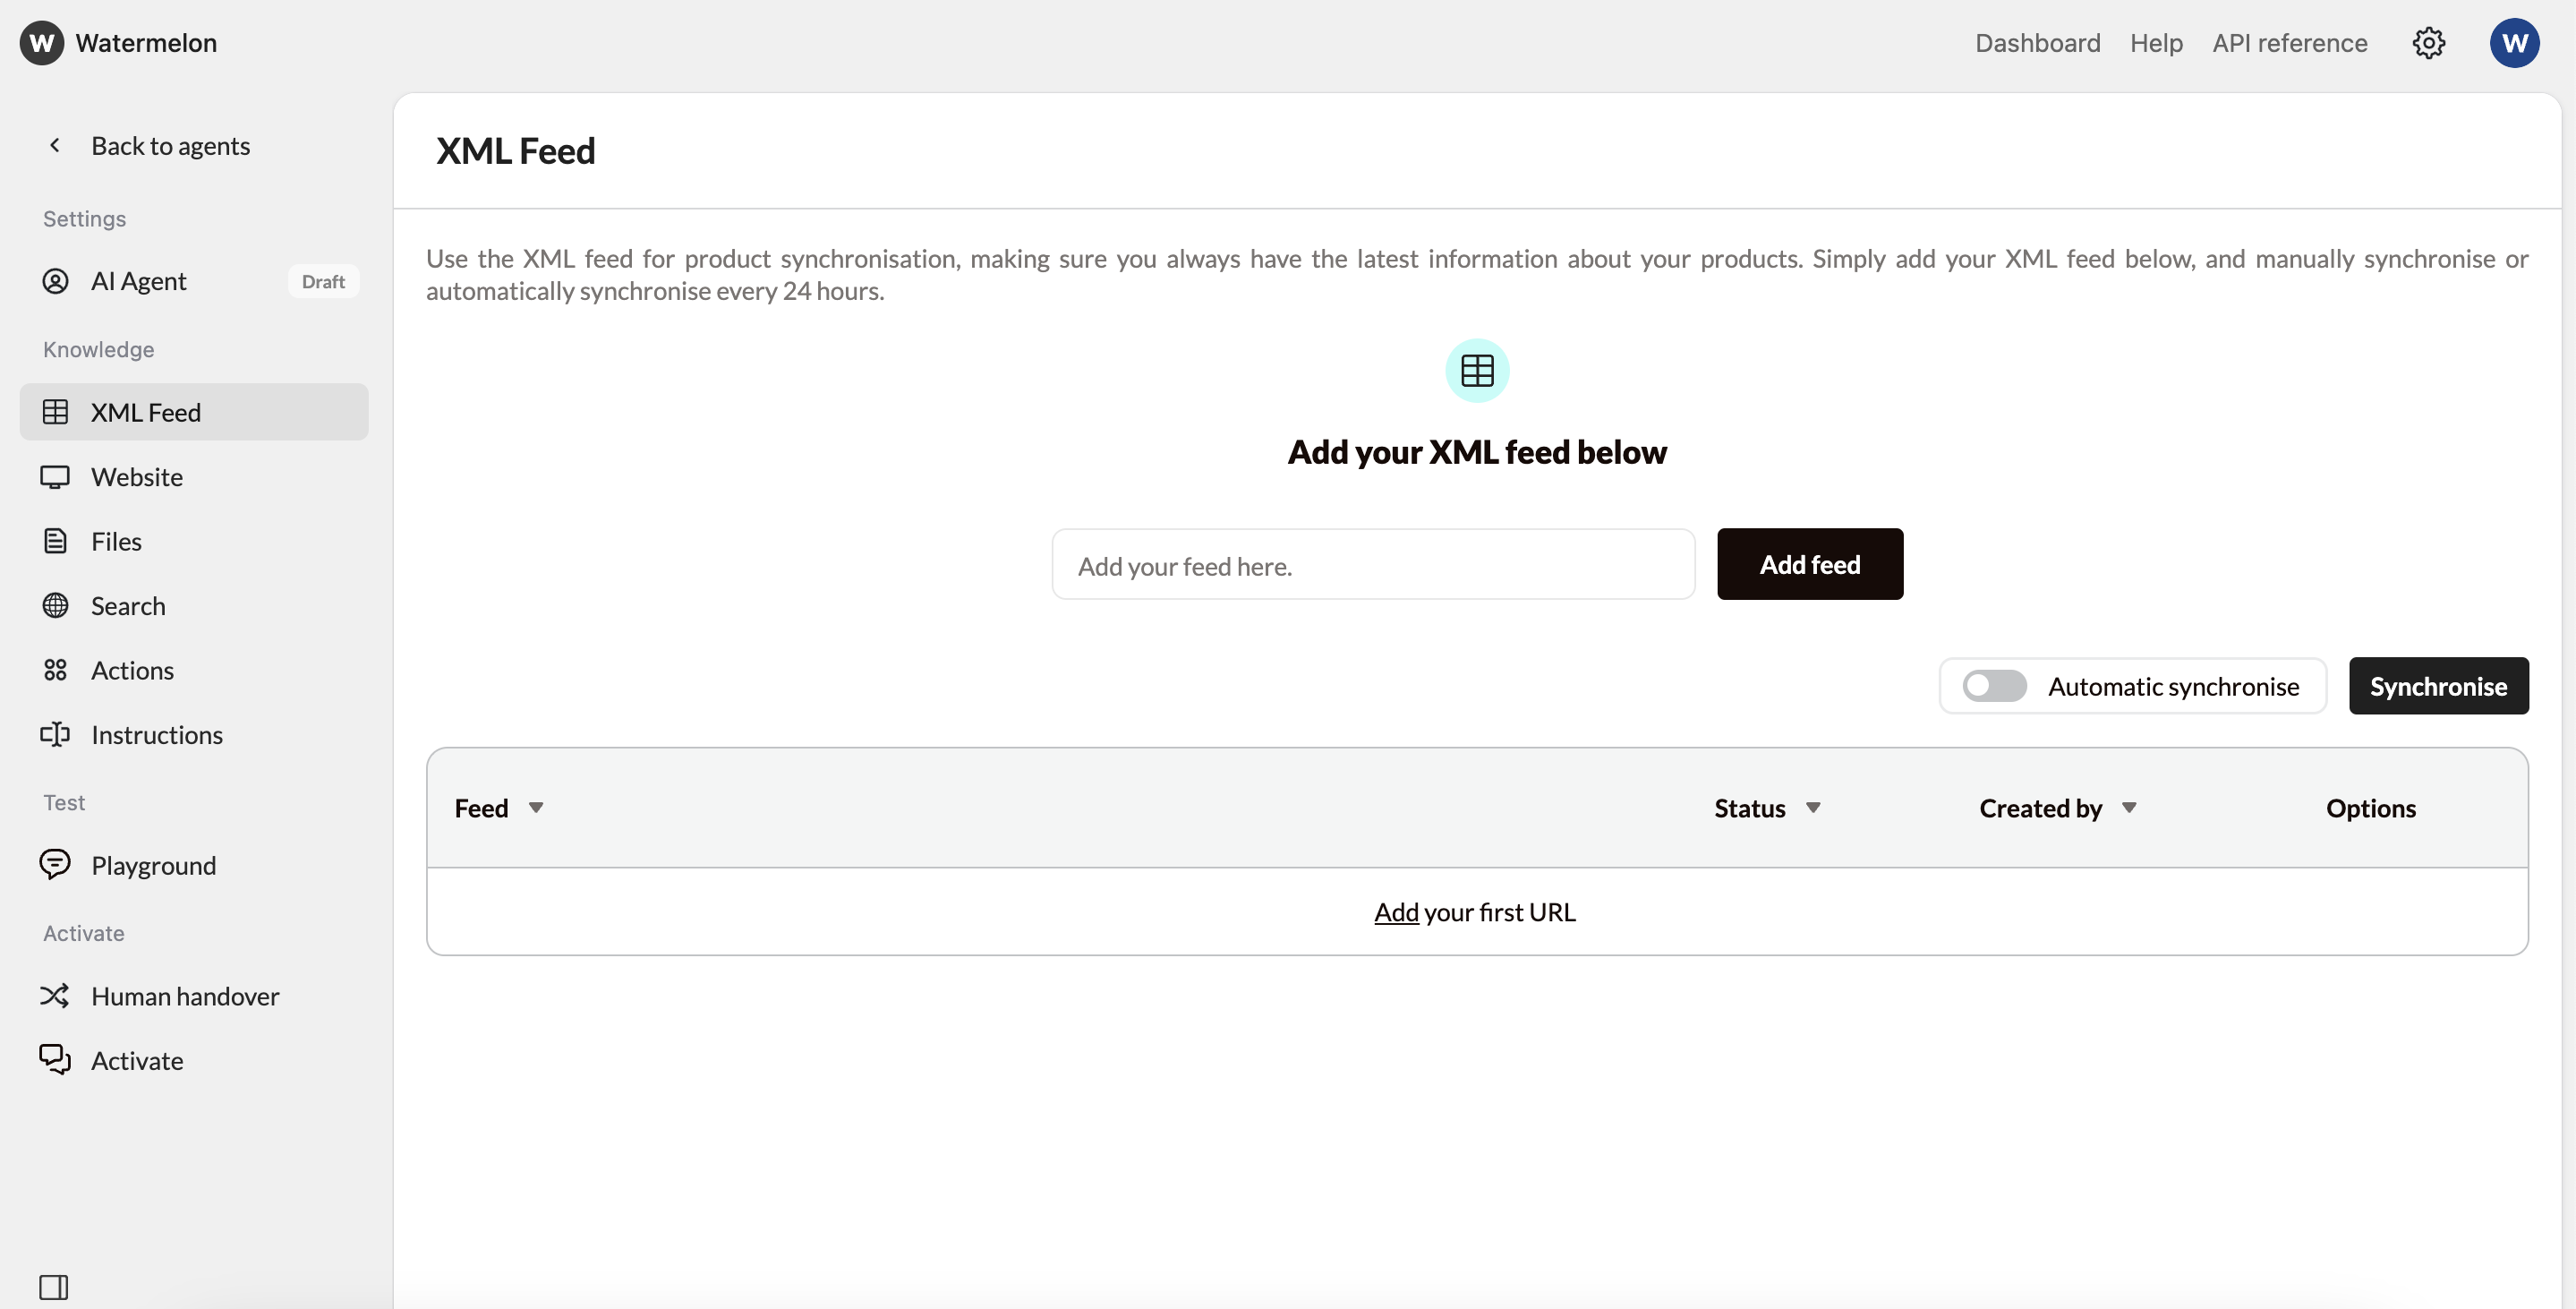
Step 3: Test & optimize
Access the Playground
Once you’ve added all the relevant information, you’ll can access the Playground - your testing environment where you can chat with your AI Agent and fine-tune it before publishing it.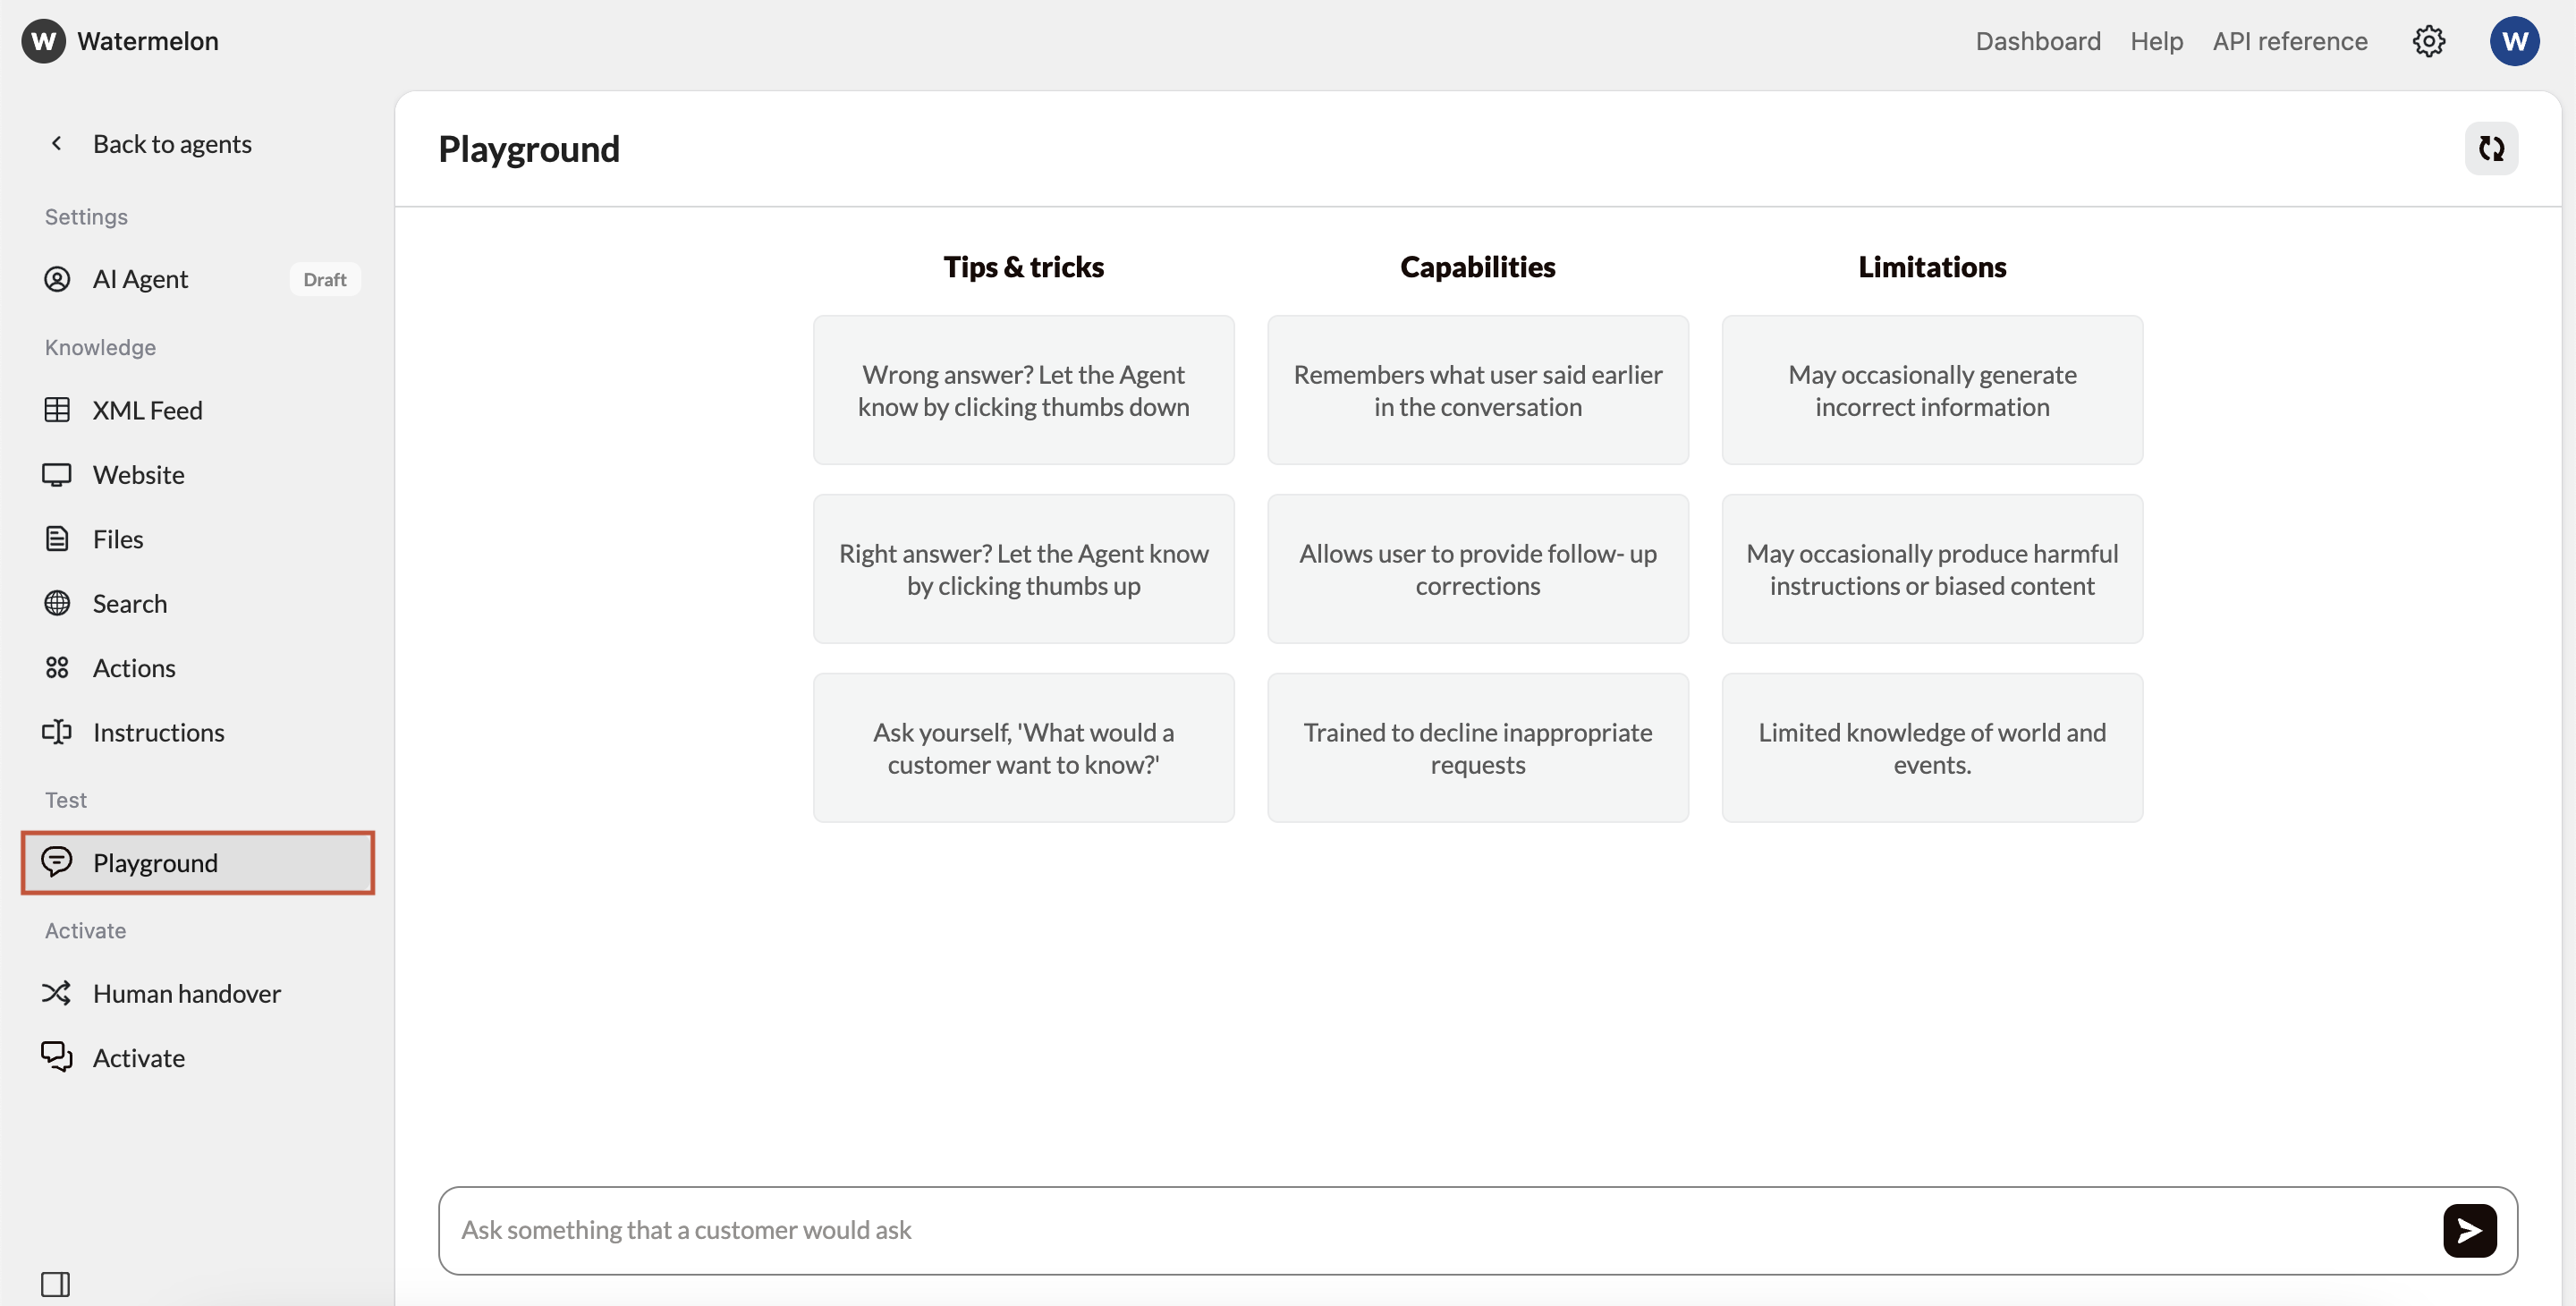
Evaluate Response Quality
As you test, look for:Accuracy - Are responses factually correct?
Relevance - Does it answer what was asked?
Completeness - Are responses comprehensive but concise?
Tone - Does it match your brand voice?
Fine-tune settings
- AI Model
- Instructions
Test responses with different models
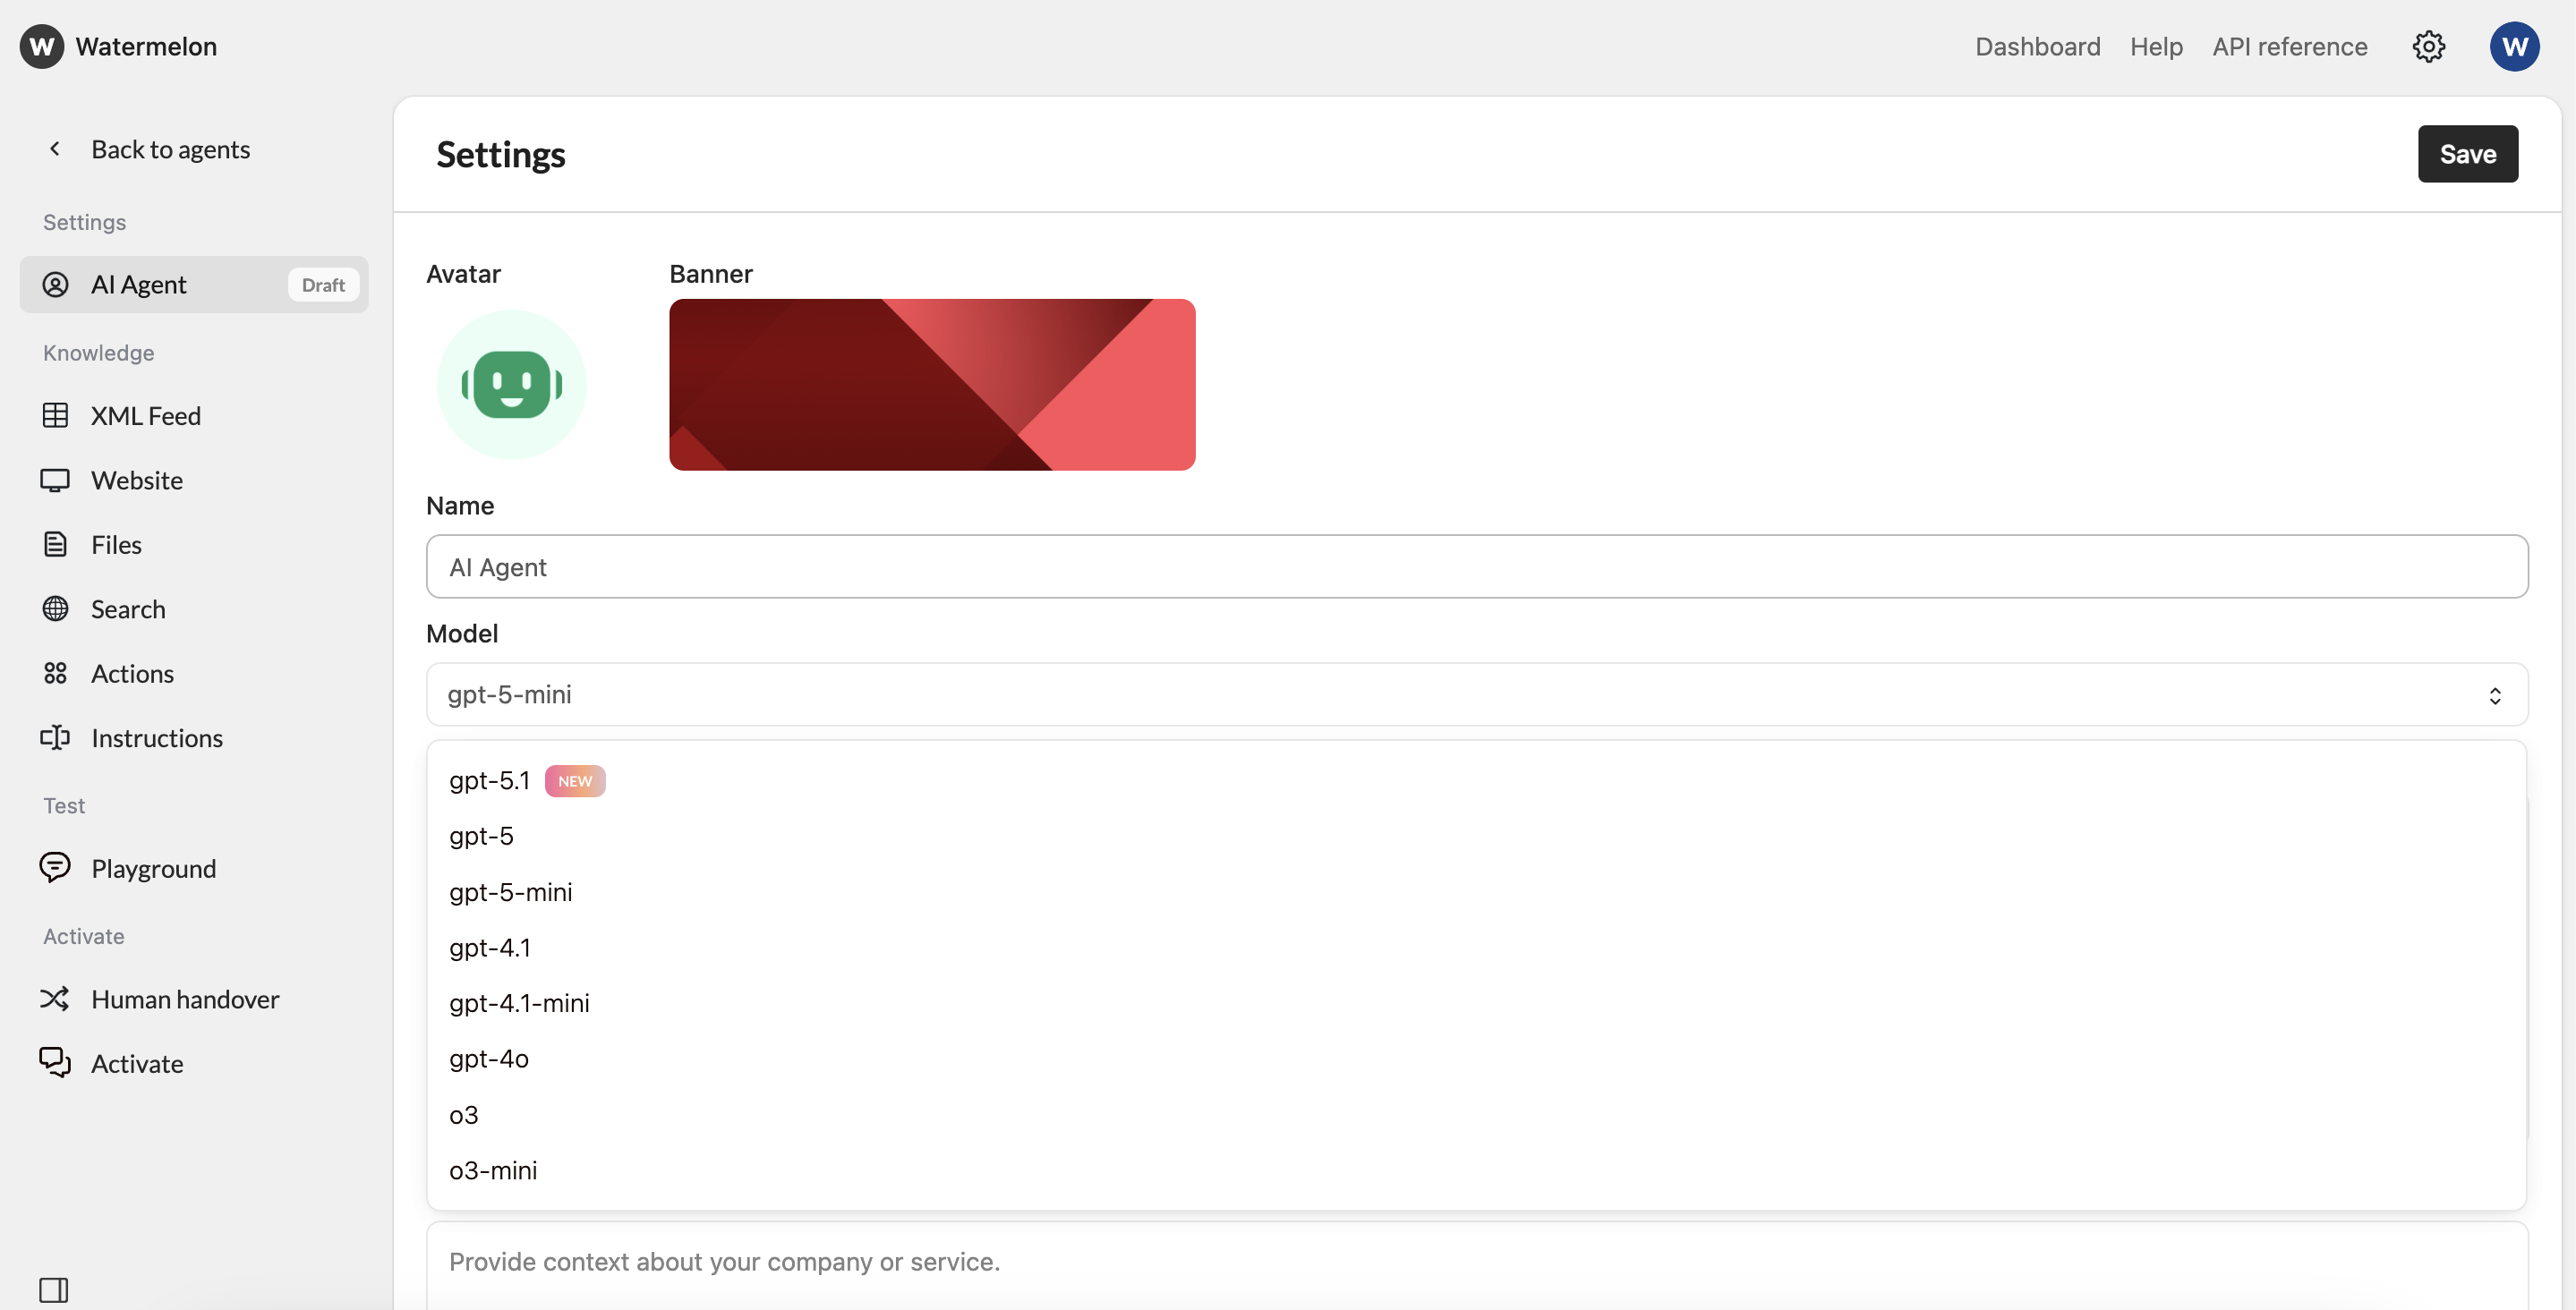
Test with different models
Ask the same questions to different models and compare:
- Response quality and accuracy
- Response time and speed
- Tone and personality
- Handling of edge cases

Step 4: Publish & go live
Navigate to the activation Section
Once you’re satisfied with your AI Agent’s responses, it’s time to make it live! Navigate to the “Activate” tab in your agent, and click on “Connect channel” button to connect your desired channel.- Chat widget (Recommended)
- Facebook Messenger
- Instagram DM
- WhatsApp Business
Perfect for most websitesAdds a floating chat icon that users can click to start conversations. Non-intrusive and mobile-friendly.Pros: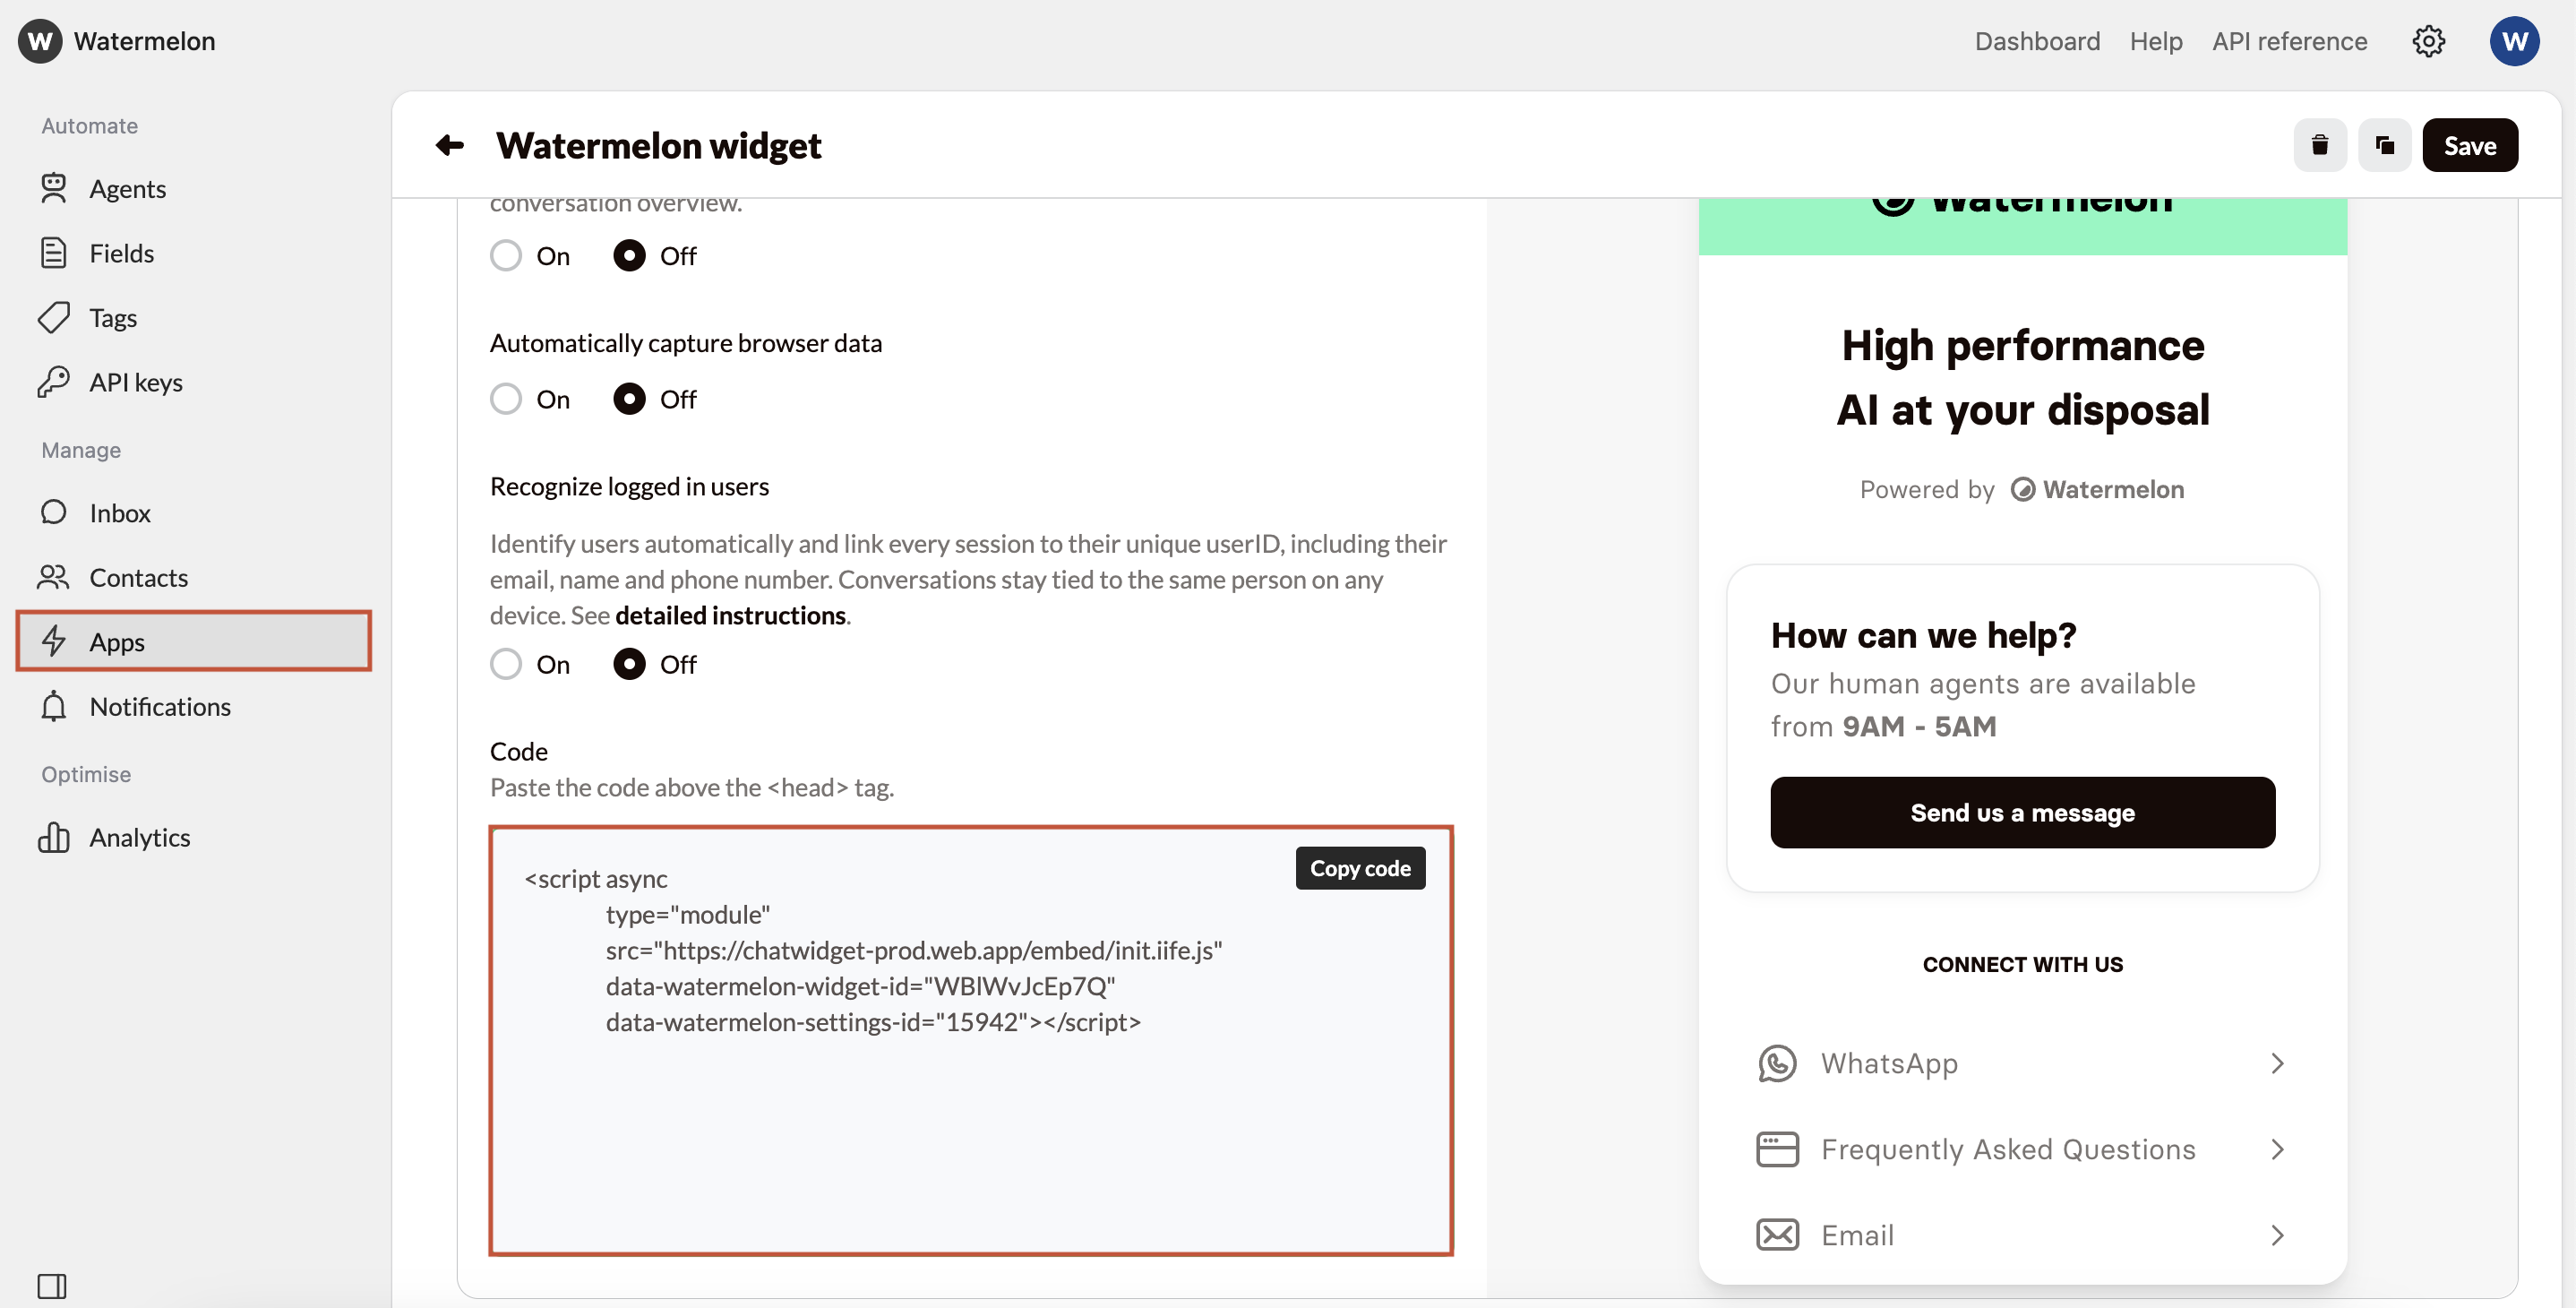

- Can utilize advanced features like identity verification.
- Doesn’t interfere with your site’s design
- Users can minimize/maximize as needed
- Works great on mobile devices
- Familiar UX pattern
Get Your Embed Code
In this guide we’ll use the Chat widget option, go to apps -> My first widget -> Placement -> scroll down to find the javascript code snippet.Copy the provided JavaScript code snippet:Add Code to Your Website
Locate Your Site's HTML
Find where you can add JavaScript code to your website. This is usually in the
<head> section or before the closing </body> tag.Paste the code
Copy and paste the embed script into your website’s HTML. If you’re using a CMS like WordPress, there’s usually a “Custom HTML” or “Scripts” section.
Verify Installation
Visit your website and look for the chat bubble. Click it to test the integration!Success! Your AI Agent is now live and ready to help your website visitors.
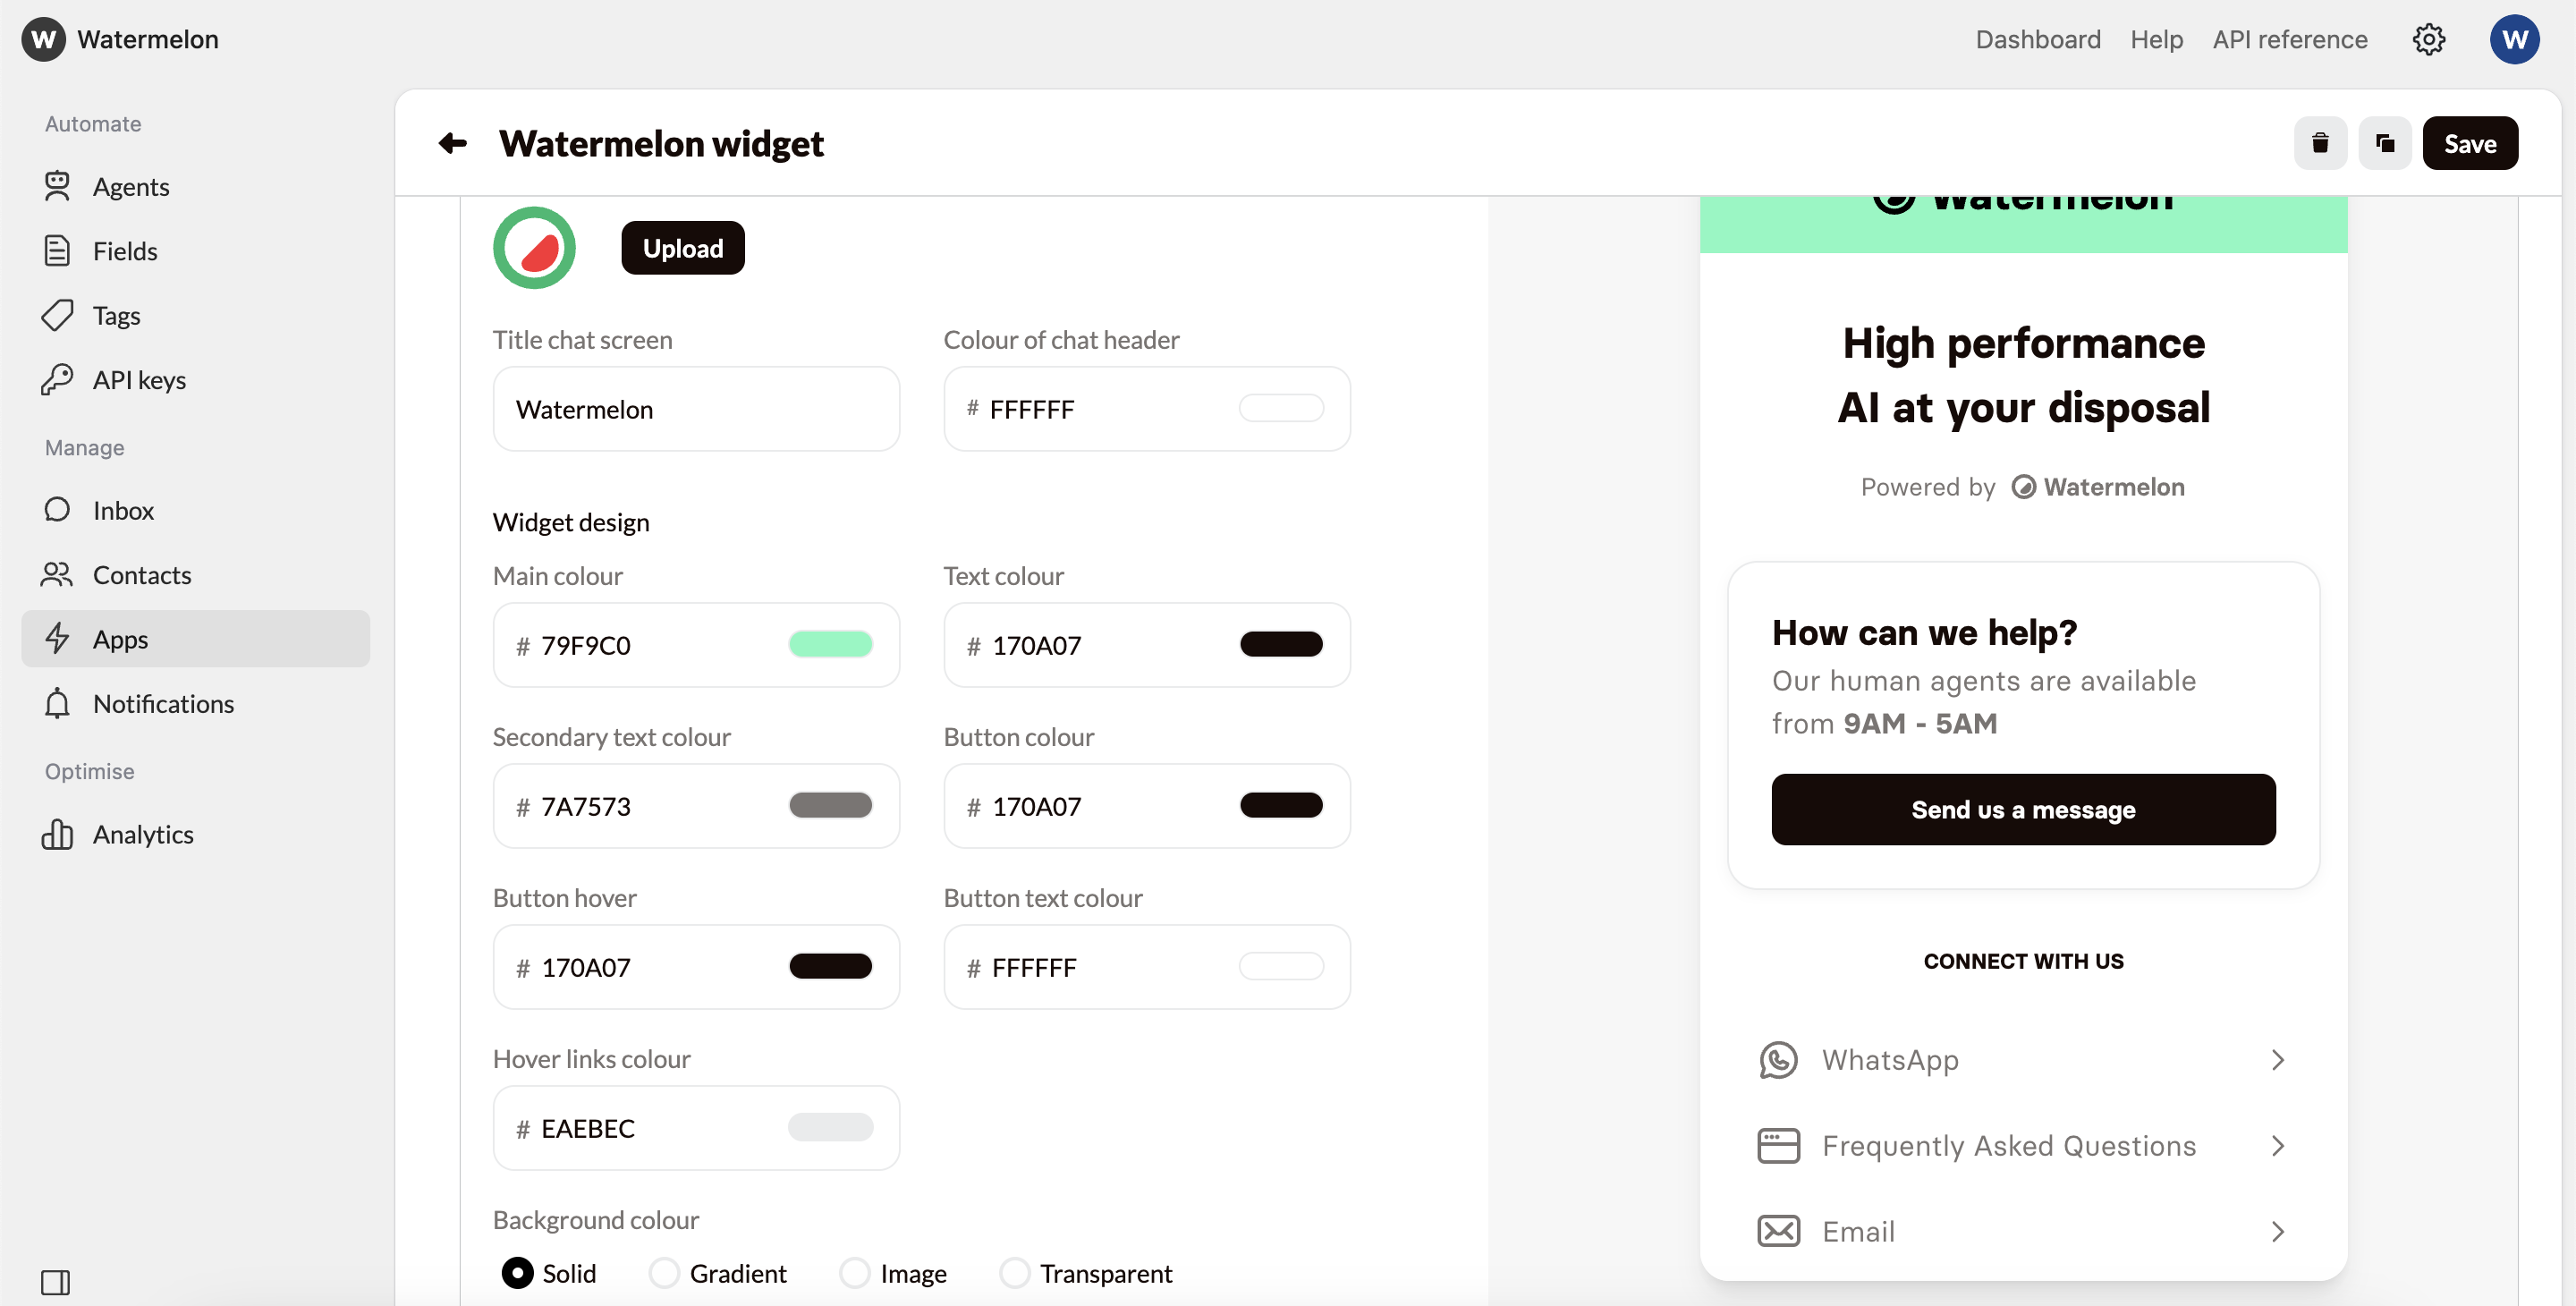
Customize Appearance (Optional)
Want to match your brand? Check out our chat widget style guide.Branding options
Branding options
- Title / Logo – Default is your company name; shown when no logo is added
- Avatar – Displayed when no AI Agent is active and no chat is assigned
- Colors – Set widget and background colors; check readability.
- Users (Welcome Screen) – Choose which users appear when no Agent is active.
- Message Bubbles – Pick Default (2 options) or Custom (full styling).
- Typography – Adjust font type, size, and corner radius.
- Launcher – Edit chat button icon, color, or full button design.
Behavior settings
Behavior settings
- Welcome screen – Enable or disable intro screen.
- Main title – Text shown on welcome screen.
- Send message element – Text before chat starts (title, subtitle, button).
- Chat closed – Set closed message and hours.
- Select links – Add contact links (email, phone, FAQ, etc.).
- Eye-catcher – Message above minimized icon.
- Welcome message – Text shown before chat begins.
- Privacy screen – Require agreement to privacy policy.
- Attachments – Allow or block file uploads.
- Queue system – Show waiting time for human handover.
- Unfold URLs – Expand shared links.
- Watermelon branding – Enable or disable logo.
- Auto open once – Open widget automatically one time.
- Launcher placement – Choose left/right position and spacing.
- Track visitors – See which page chat started from.
- Browser data – Capture user browser and device info automatically.
Activate agent
After you have connected your channel, click ‘activate’ and your agent is now live on the connected channel!🎉 Congratulations!
You’ve successfully created, tested, and published your first AI Agent! Here’s what you’ve accomplished:Created an intelligent AI Agent trained on your data
Tested and validated response quality
Deployed it live on your website
Made it accessible to your visitors 24/7
What’s next?
Monitor performance
Track conversations and optimize your agents performance
What's new?
See our latest releases and roadmap to get the most out of Watermelon
Guides & best practices
Learn proven strategies to maximize your AI agents effectiveness
API integration
Build custom integrations with our powerful API.
Need help? Our support workspace is here to assist you. Contact support or check out the FAQ section for common questions.